Integrate BotStacks with Wix
This guide will walk you through adding the BotStacks assistant widget to your Wix website using the custom code feature.
Prerequisite: Adding custom code in Wix requires a Wix Premium plan. This feature is not available on free sites.
1. Copy your BotStacks widget code
Go to the Activate tab in your BotStacks dashboard. You’ll see the code snippets you need to add to your website.
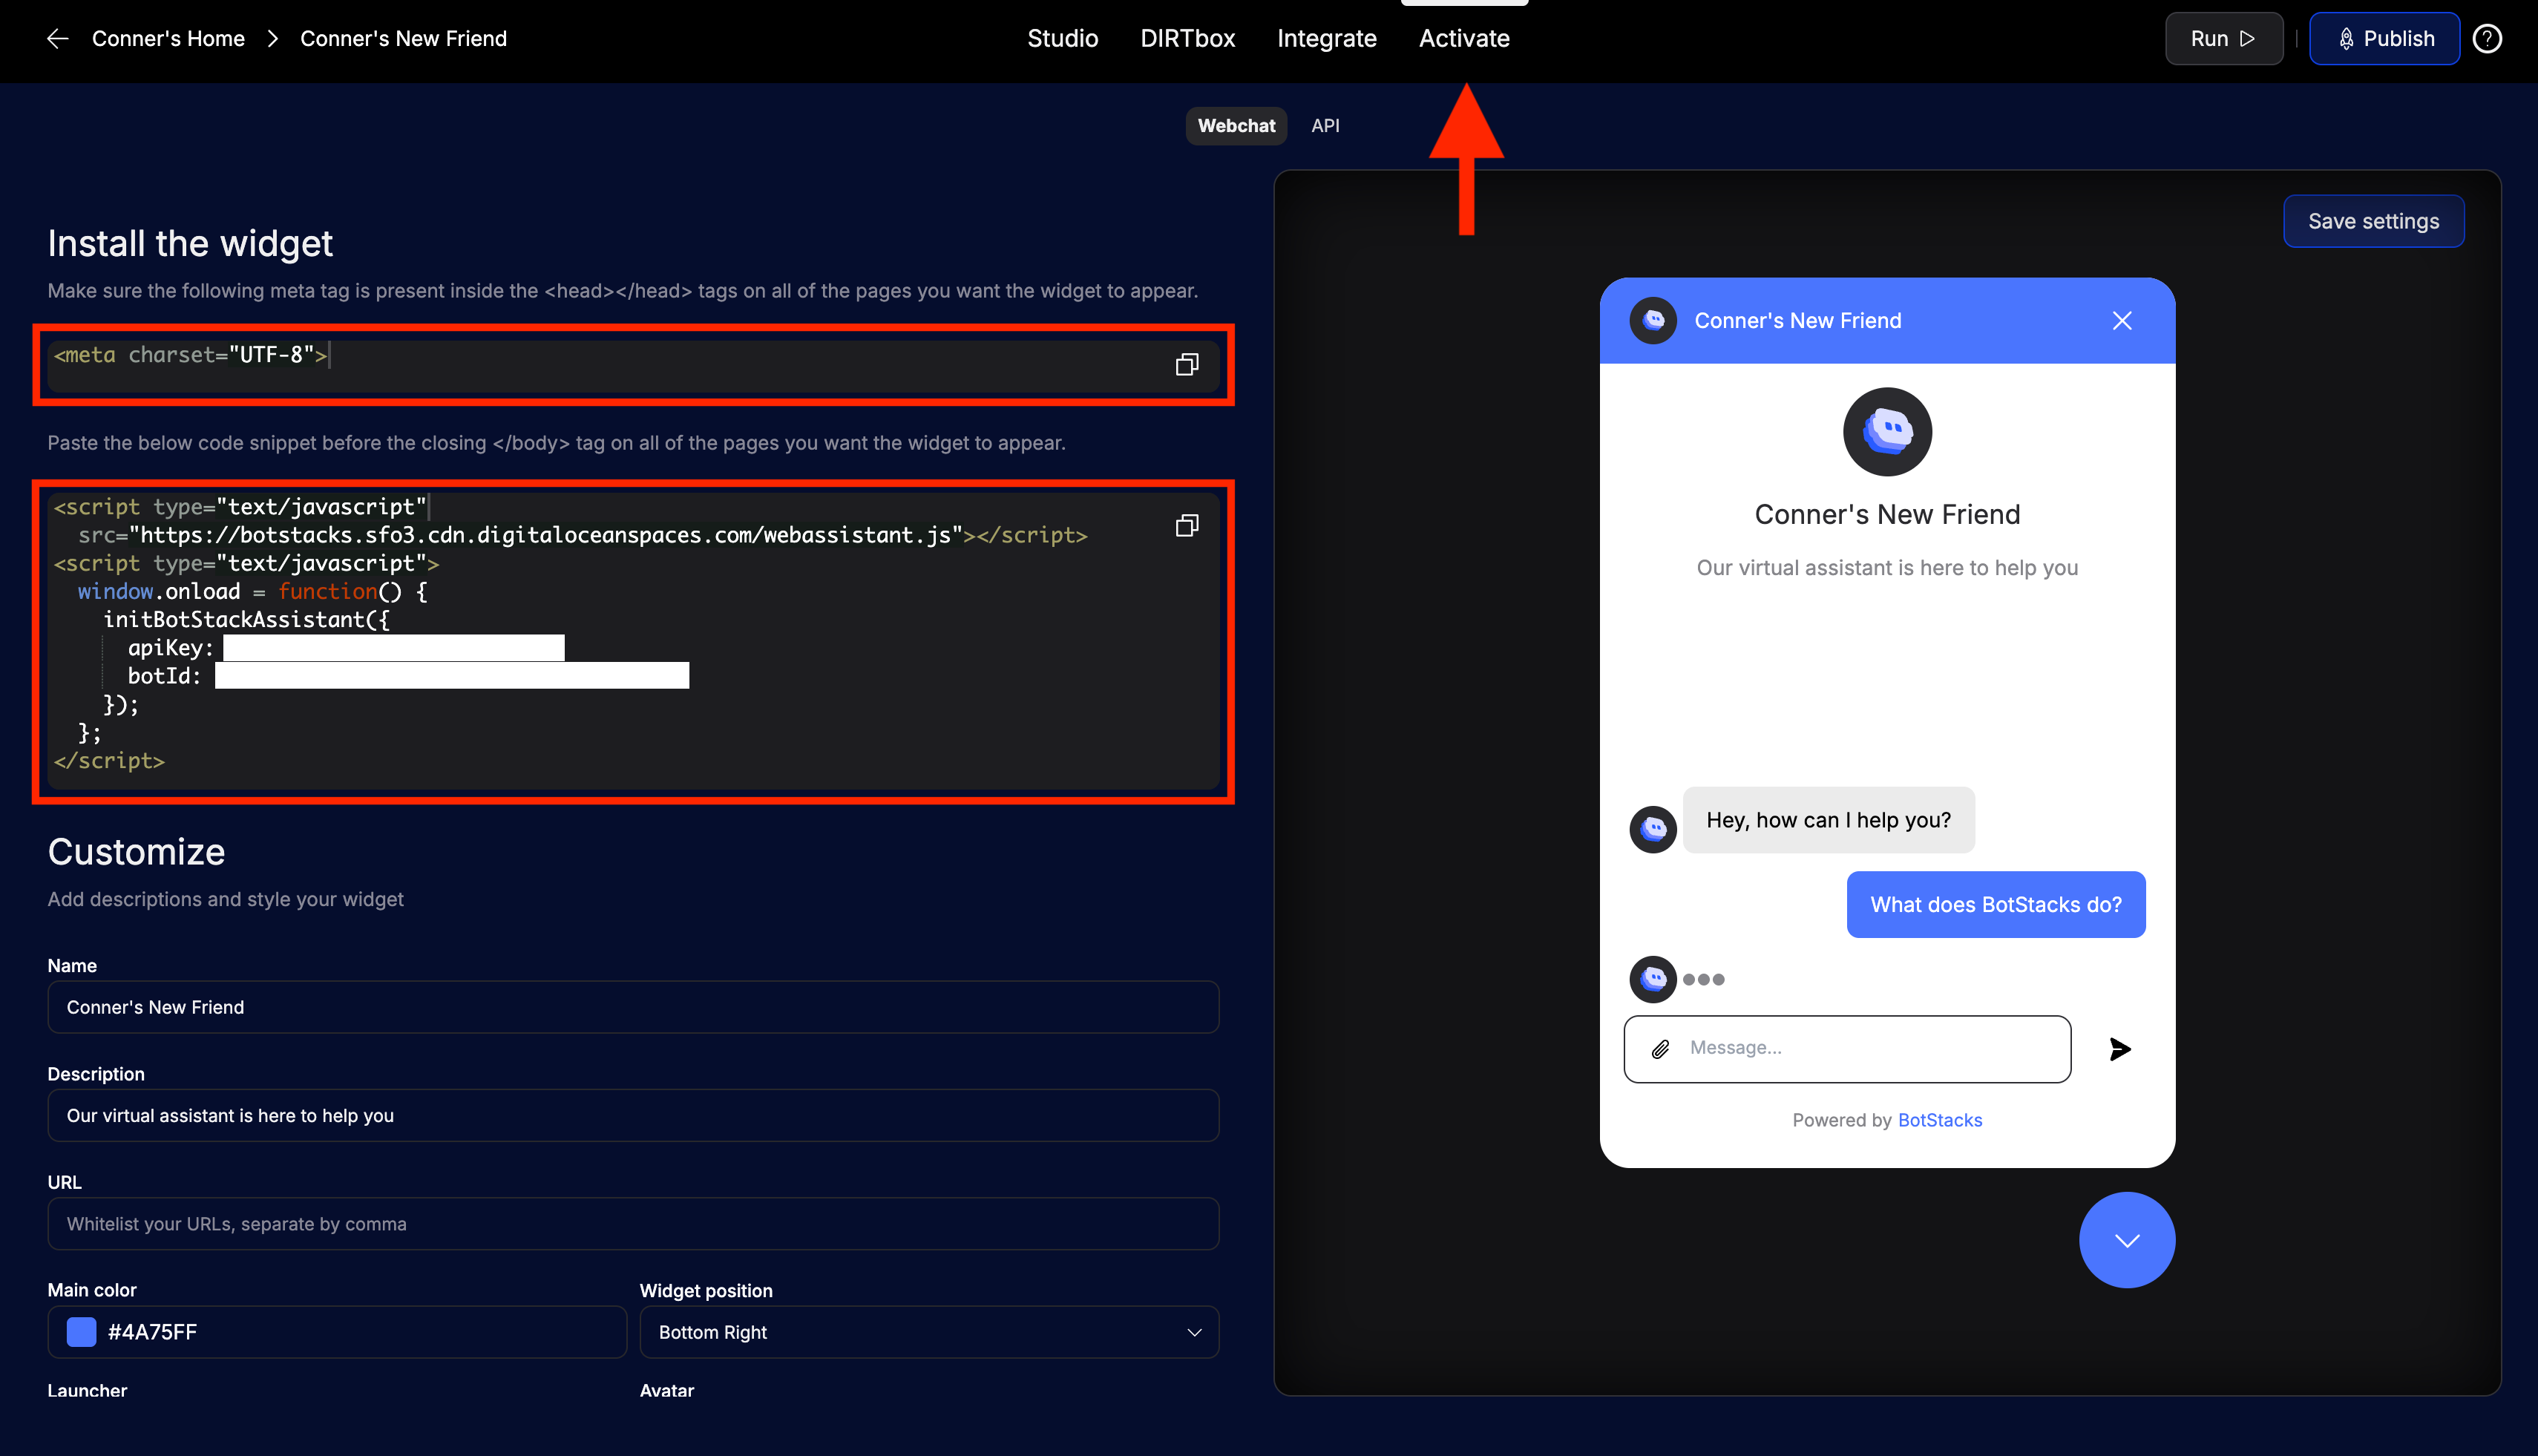
You’ll need two pieces of code:
- A
<meta>tag for the<head>section - Two
<script>tags for just before the closing</body>tag
Meta tag (for <head>):
<meta charset="UTF-8">
Script tags (for end of <body>):
Note: Be sure to copy your own
apiKeyandbotIdfrom the Activate tab in your BotStacks dashboard. Do not use the example values below.
<script type="text/javascript" src="https://botstacks.sfo3.cdn.digitaloceanspaces.com/webassistant.js"></script>
<script type="text/javascript">
  window.onload = function() {
    initBotStackAssistant({
      apiKey: "YOUR_API_KEY_HERE",
      botId: "YOUR_BOT_ID_HERE"
    });
  };
</script>
2. Open your Wix site editor
- Log in to your Wix account and open the site you want to edit.
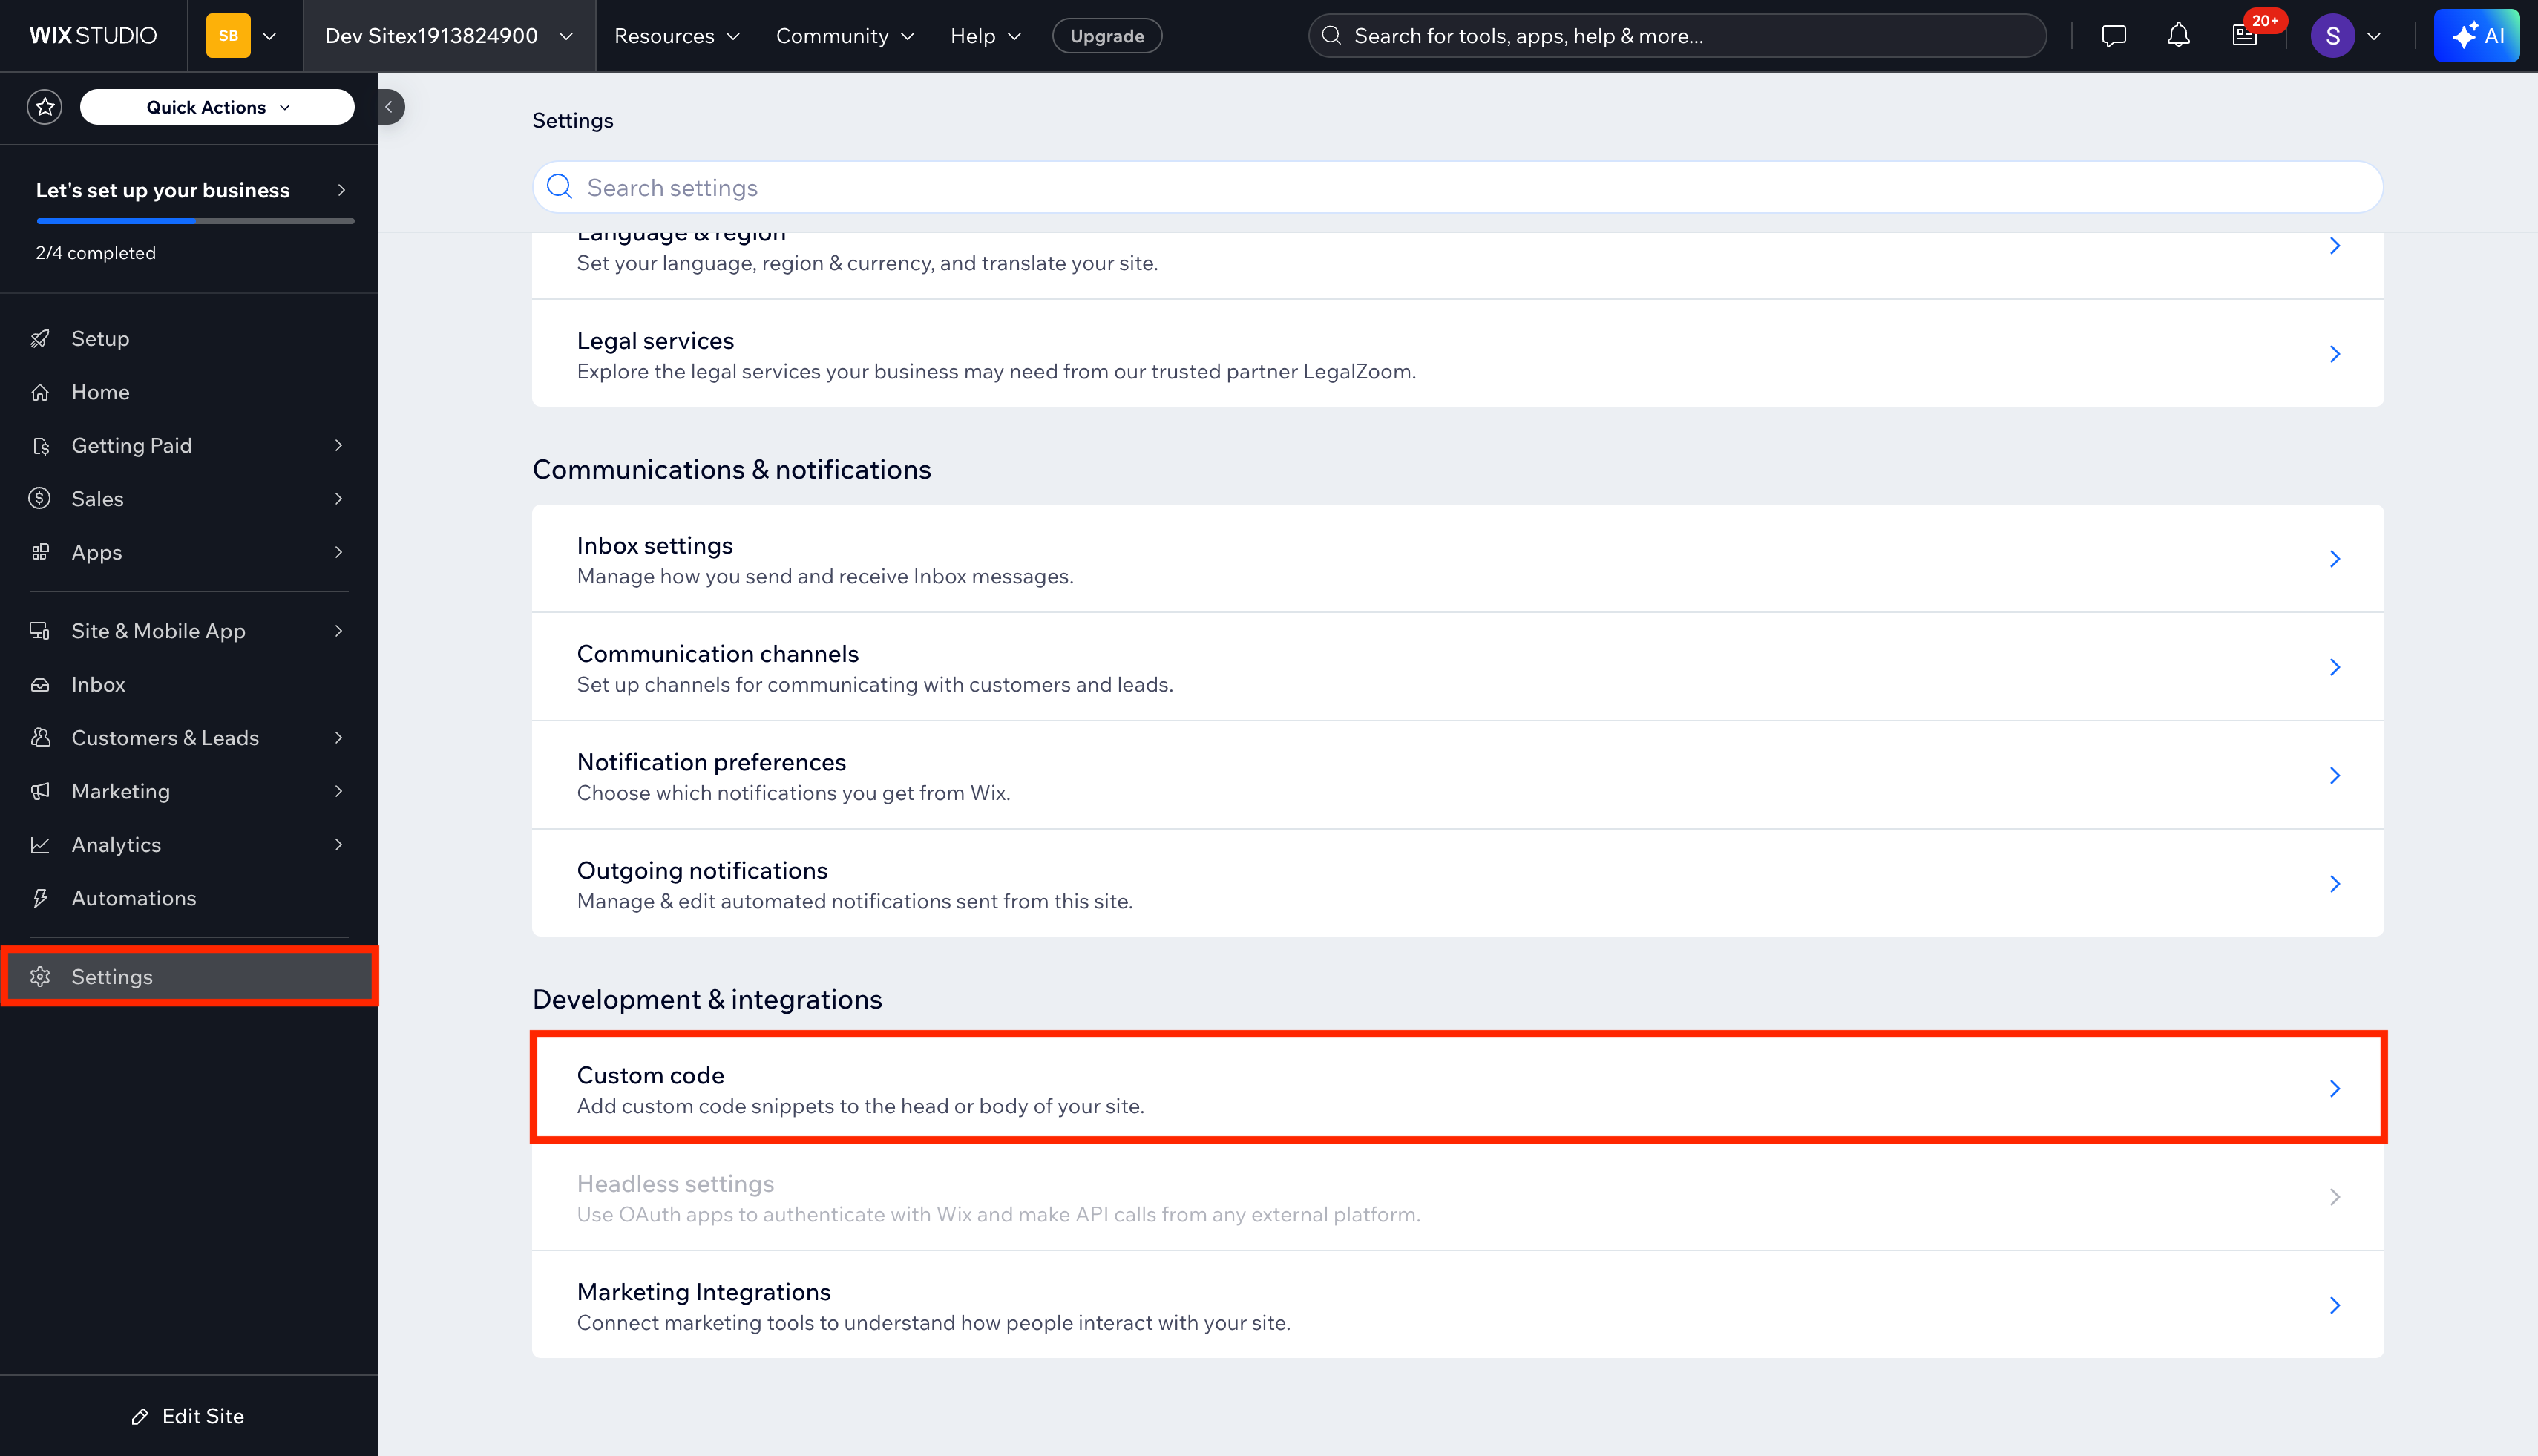
- Go to the Settings panel.
- In the left sidebar, click Settings > Custom Code.
3. Add the meta and script tags in Wix
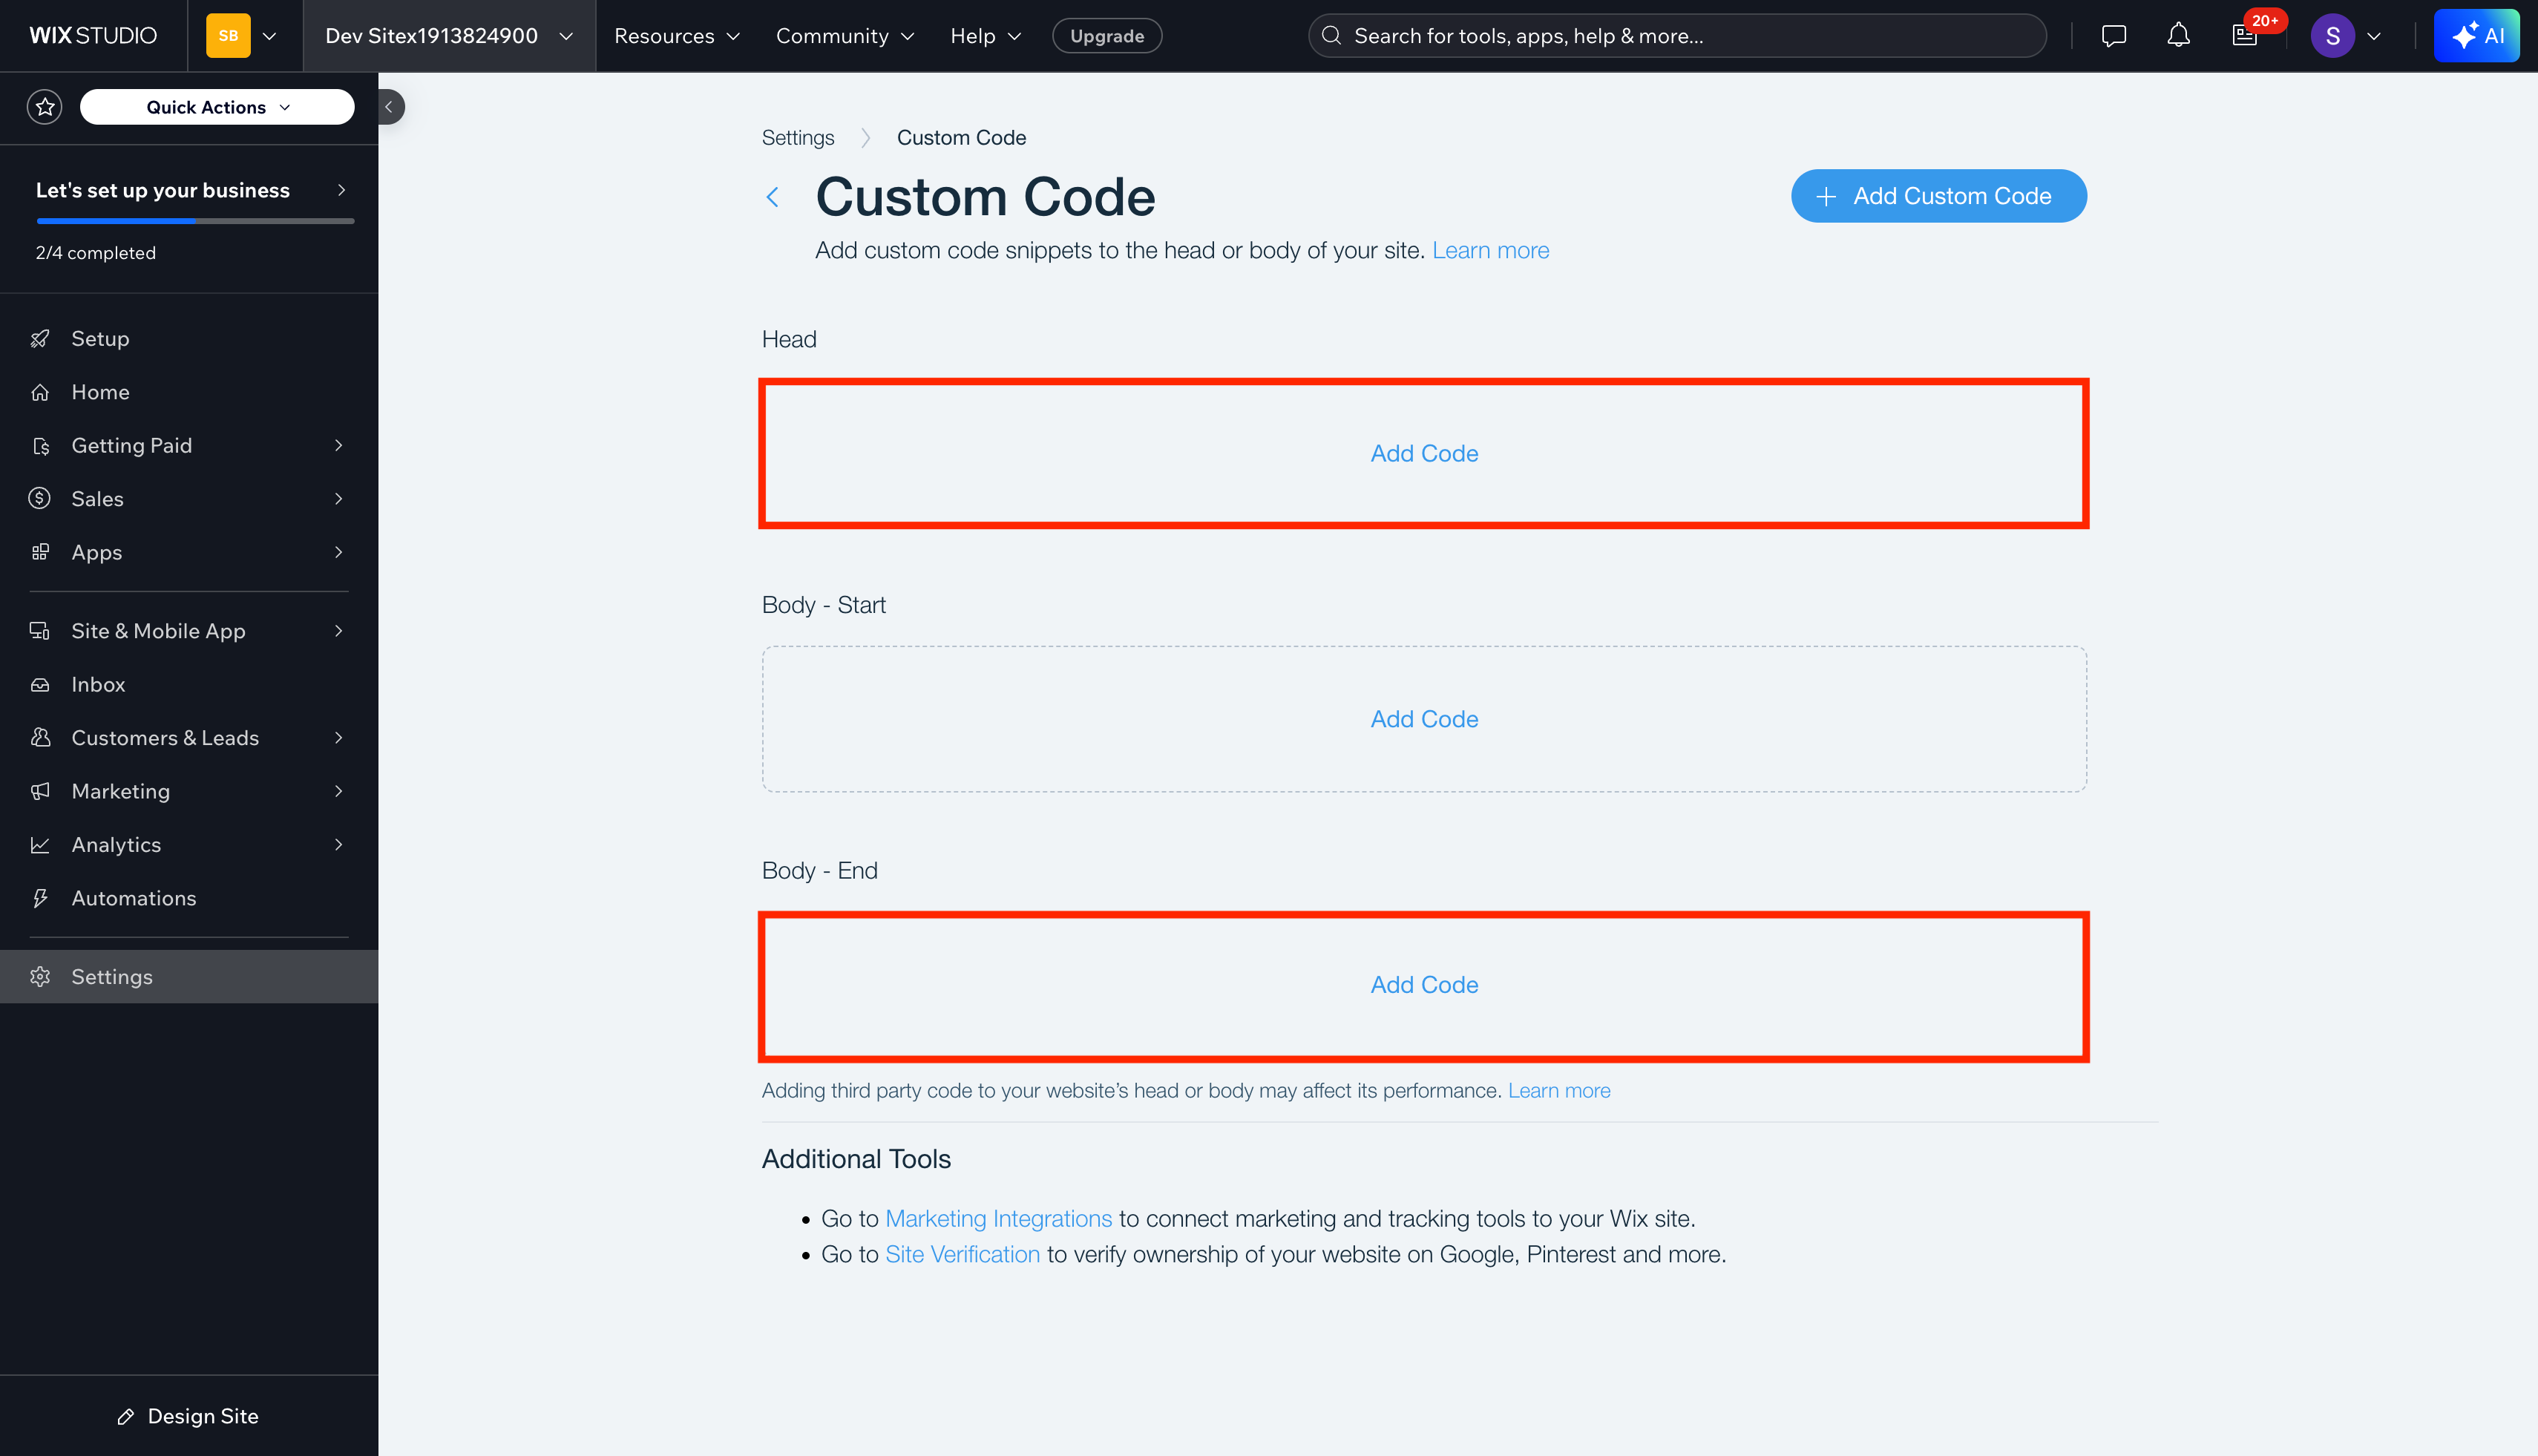
- Click Add Custom Code.
- When prompted, paste the
<meta charset="UTF-8">tag and set the location to Head. (Optional: Name it "BotStacks Meta Tag") - Click Add Custom Code again.
- Paste both
<script>tags (from above) and set the location to Body - end. (Optional: Name it "BotStacks Widget") - Click Apply or Save after each addition.
4. Publish your site
- Click Publish in the Wix editor to make your changes live.
- Visit your site and confirm the BotStacks widget appears.
Need help? Contact support or visit our Discord for assistance.