Crisp Integration
- To setup Crisp Integration you will need 3 pieces of information:
-
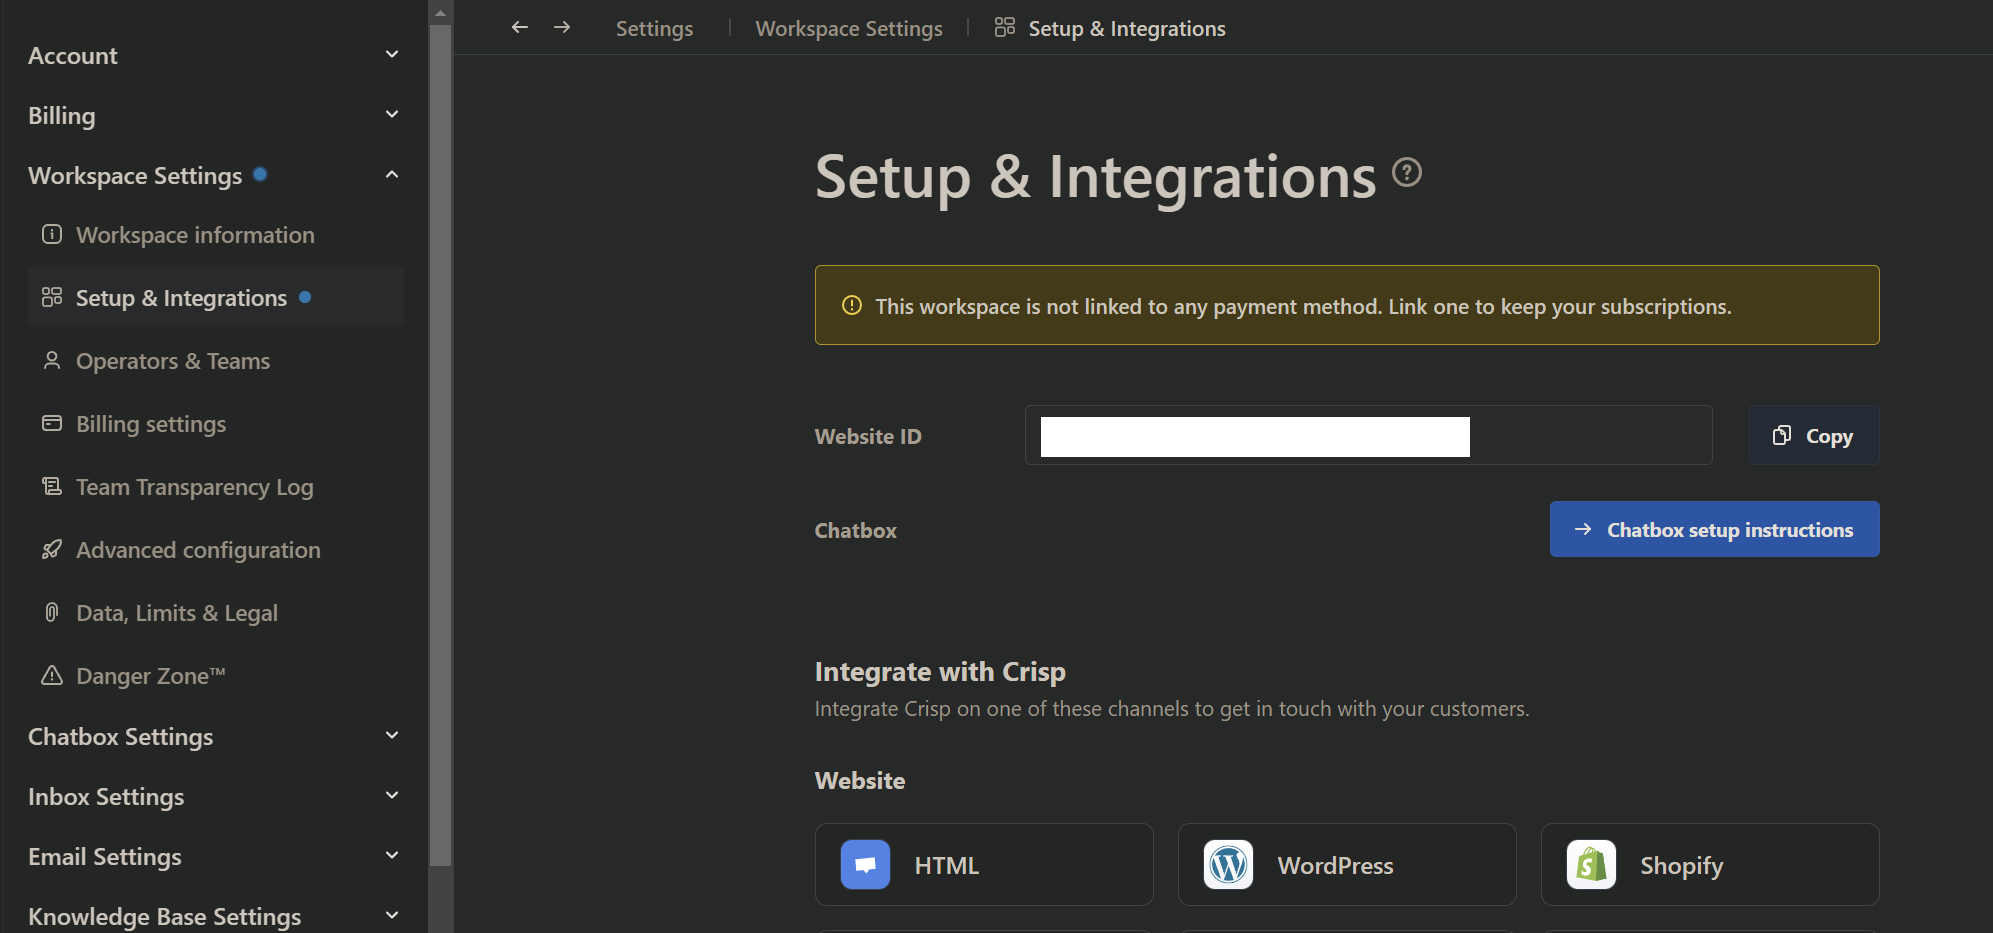
Get Website ID from Crisp
Login to your account at https://crisp.chat/en/ and navigate to Settings -> Workspace Settings -> Setup & Integrations. There you can get the Crisp Website ID and use it on Botstacks.
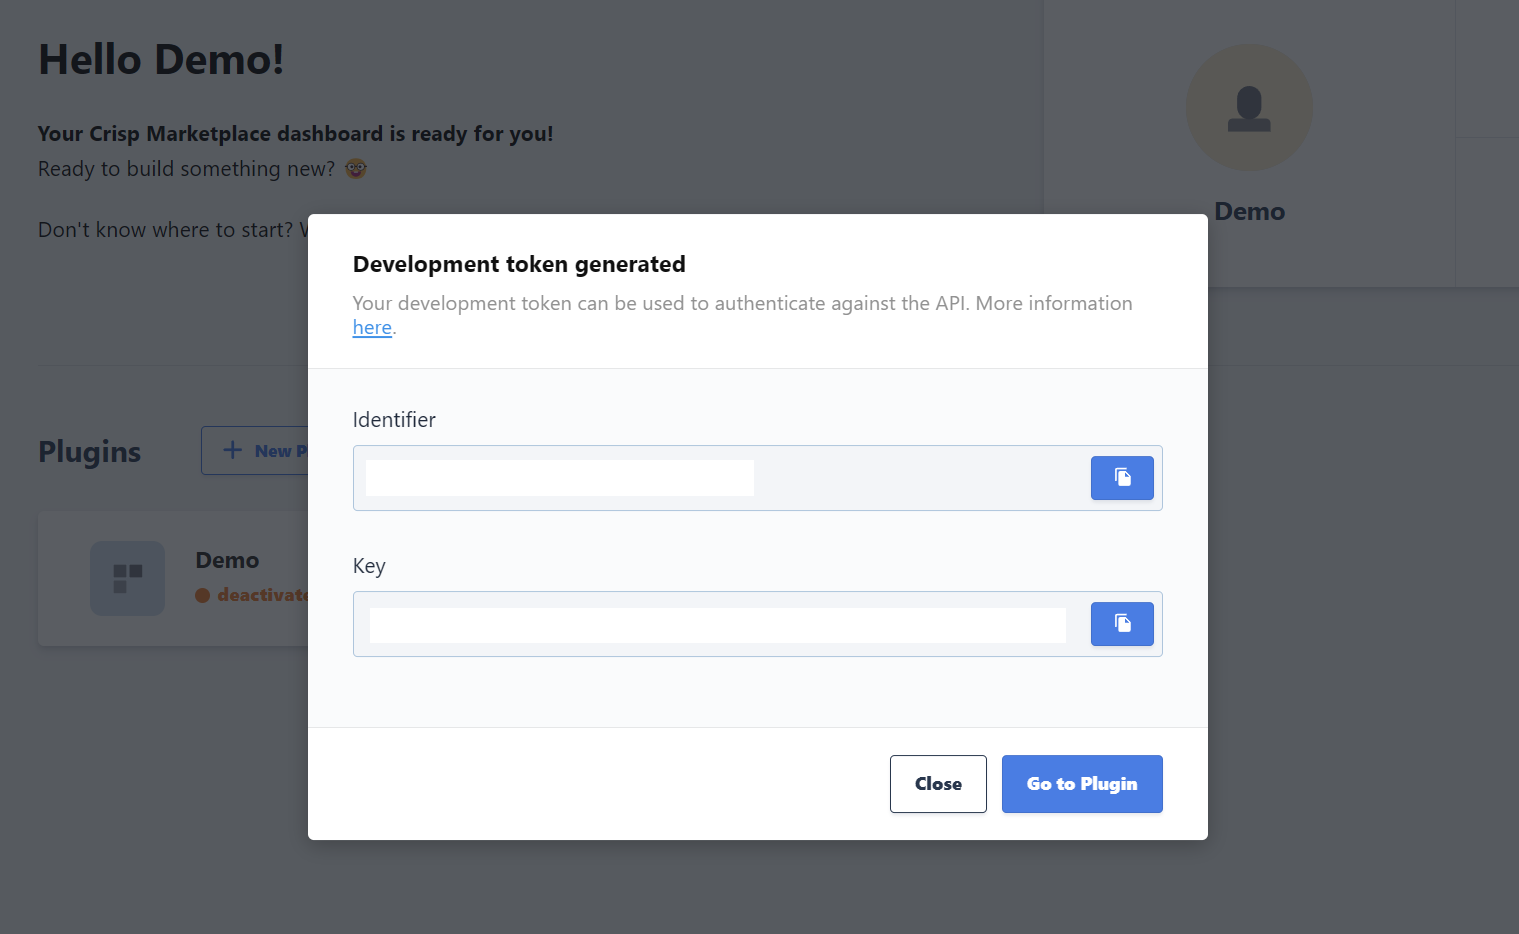
2. Creating a plugin on Marketplace Log in to your account at https://marketplace.crisp.chat/, navigate to the "Plugins" section, and click on "New Plugin" to create your plugin, providing a name and description.

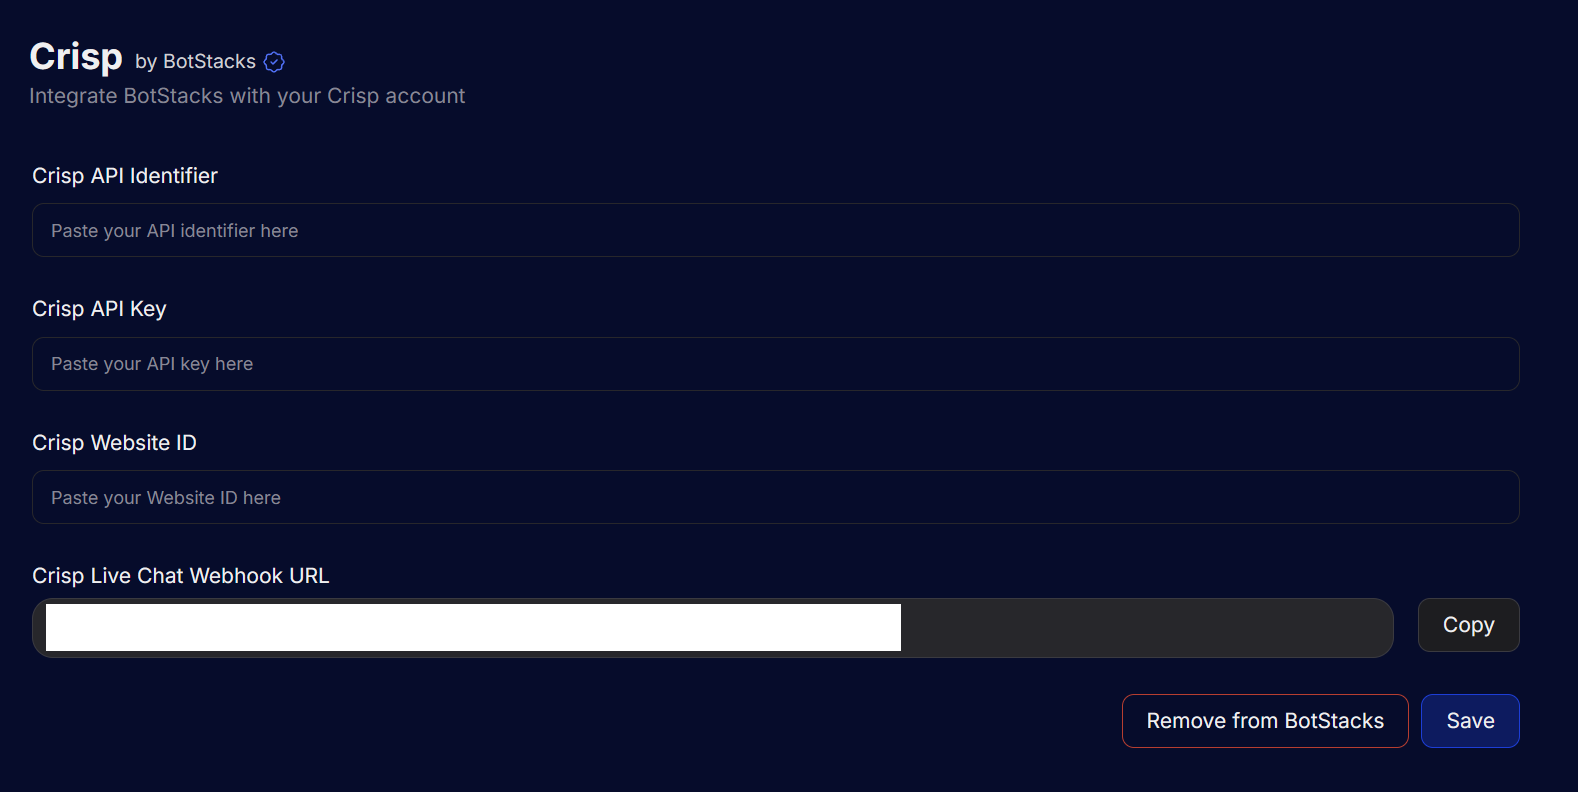
- Obtaining Identifier and Key. Copy and paste the identifier and key into their corresponding fields in BotStacks.
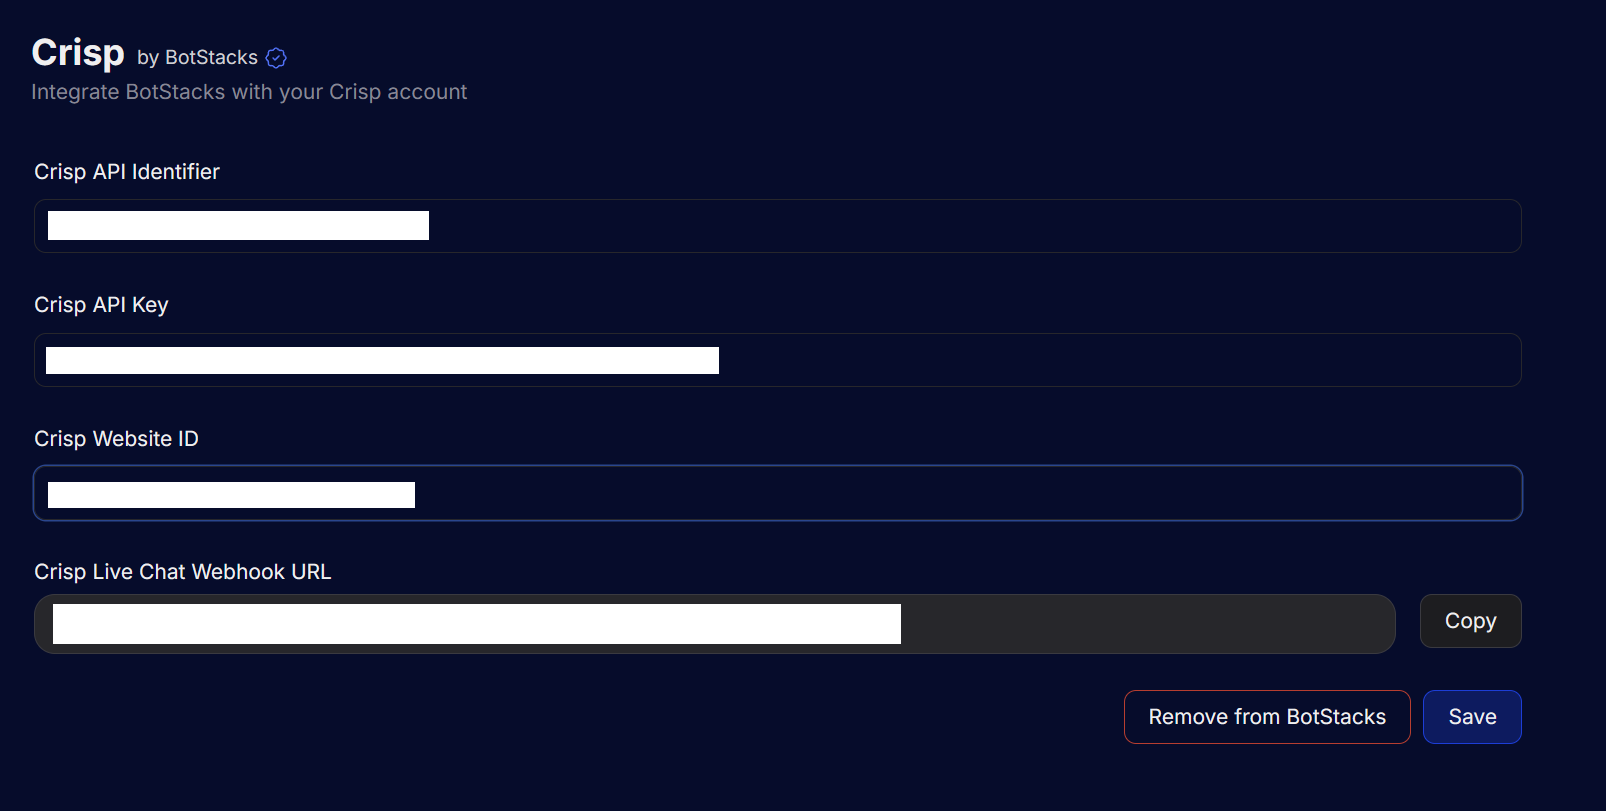
Hit the save button and copy the Live Chat Webhook URL.
-
Add webHook to Crisp Plugin
Go to the created plugin on Crisp Marketplace and navigate to settings tab.
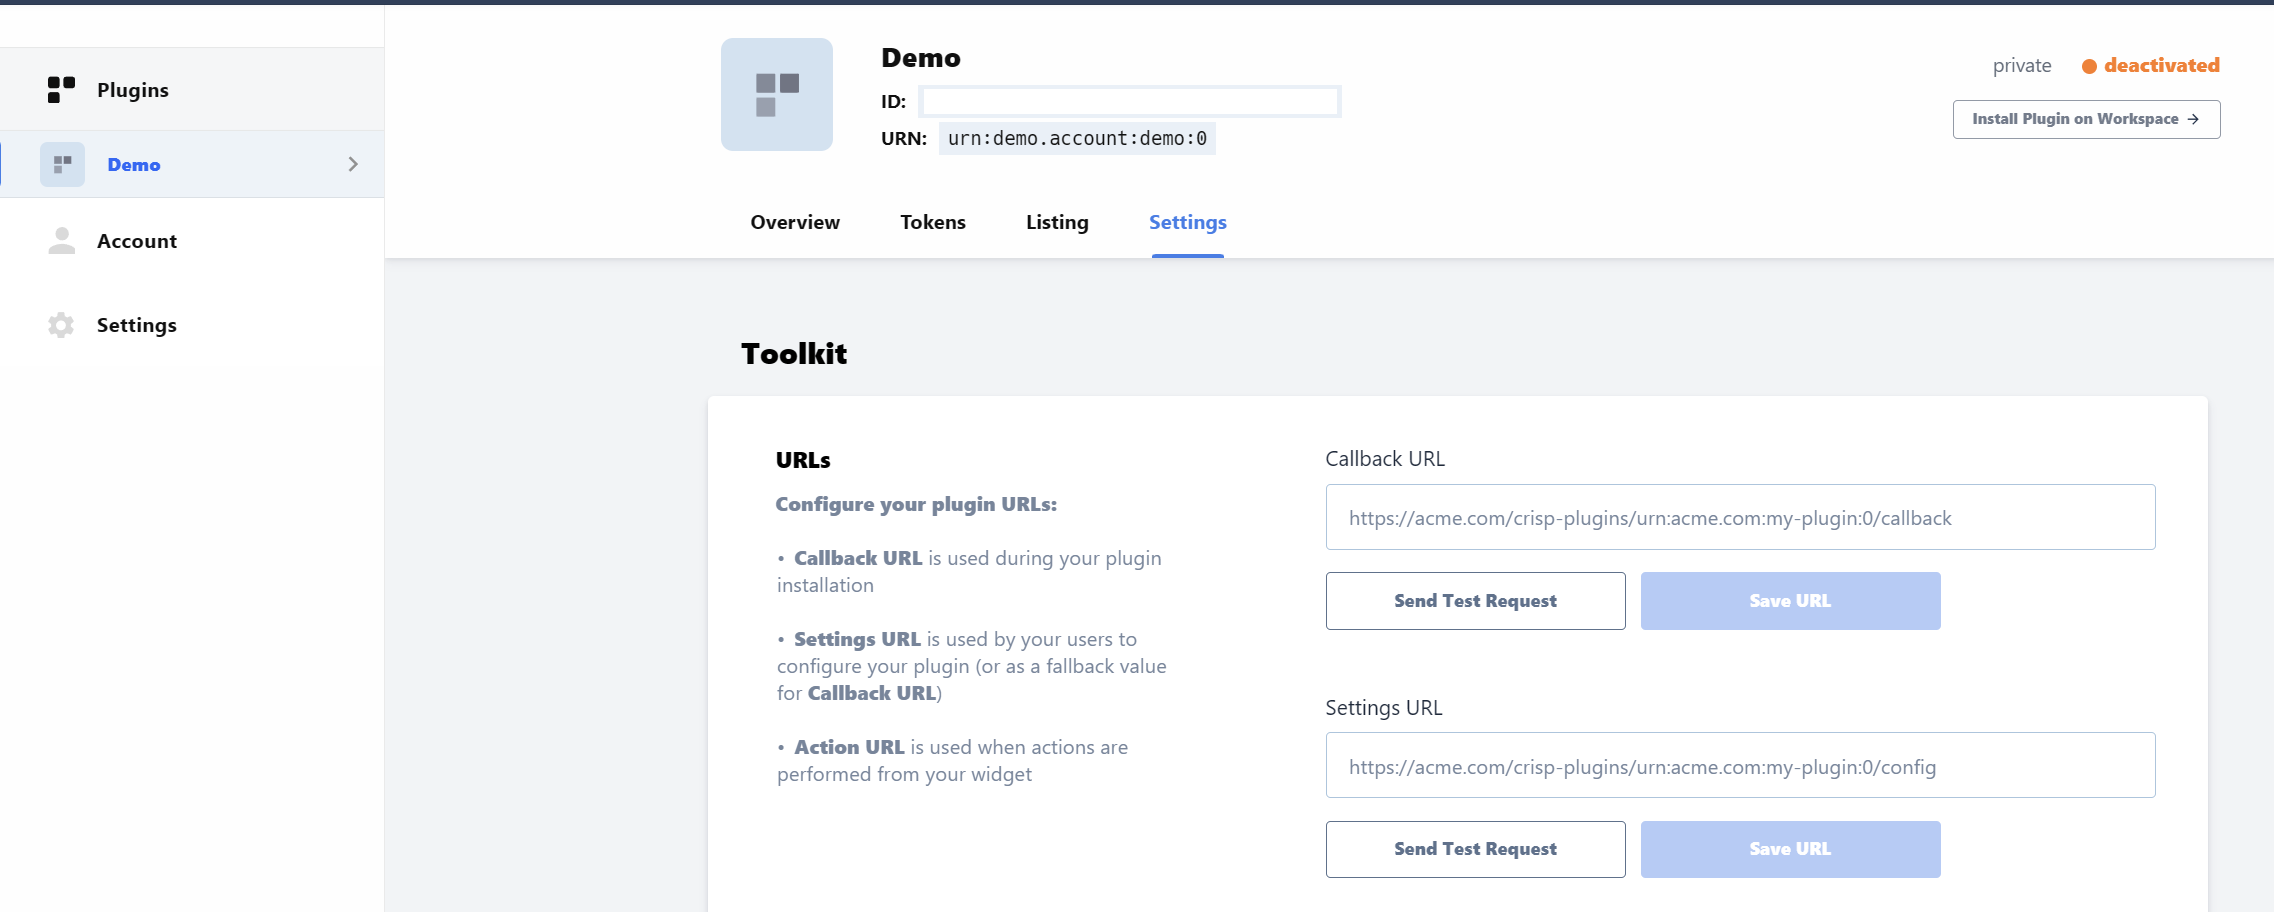
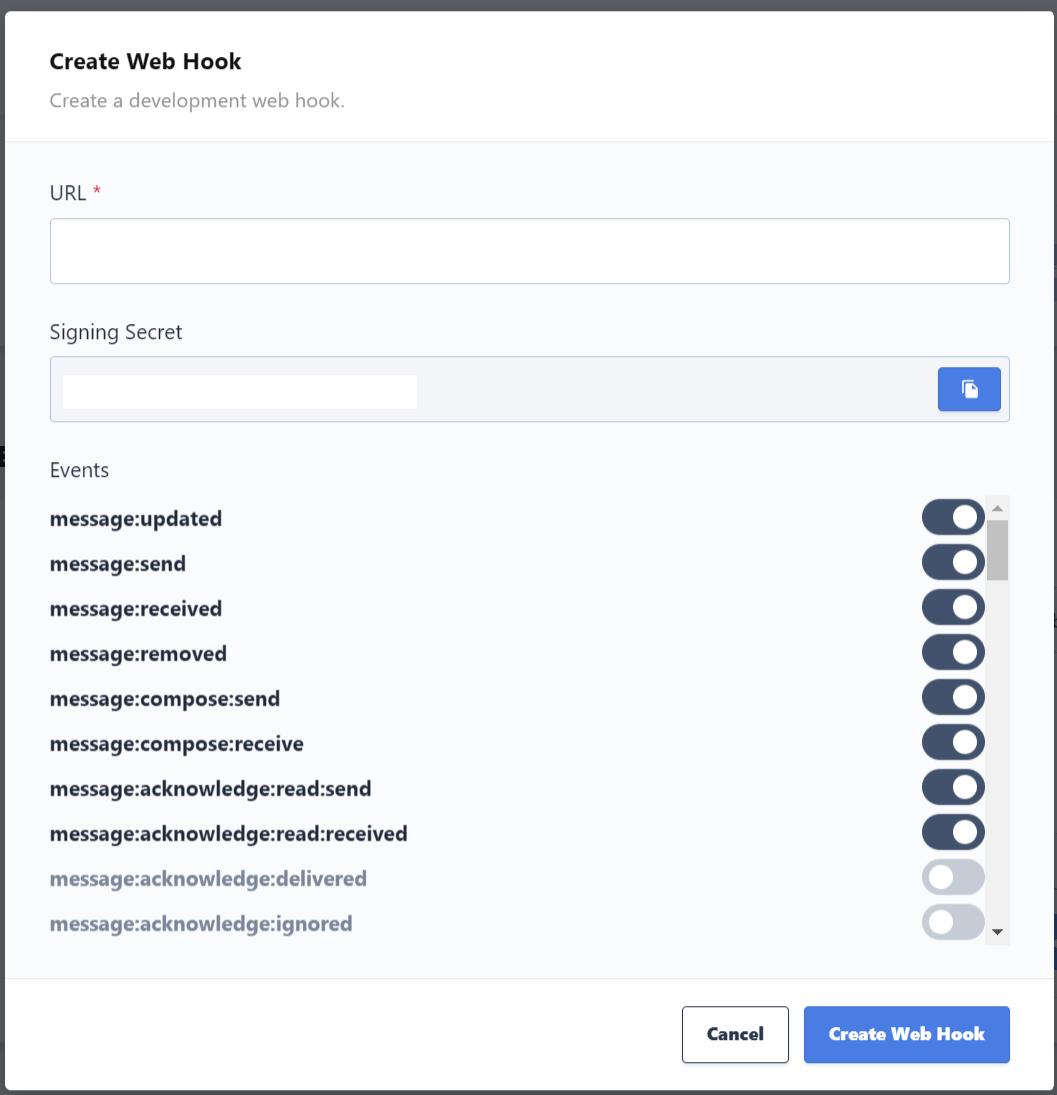
Scroll down to the "Event" section, paste the webhook copied in Step 3 (or the URL obtained at the end of step 4) into the "Development Webhook" field, and click the "Create Web Hook" button to complete the setup. Toggle all the switches that are necessary and hit the create button. To test messaging the below options should be enough.
-
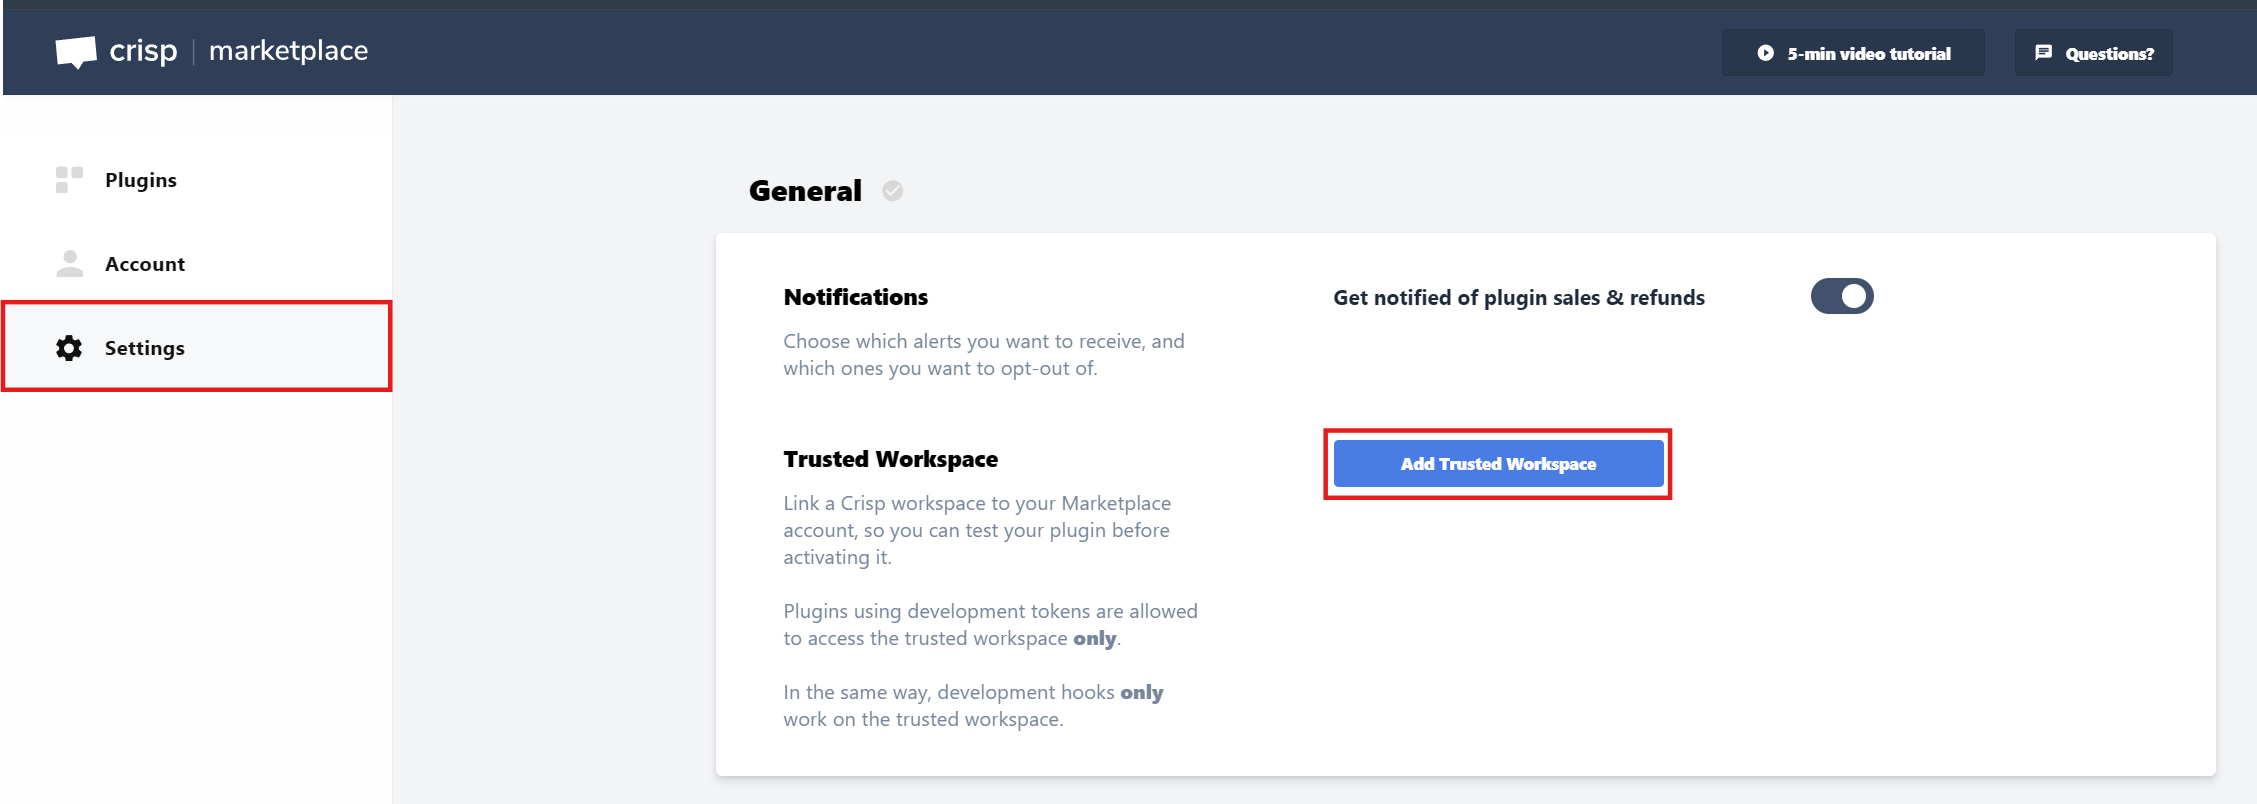
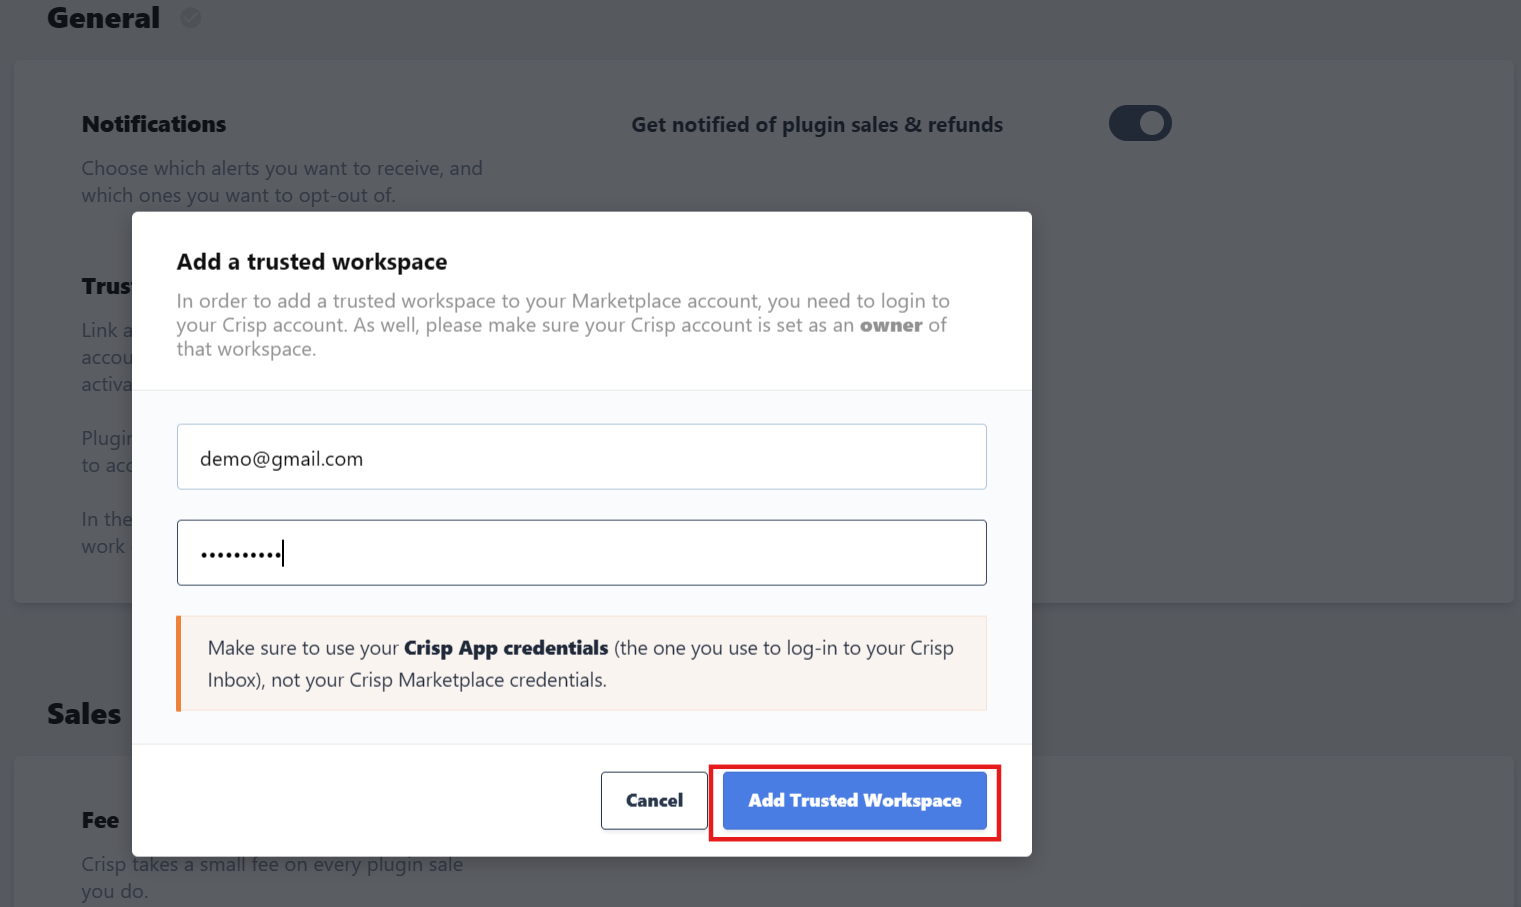
Add Website ID to trusted workspace.
Navigate to https://marketplace.crisp.chat/settings/ and click on Add trusted workspace.
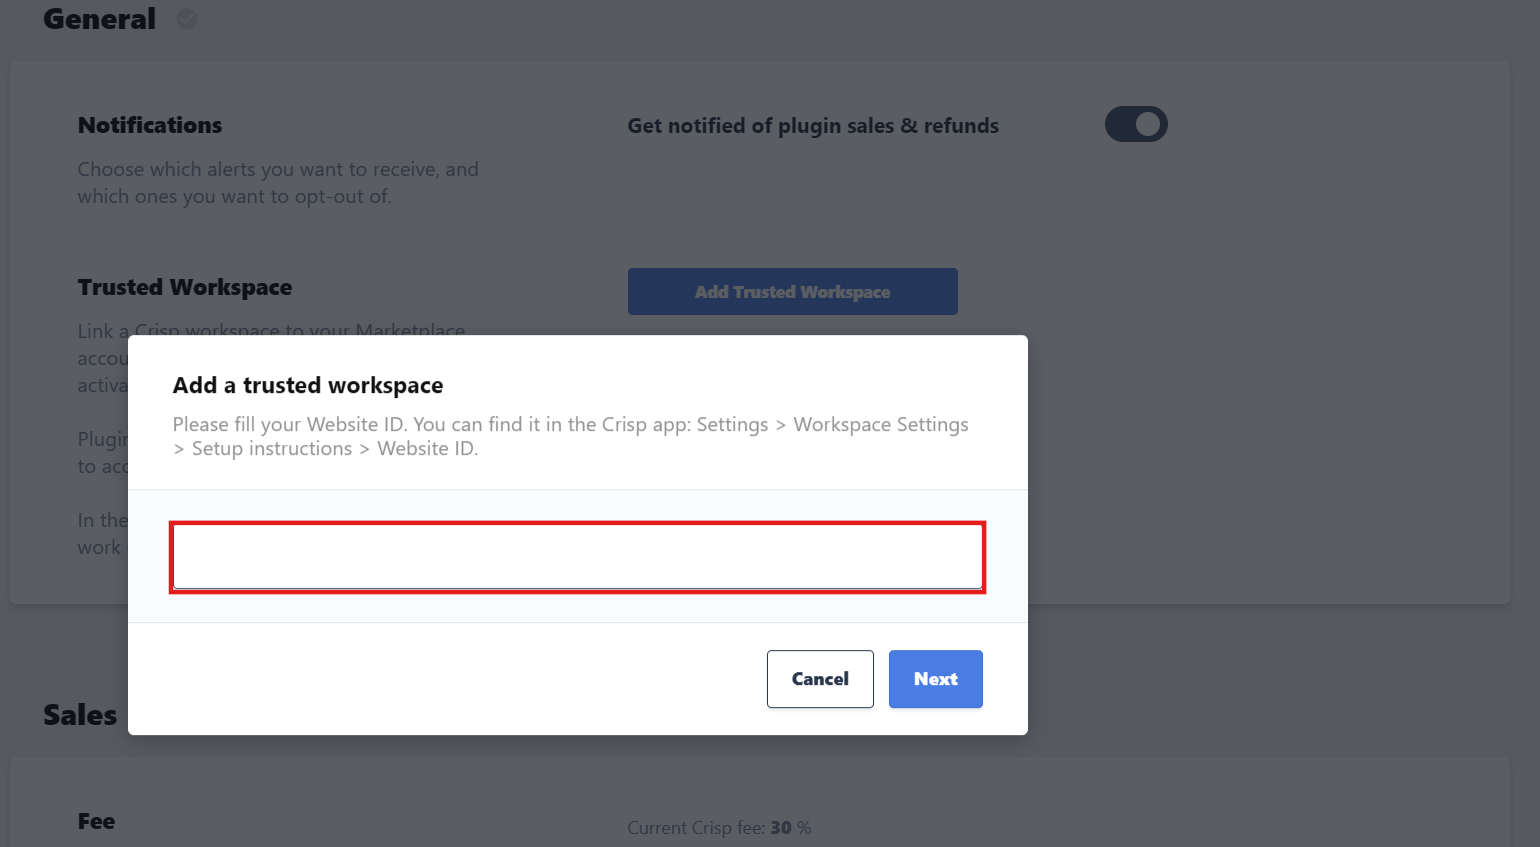
Provide the Website ID from Step 1 in the Website ID field and click on next.
Provide the email and password that were used to login to https://app.crisp.chat/. If a third party service like Google was used to create a Crisp account, you can change your password by navigating to https://app.crisp.chat/settings/account/information/.
Click on Add Trusted Workspace.
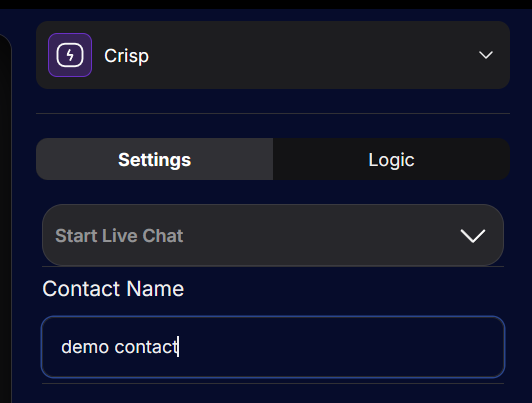
- Add a node of Type Crisp Integration to your workflow and select "Start live chat" under Settings.
- When the execution reaches the crisp node, you would be able to see a conversation initiated with Crisp (app.crisp.chat) with the entire chat history like below.
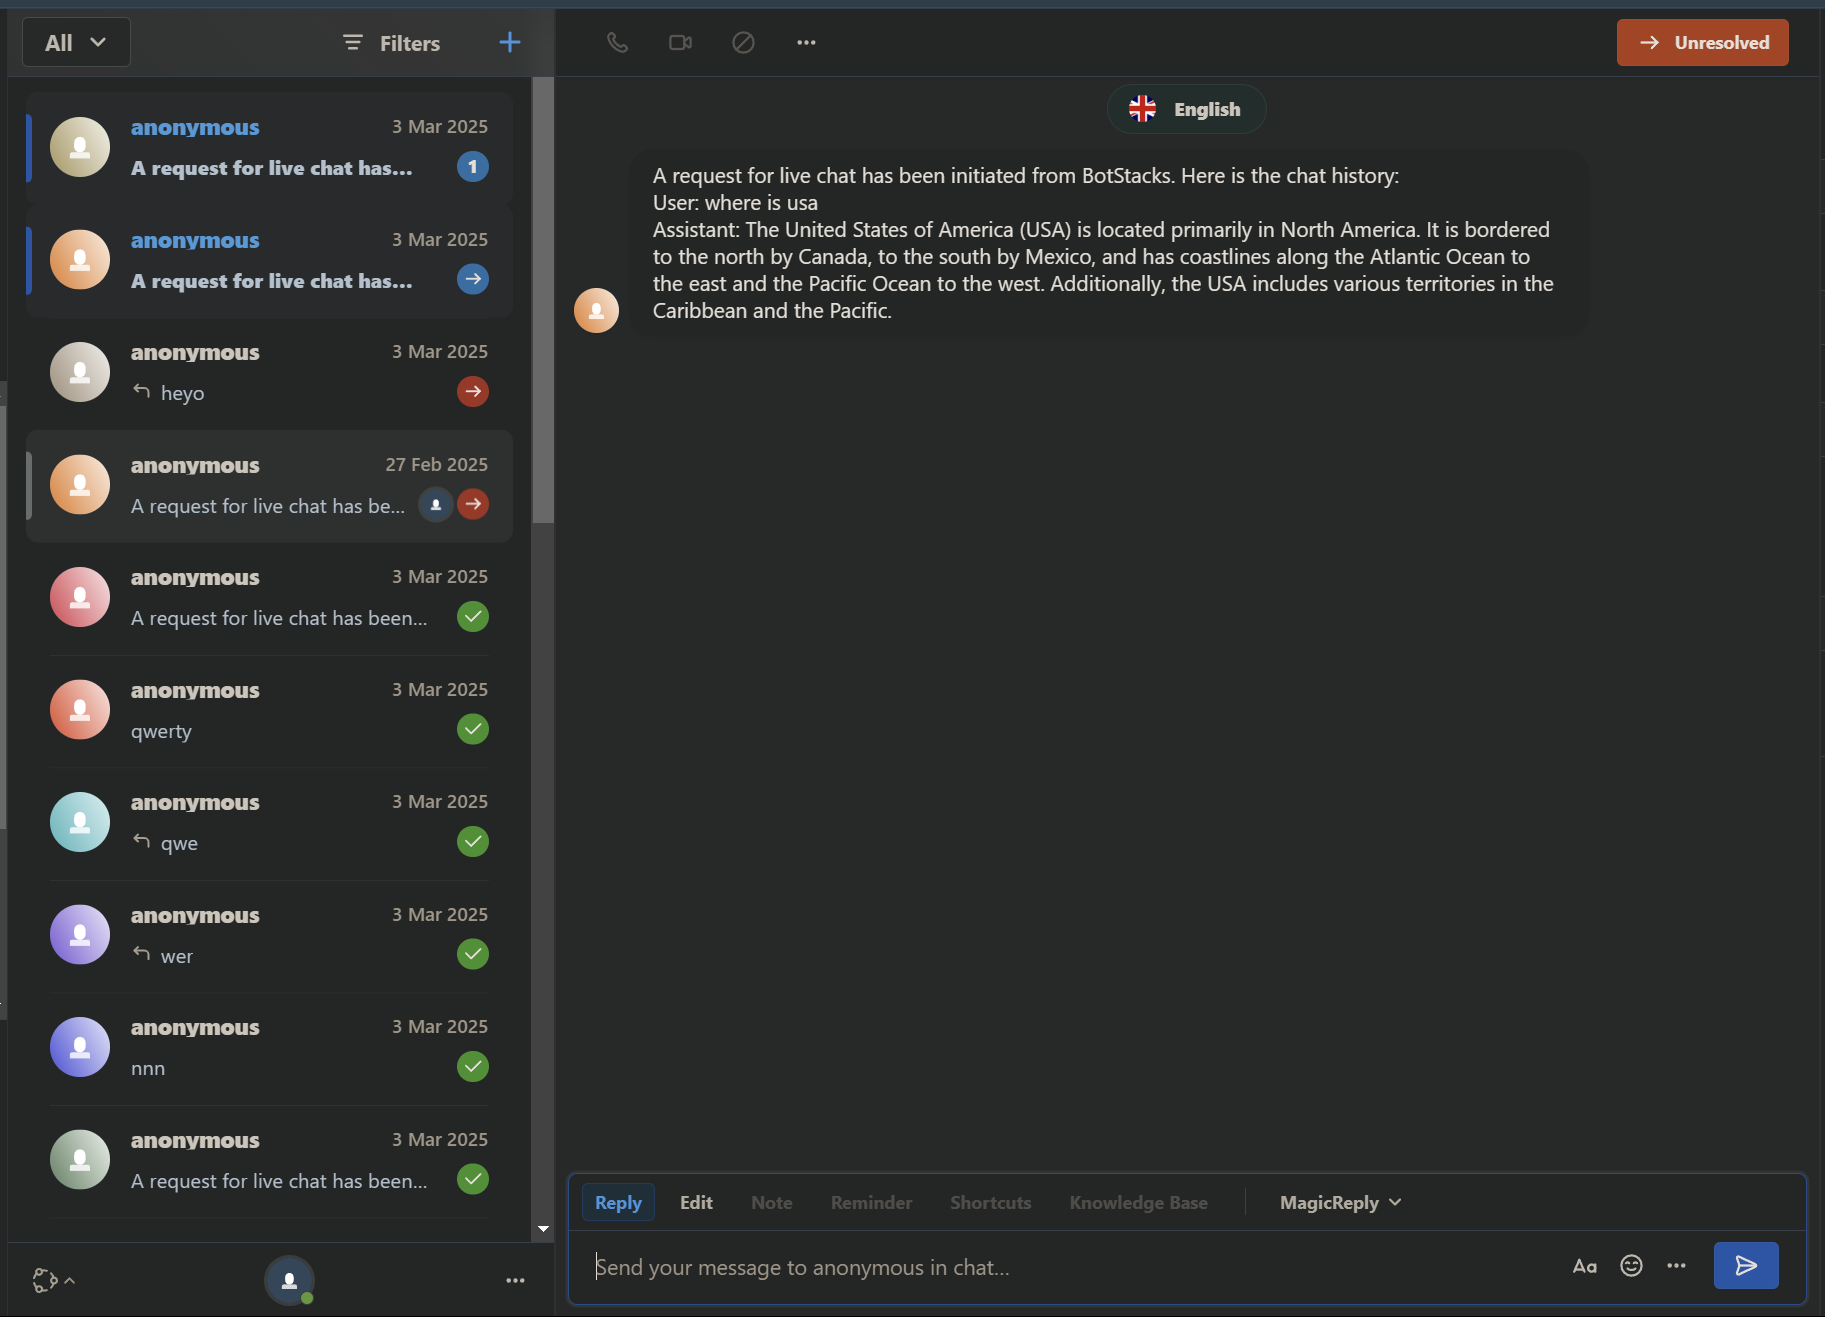
Now you can have a 2-way communication with Crisp.