Build Flows with Sequence Studio
What is a Conversation Flow?
A conversation flow is the step-by-step path your AI assistant follows to interact with users. It's like a map: each step (or "node") represents an action, question, or response, and the connections between them define how the conversation moves forward.
Flows let you design everything from simple Q&A bots to complex, multi-step assistants that can remember information, branch based on user input, and connect to external services.
How Flows Work in Sequence Studio
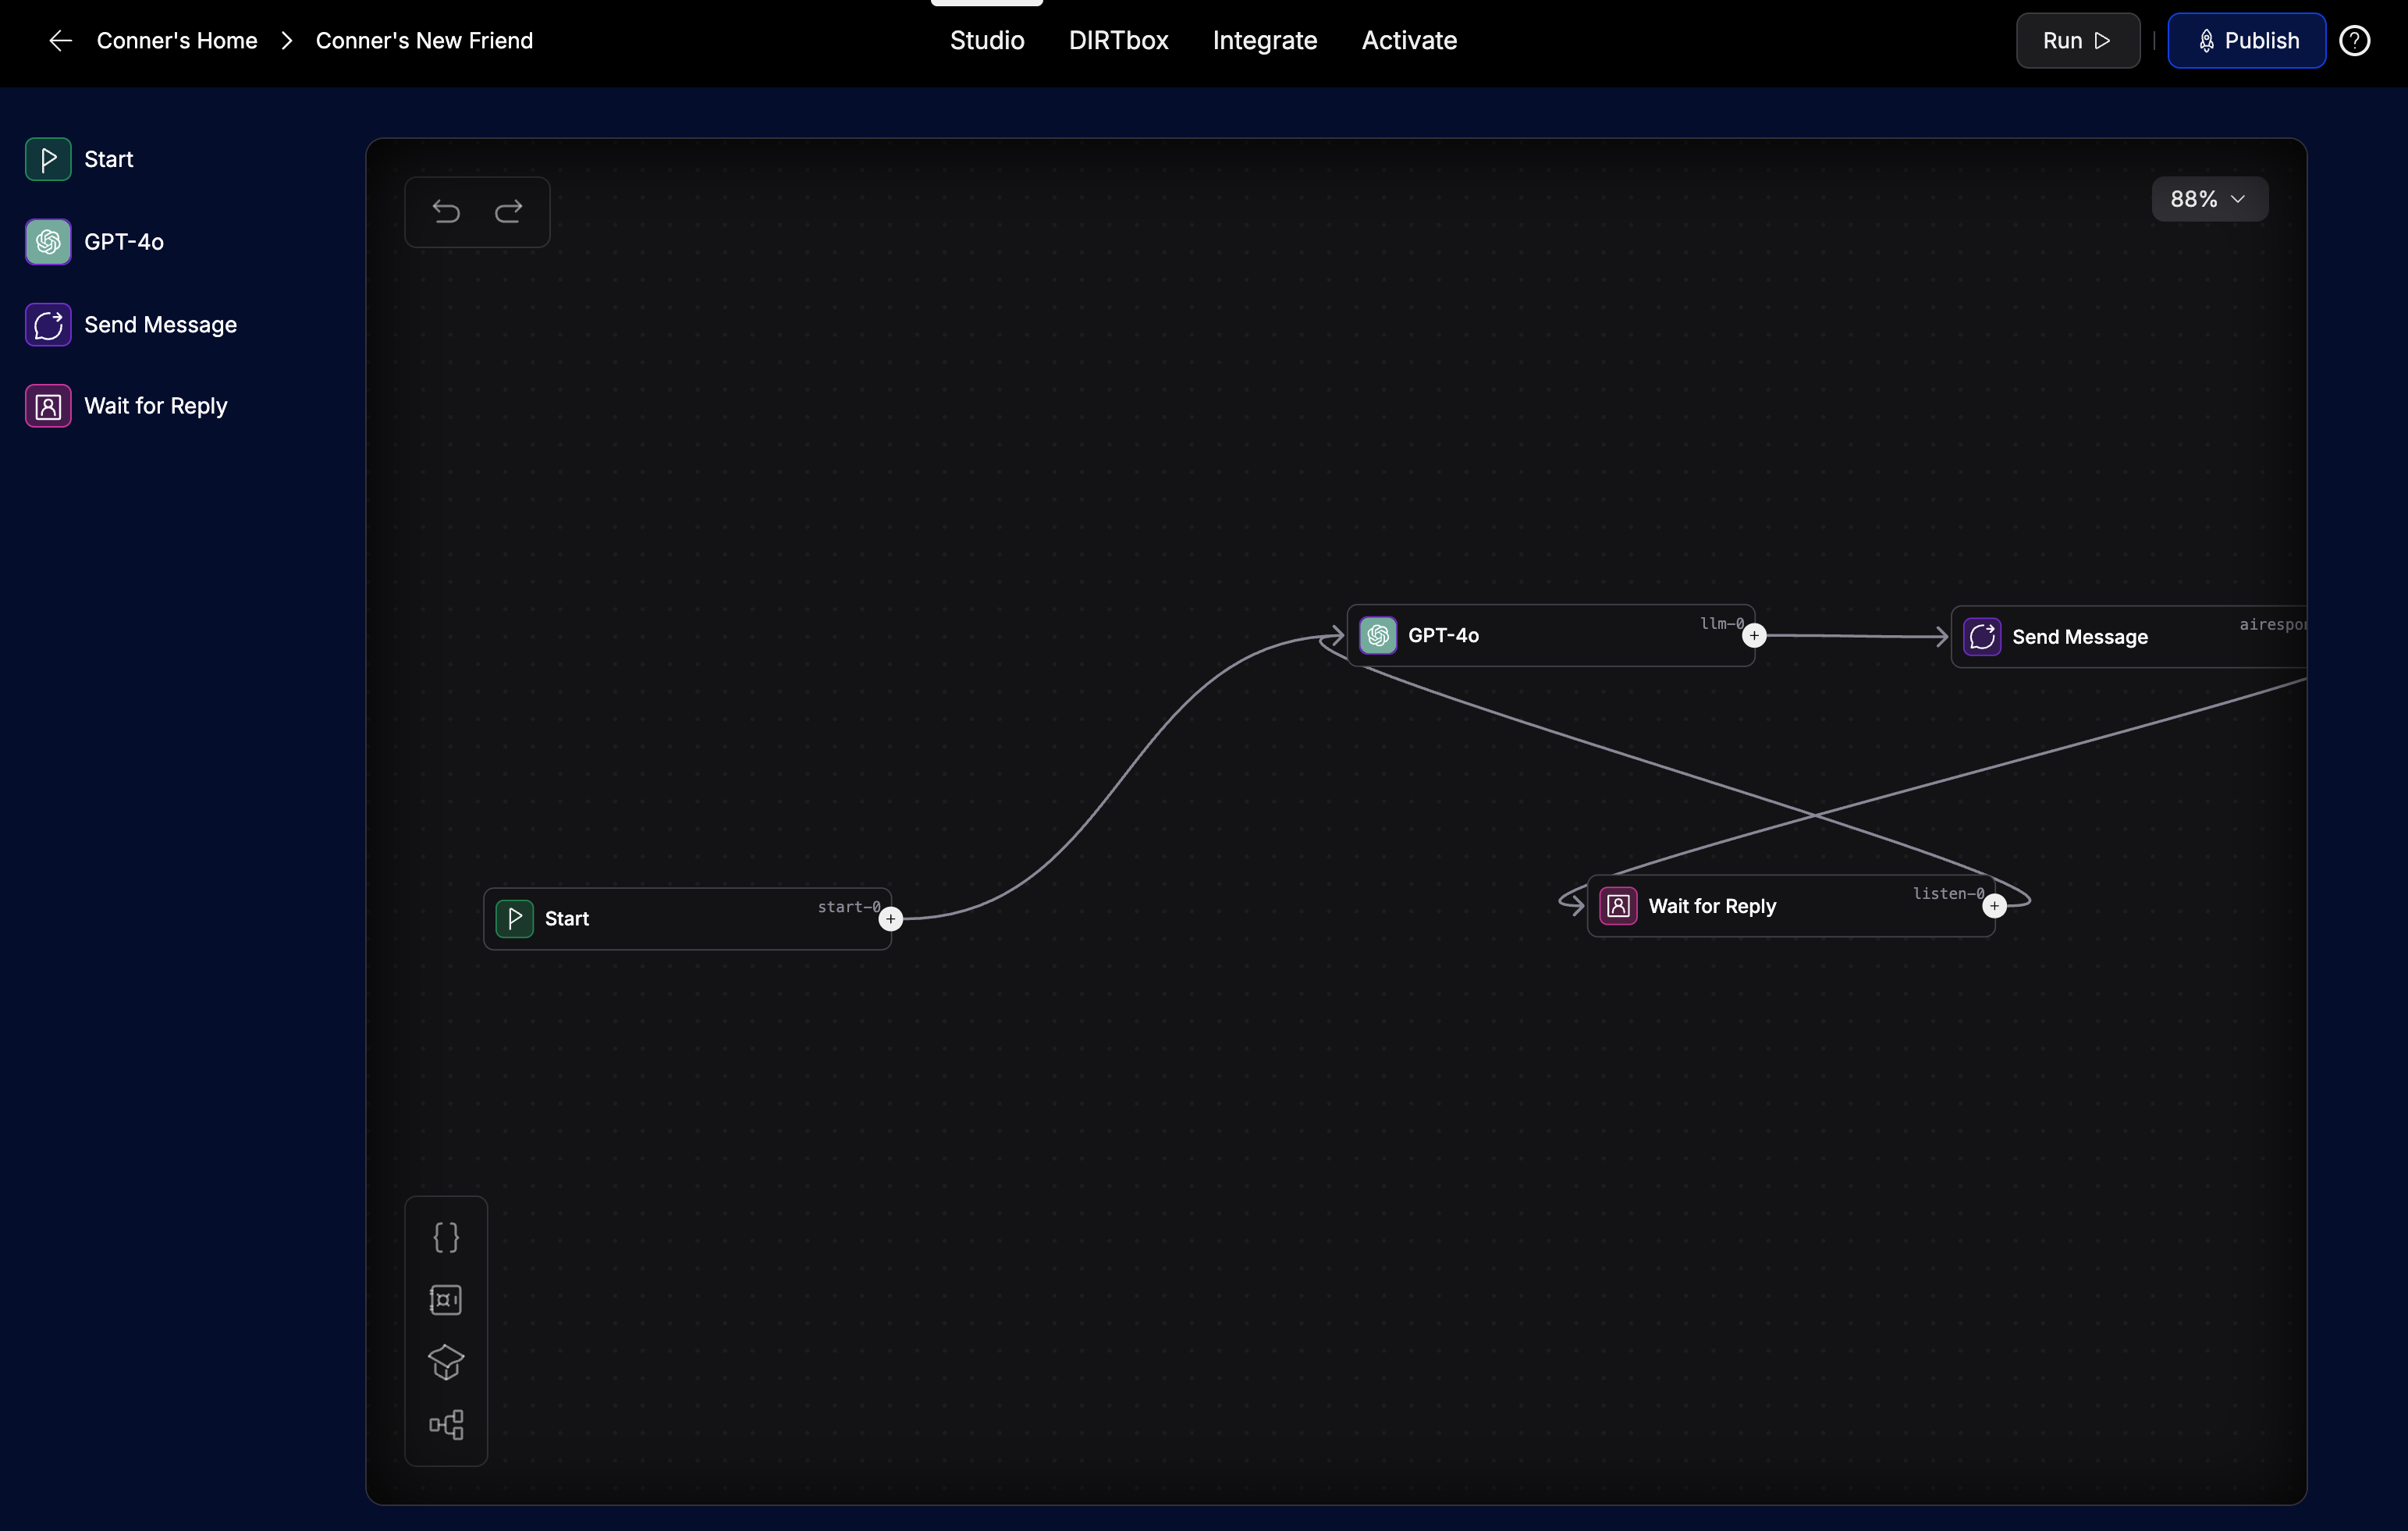
Sequence Studio is a visual builder. You drag and drop nodes onto a canvas, connect them, and configure their behavior. The flow starts at a Start node and moves from node to node based on your design.
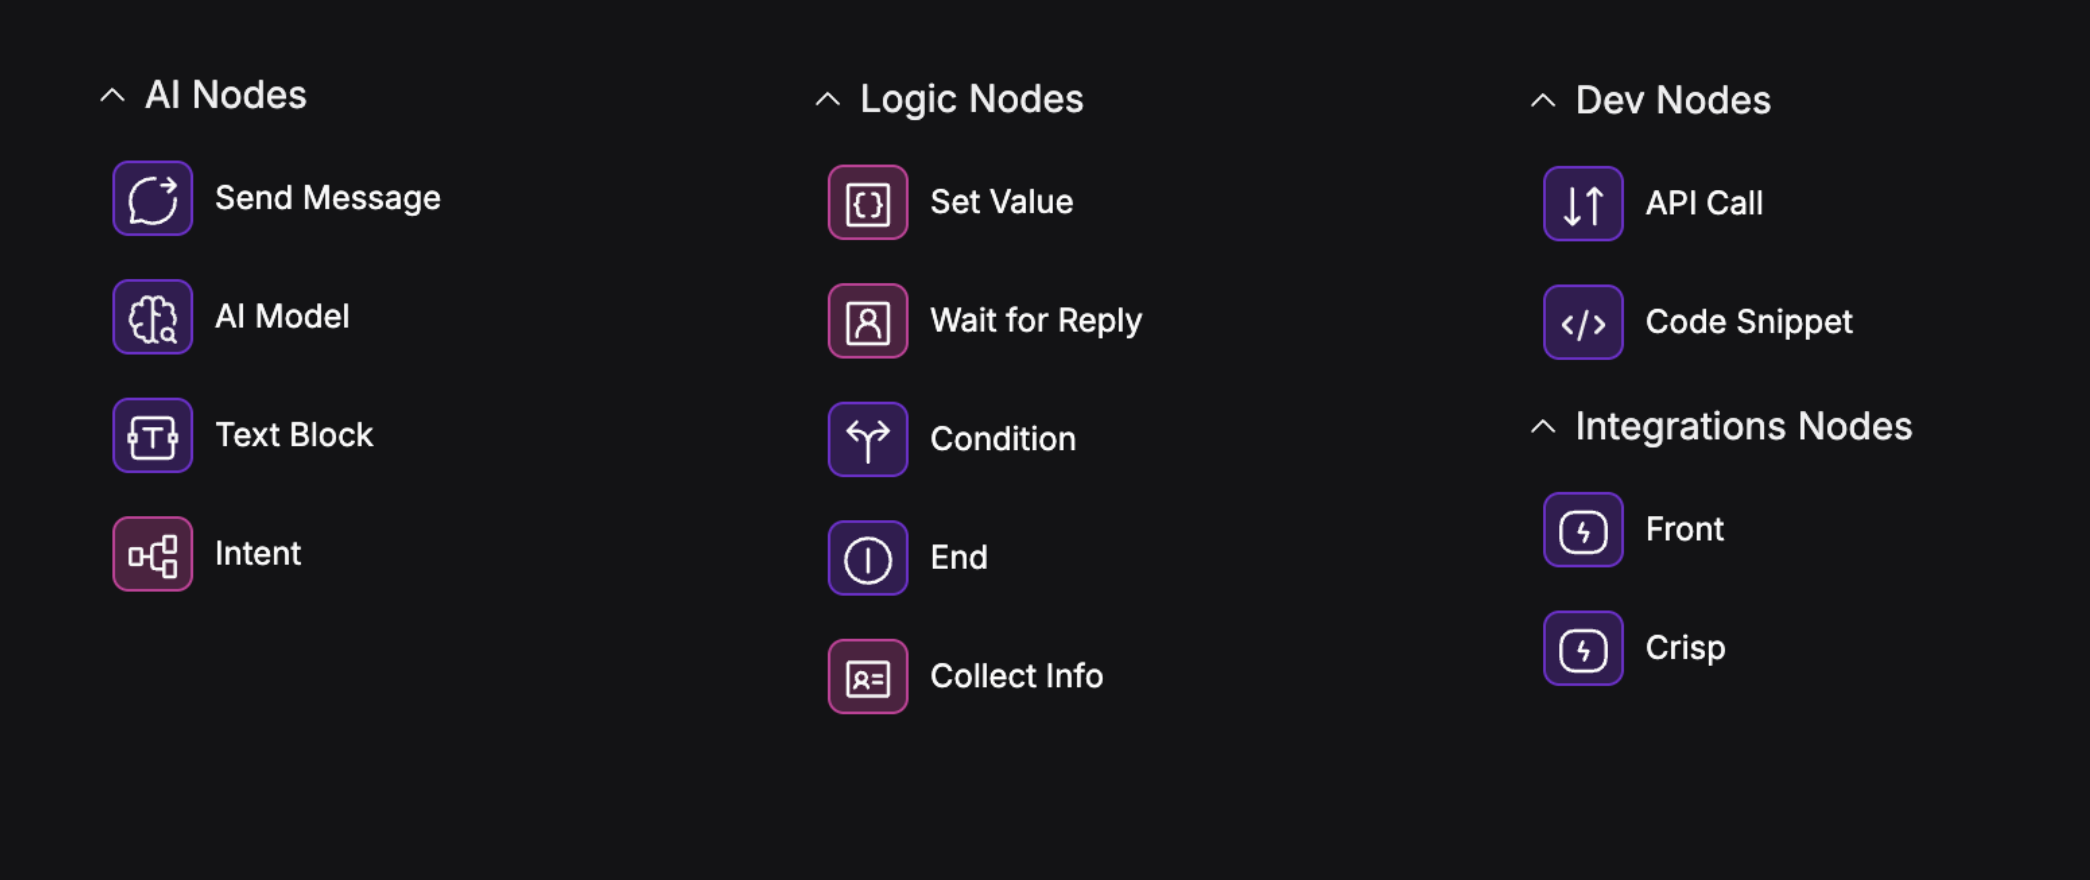
Nodes: The Building Blocks
Nodes are the core steps in your flow. Each node does something specific—like sending a message, waiting for user input, calling an API, or making a decision.
Common Node Types
- Start: Where every flow begins. Triggers when a user starts a chat or sends a message.
- AI Model: Uses an AI model (like GPT-4) to generate a response.
- Wait for Reply: Waits for user input before continuing.
- Text: Outputs a specific message or value.
- Send Message: Sends a message to the user in the chat.
- Set Value: Stores or updates a variable.
- Condition: Branches the flow based on logic (e.g., if/else).
- API Call: Calls an external service and uses the result.
- Intent: Routes based on user intent.
- End: Ends the conversation.
Connections: How Nodes Talk to Each Other
Connections are the arrows that link nodes. They define the order of operations and how data moves. You create a connection by dragging from a node's output to another node's input.
- Some nodes (like Condition or Intent Classify) have multiple outputs for different branches.
- You can loop connections to create repeating flows (e.g., keep listening for user input).
Building Your First Assistant: Step-by-Step
- Open Sequence Studio from your assistant's dashboard.
- Add an AI Model Node from the Start node to generate AI responses.
- Add a Send Message Node from the AI Model node to send the AI's message to the user.
- Add a Wait for Reply Node from the Send Message node to wait for user input.
- Complete the Loop by connecting the Wait for Reply back to the AI Model node.
- Configure Node Settings: Click a node to set its options (e.g., choose a model for the AI Model node, like GPT-4o).
- Test Your Flow: Use the preview or run button to see your assistant in action.
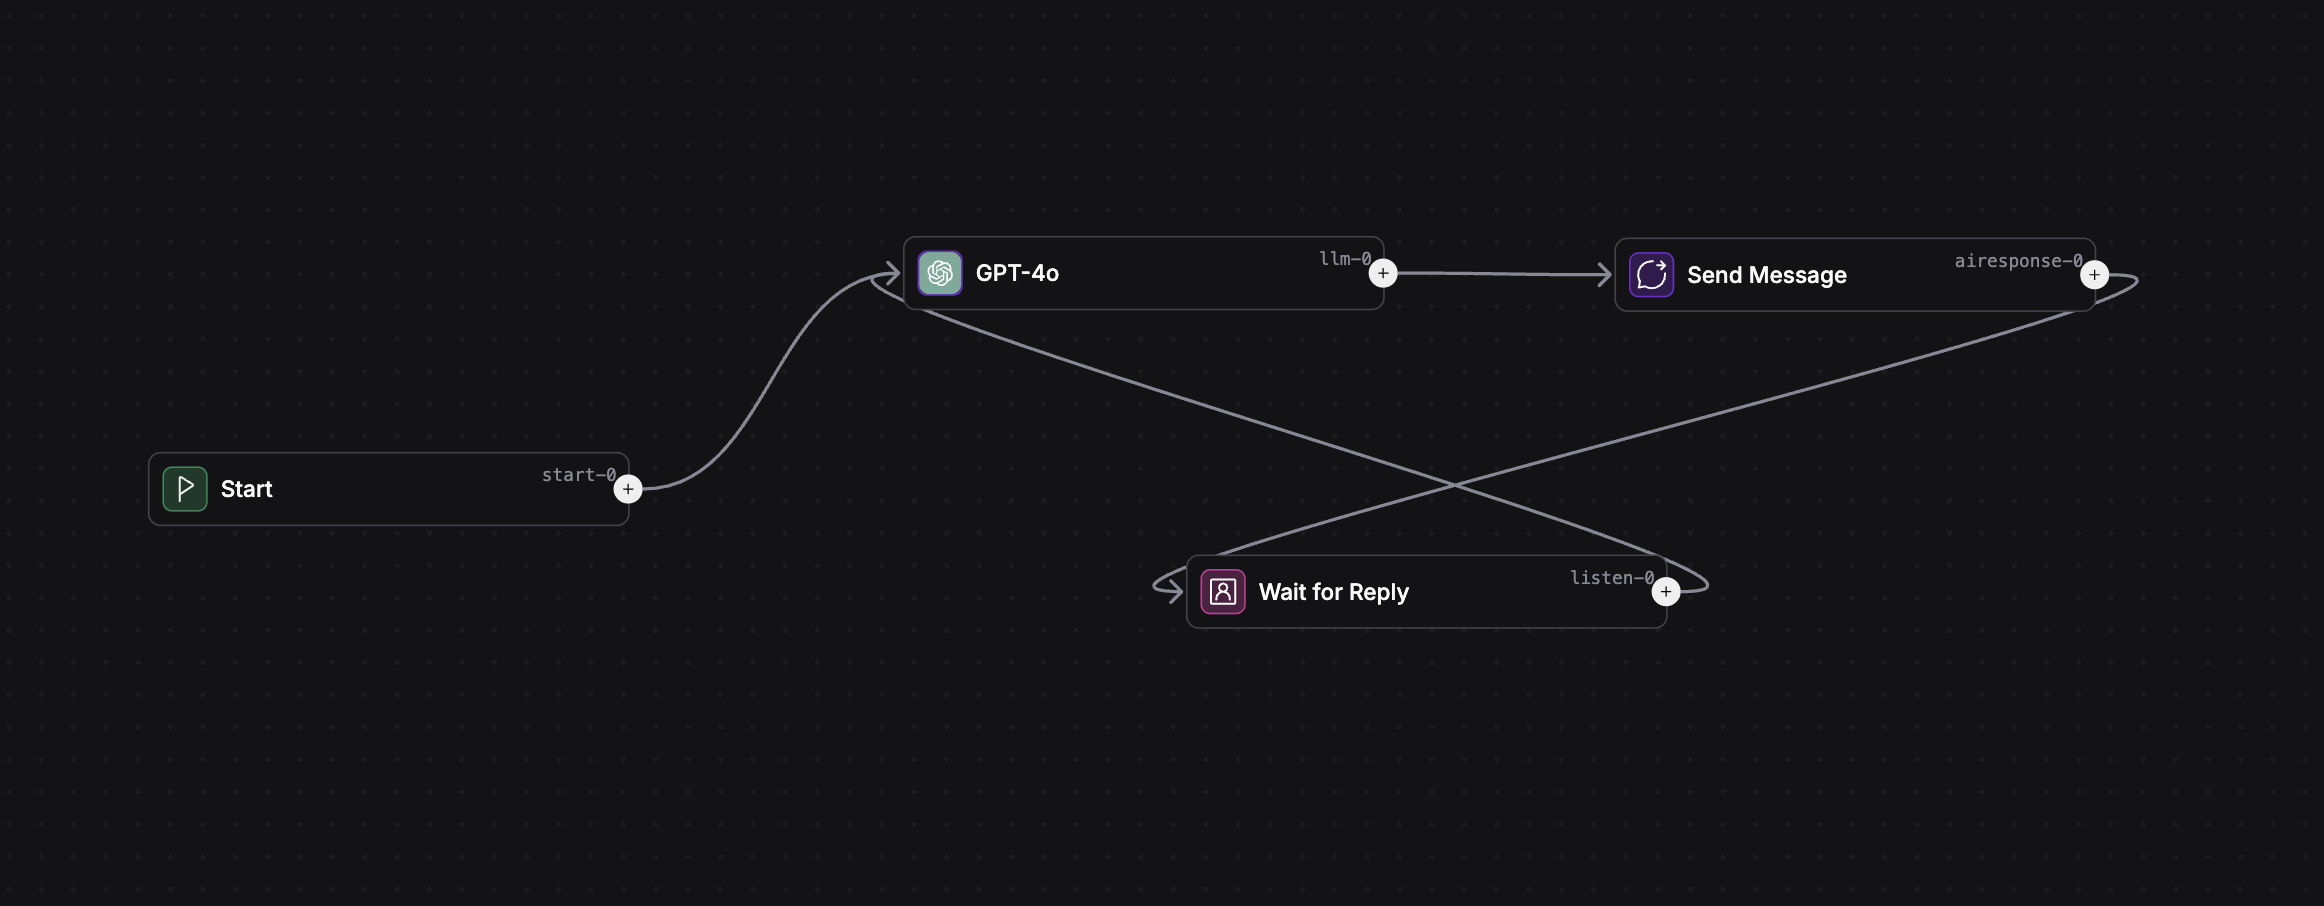
How Data Moves Through a Flow
- When a user sends a message, the Start node is triggered.
- Data (like the user's message) is passed from node to node via connections.
- Variables can be set and used throughout the flow for memory and logic.
Example:
- User says: "What's the weather?"
- Start node passes the message to AI Model node.
- AI Model node generates a response using the message and any relevant variables.
- Send Message node sends the answer to the user.
- Wait for Reply node waits for the next user input, and the loop continues.
Tips for Designing Great Flows
- Start simple: get a basic loop working, then add complexity.
- Use clear, descriptive names for nodes and variables.
- Test often—preview your flow after each change.
- Use variables to remember important info (like names, preferences, etc.).
- Use Condition and Intent nodes to make your assistant smarter and more dynamic.
- Keep flows organized—use comments or labels if available.
What's Next?
Now that you understand flows, dive deeper into each node type and learn how to use advanced features like branching, memory, and API calls to build powerful assistants.