Use Conditions and Logic Branching
Logic branching lets your assistant make decisions and follow different paths based on what the user says or does. This is how you make your assistant dynamic, smart, and able to handle real-world conversations.
What is Logic Branching?
Logic branching means your flow can "branch"—take different routes—depending on conditions you define. For example, you might:
- Greet new users differently from returning users
- Ask for more info if a user's message is unclear
- Route requests to different flows based on user intent
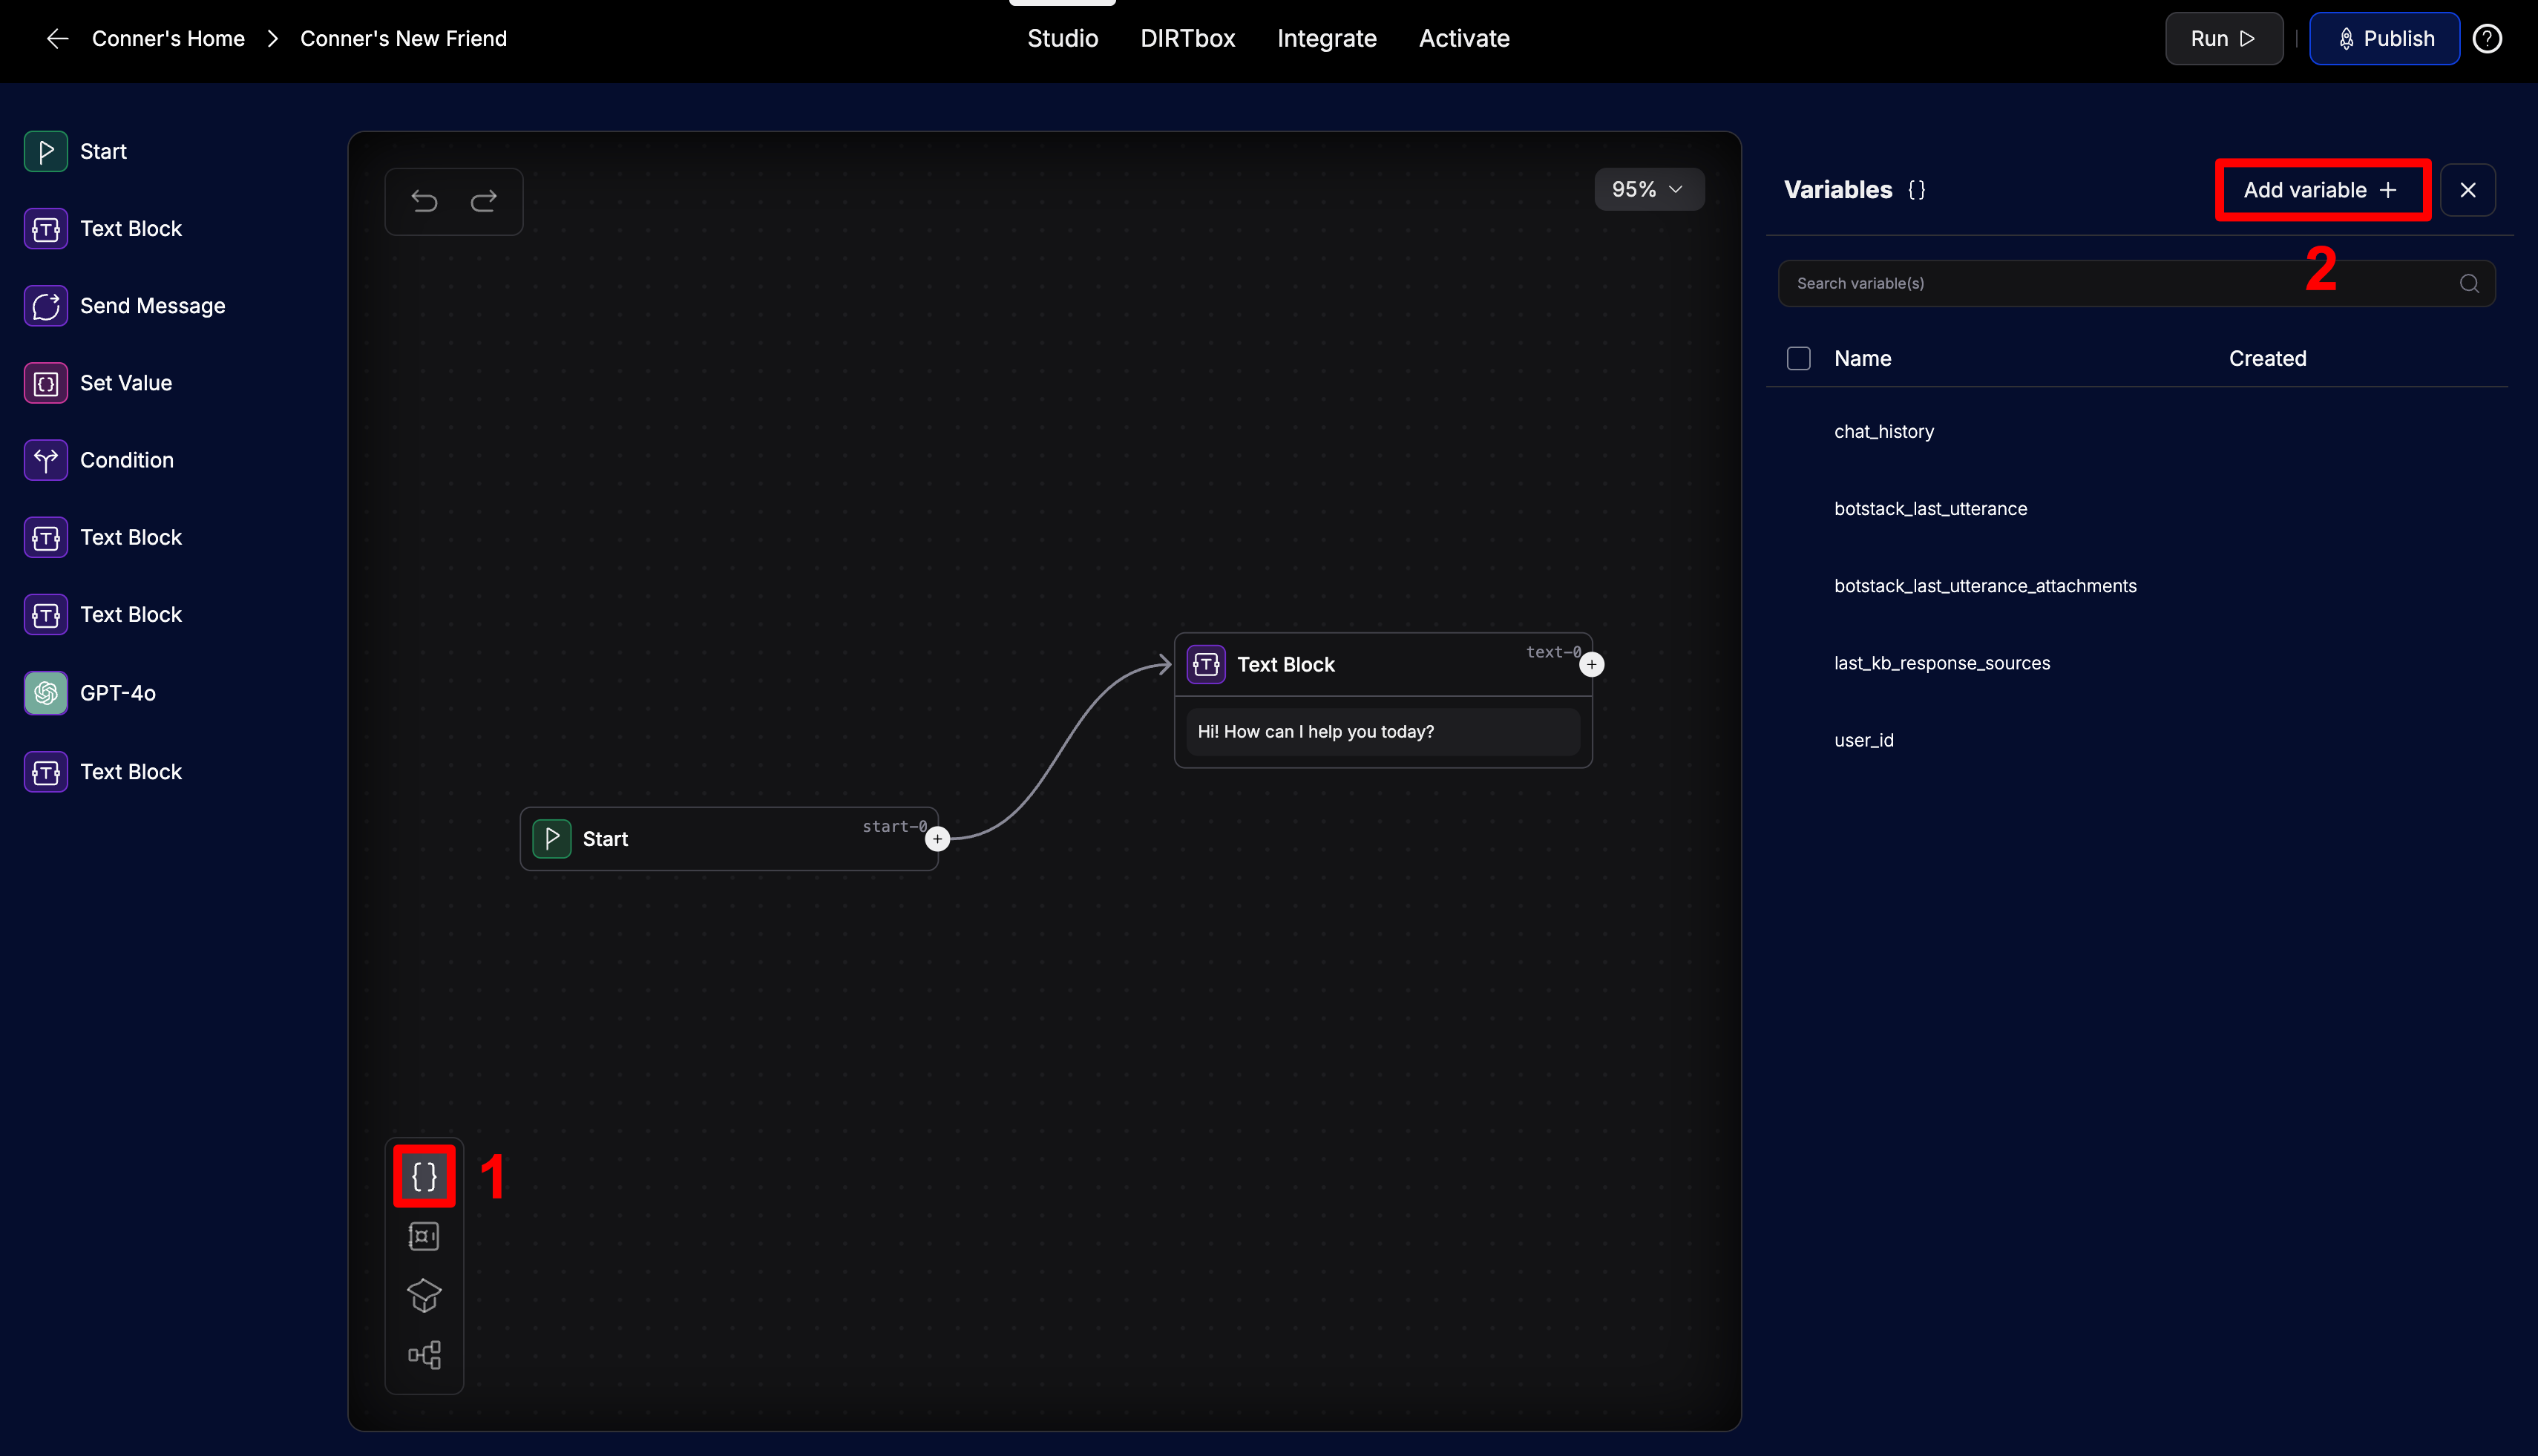
Variables: Remembering Information
Variables let your assistant remember information—like names, preferences, or anything the user tells you. You create and manage variables in the Variables tab.
- Click the Variables tab in Sequence Studio
- Add a new variable (e.g.,
age,user_name, etc.)
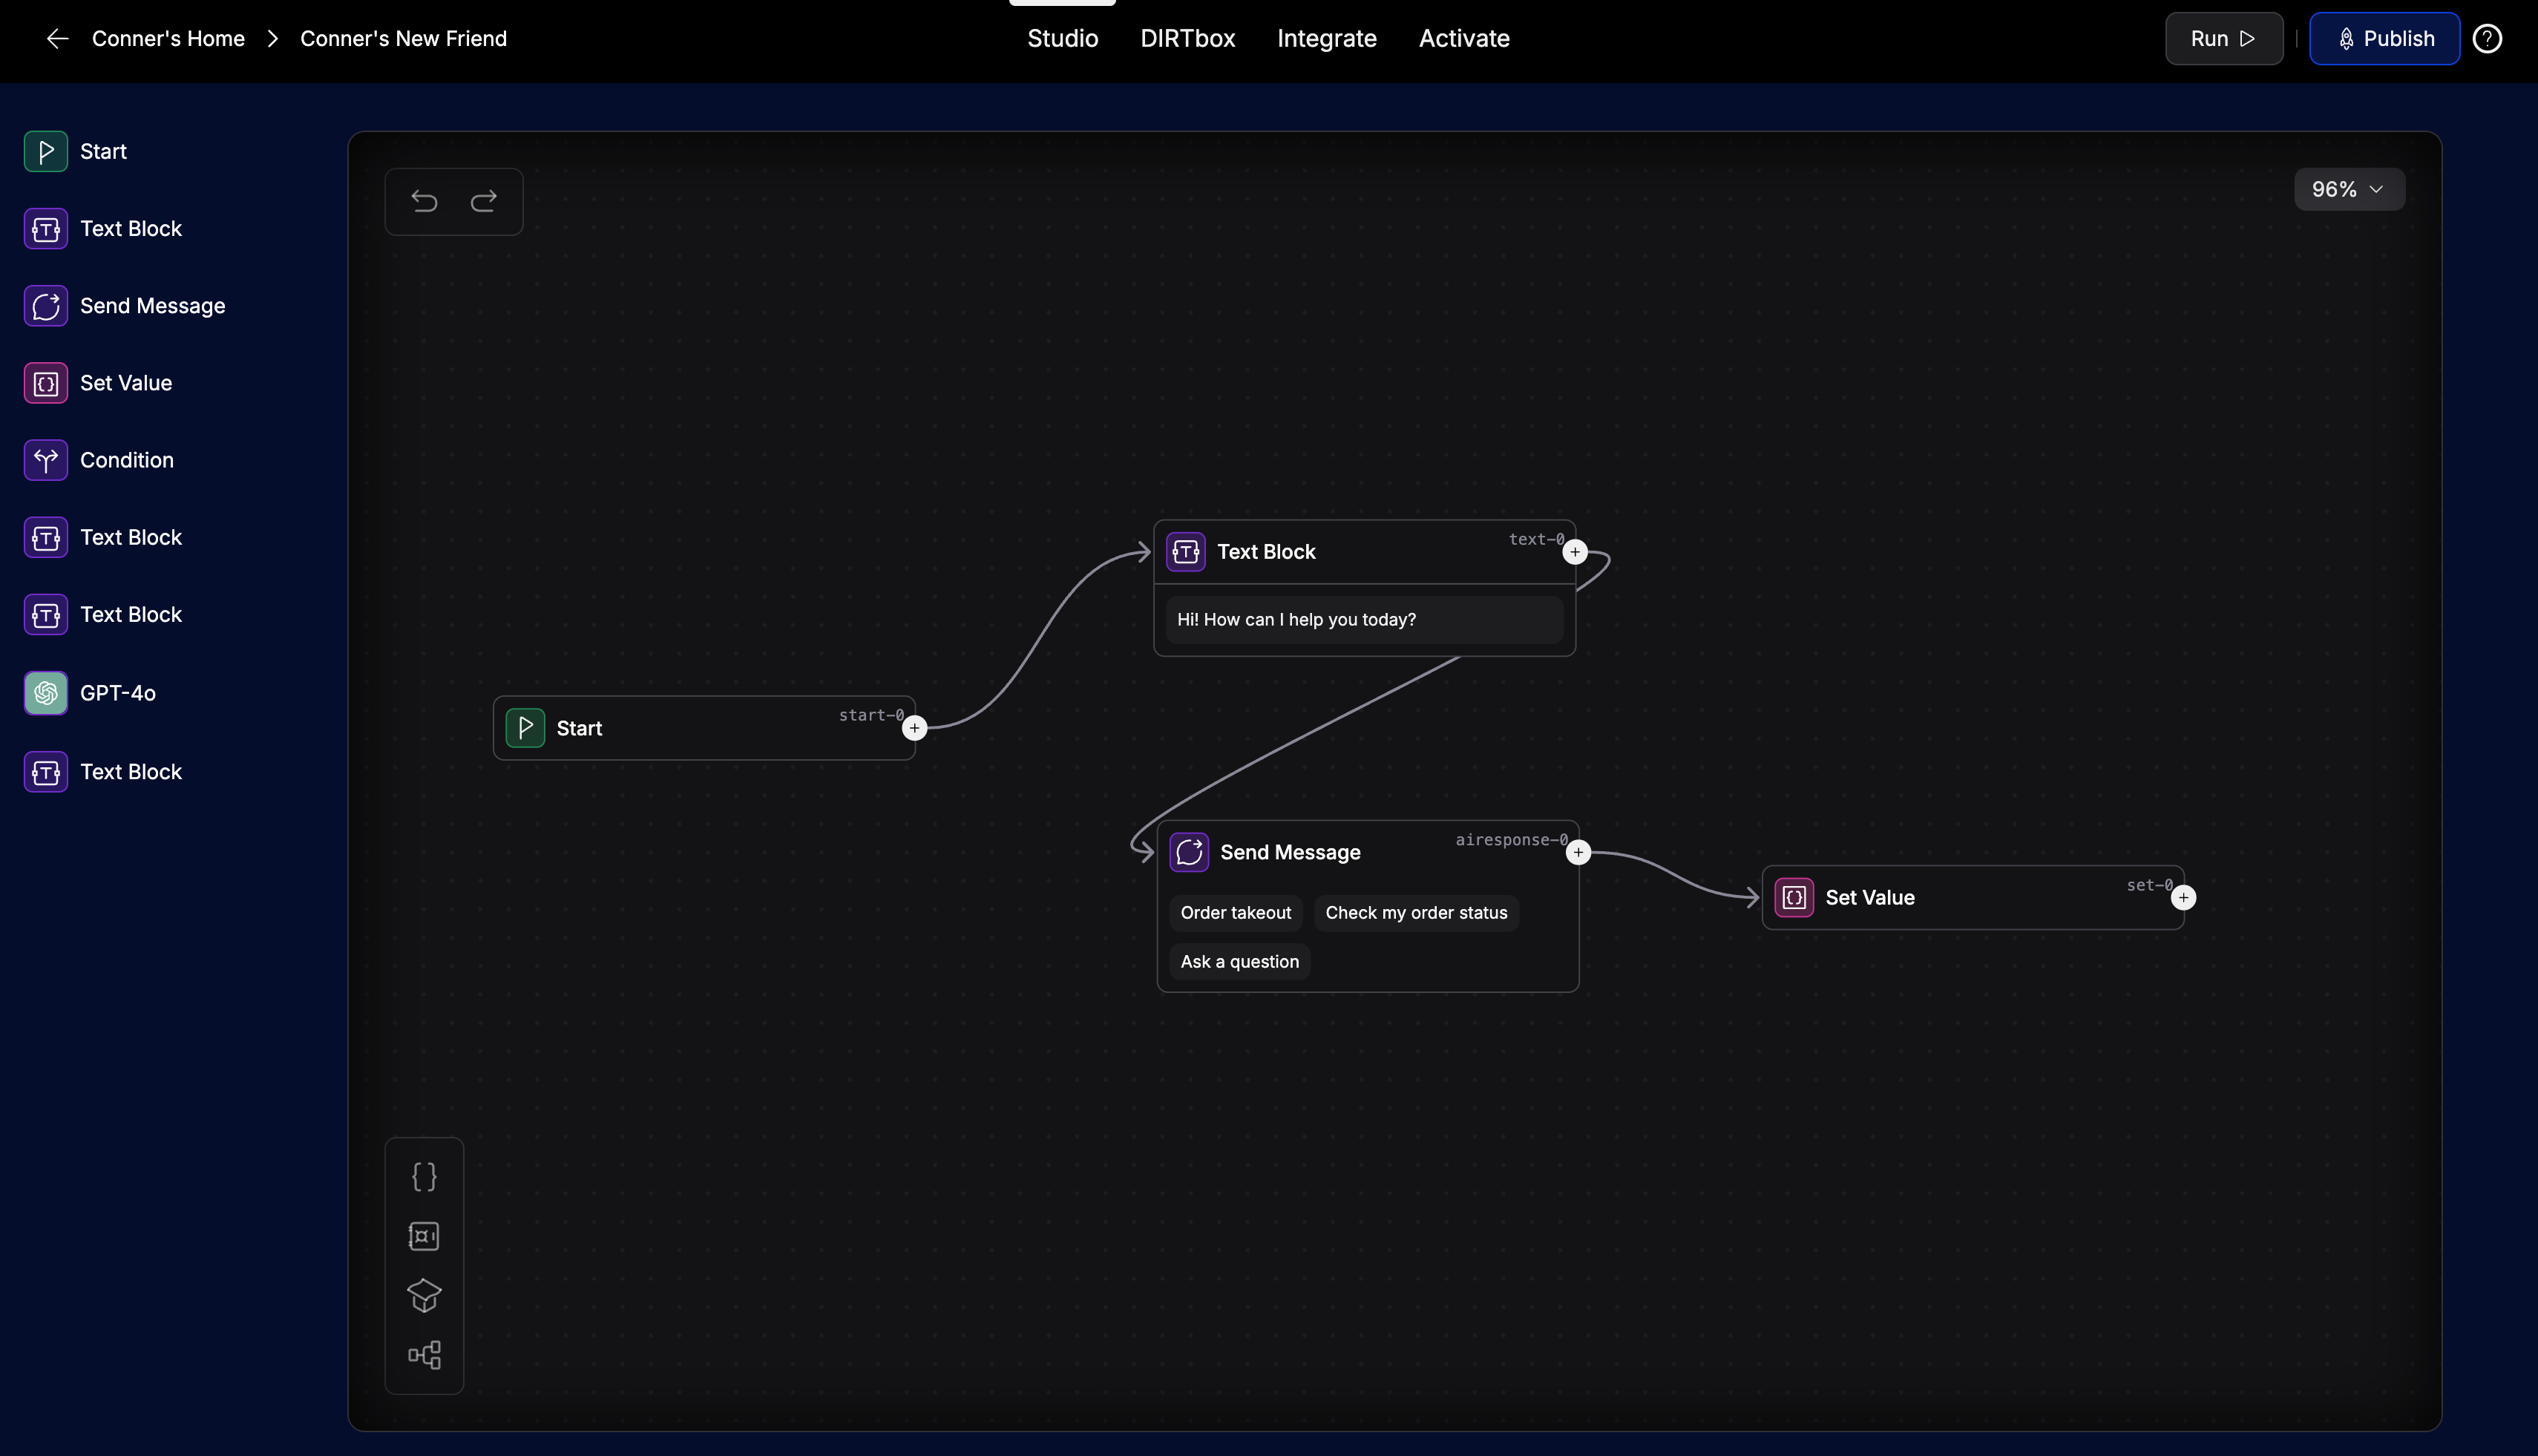
Setting Variables with the Set Value Node
To store information from the user (like their input), use the Set Value node:
- Inside the node, you can specify the variable to set and the value to set it to
- Often, you'll set the value to the output of the previous node in the flow. To do this, leave the value field blank.
A common use case of variables is in conjunction with canned responses, as seen in the example below. Canned responses are pre-written responses that users can select from, instead of typing out their own response. This allows you to set a variable one of a narrow set of pre-determined options that the user selects, which makes for easy conditional logic.
To create a canned response, simply add them in the Send Message node.
Now your flow can remember what the user said and use it later!
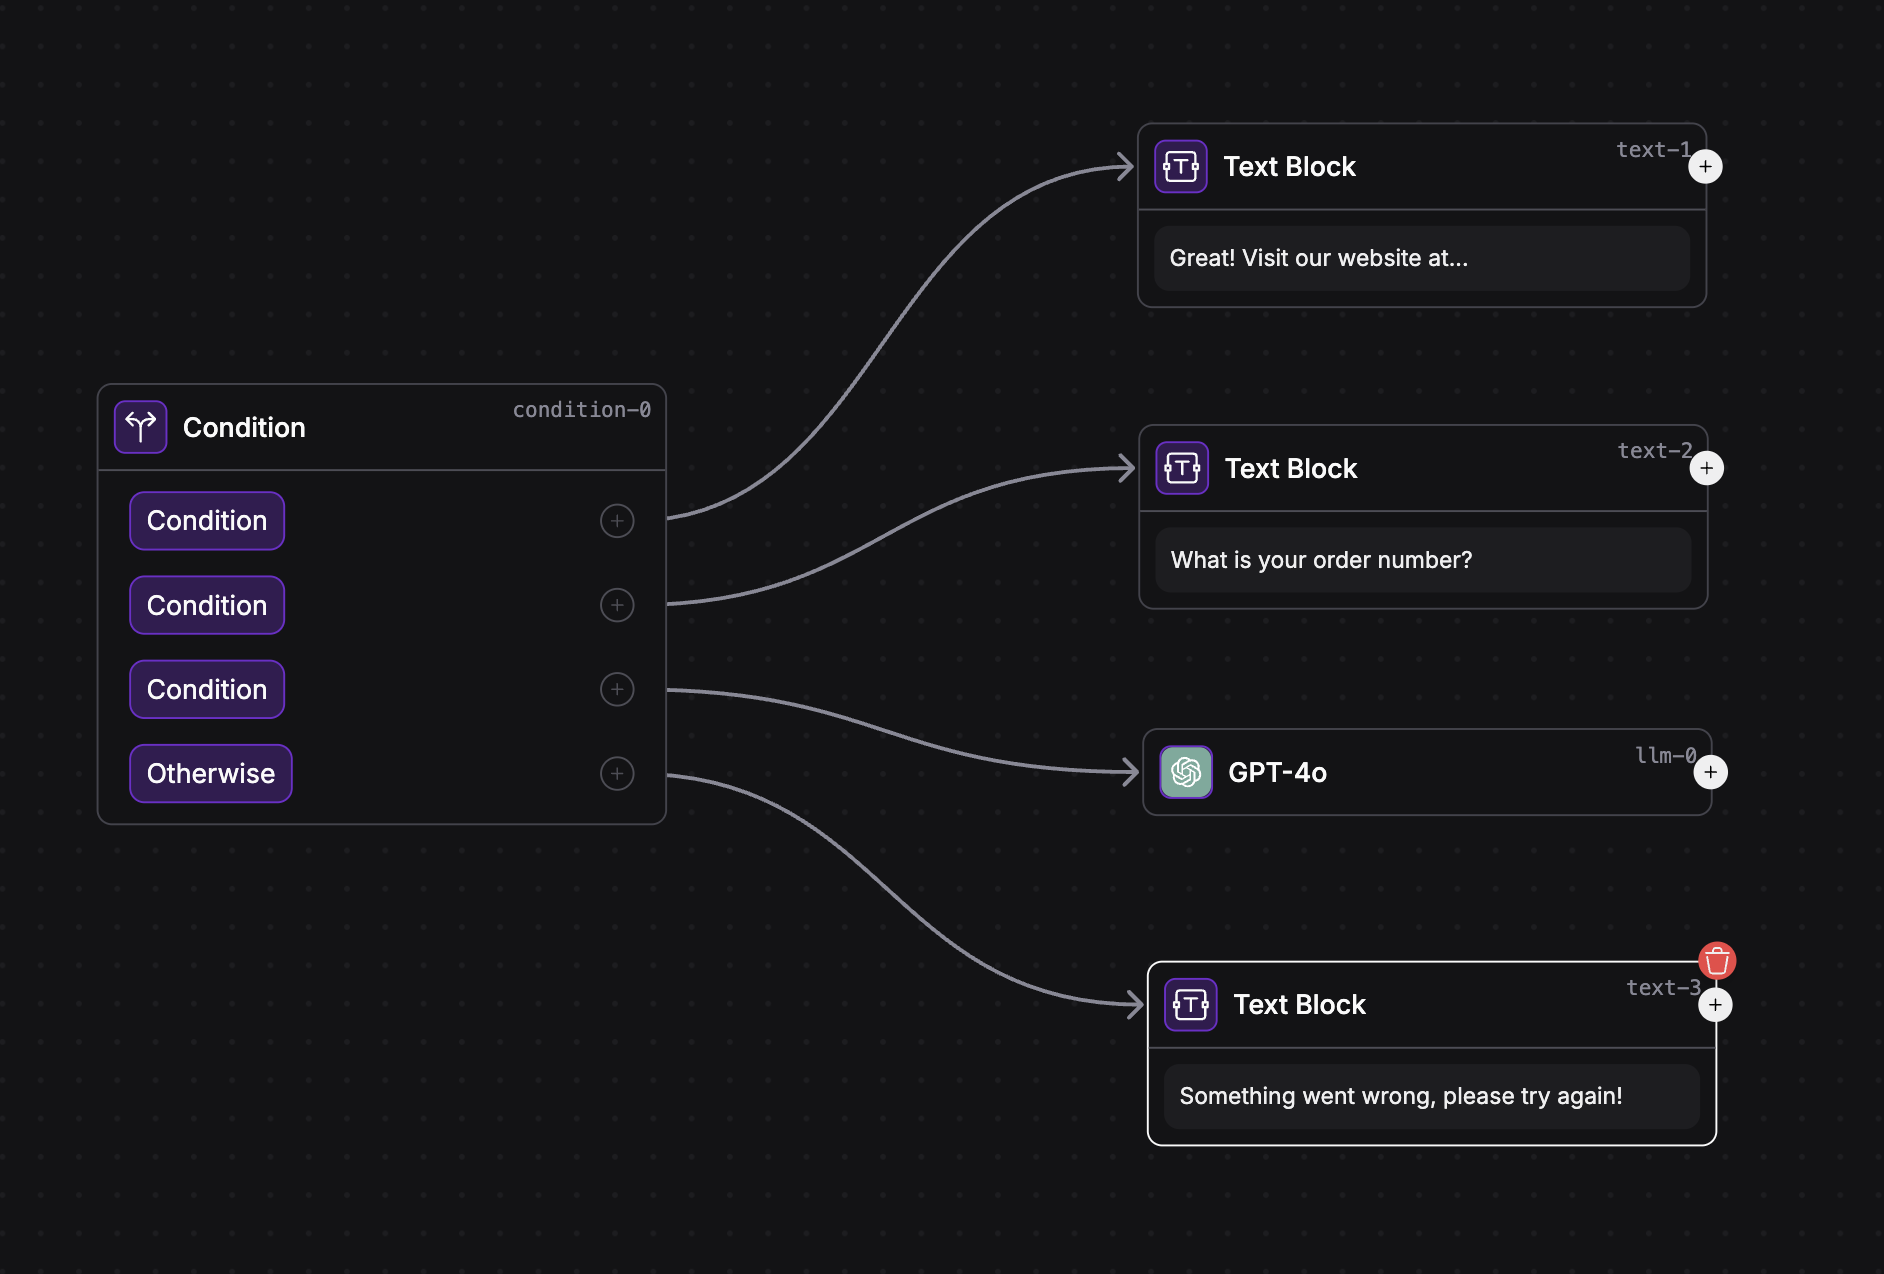
The Condition Node: Branching on Variables
The Condition node lets you create if/else logic in your flow. You can check variables to decide which path to take next.
How the Condition Node Works
- Add a Condition node to your flow
- Set up one or more conditions (e.g., if a variable equals a value)
- Each condition creates a separate output path
- There's always an "Otherwise" path for when no conditions match
Full example:
This is a full example of a flow that uses a condition node to determine the user's intent and route the conversation accordingly.
- It uses a canned response to set a variable based on the user's selection, and sets a variables called
conversation_typeto whichever canned response the user selected. - It then uses a condition node to check the value of
conversation_typeand route the conversation accordingly.
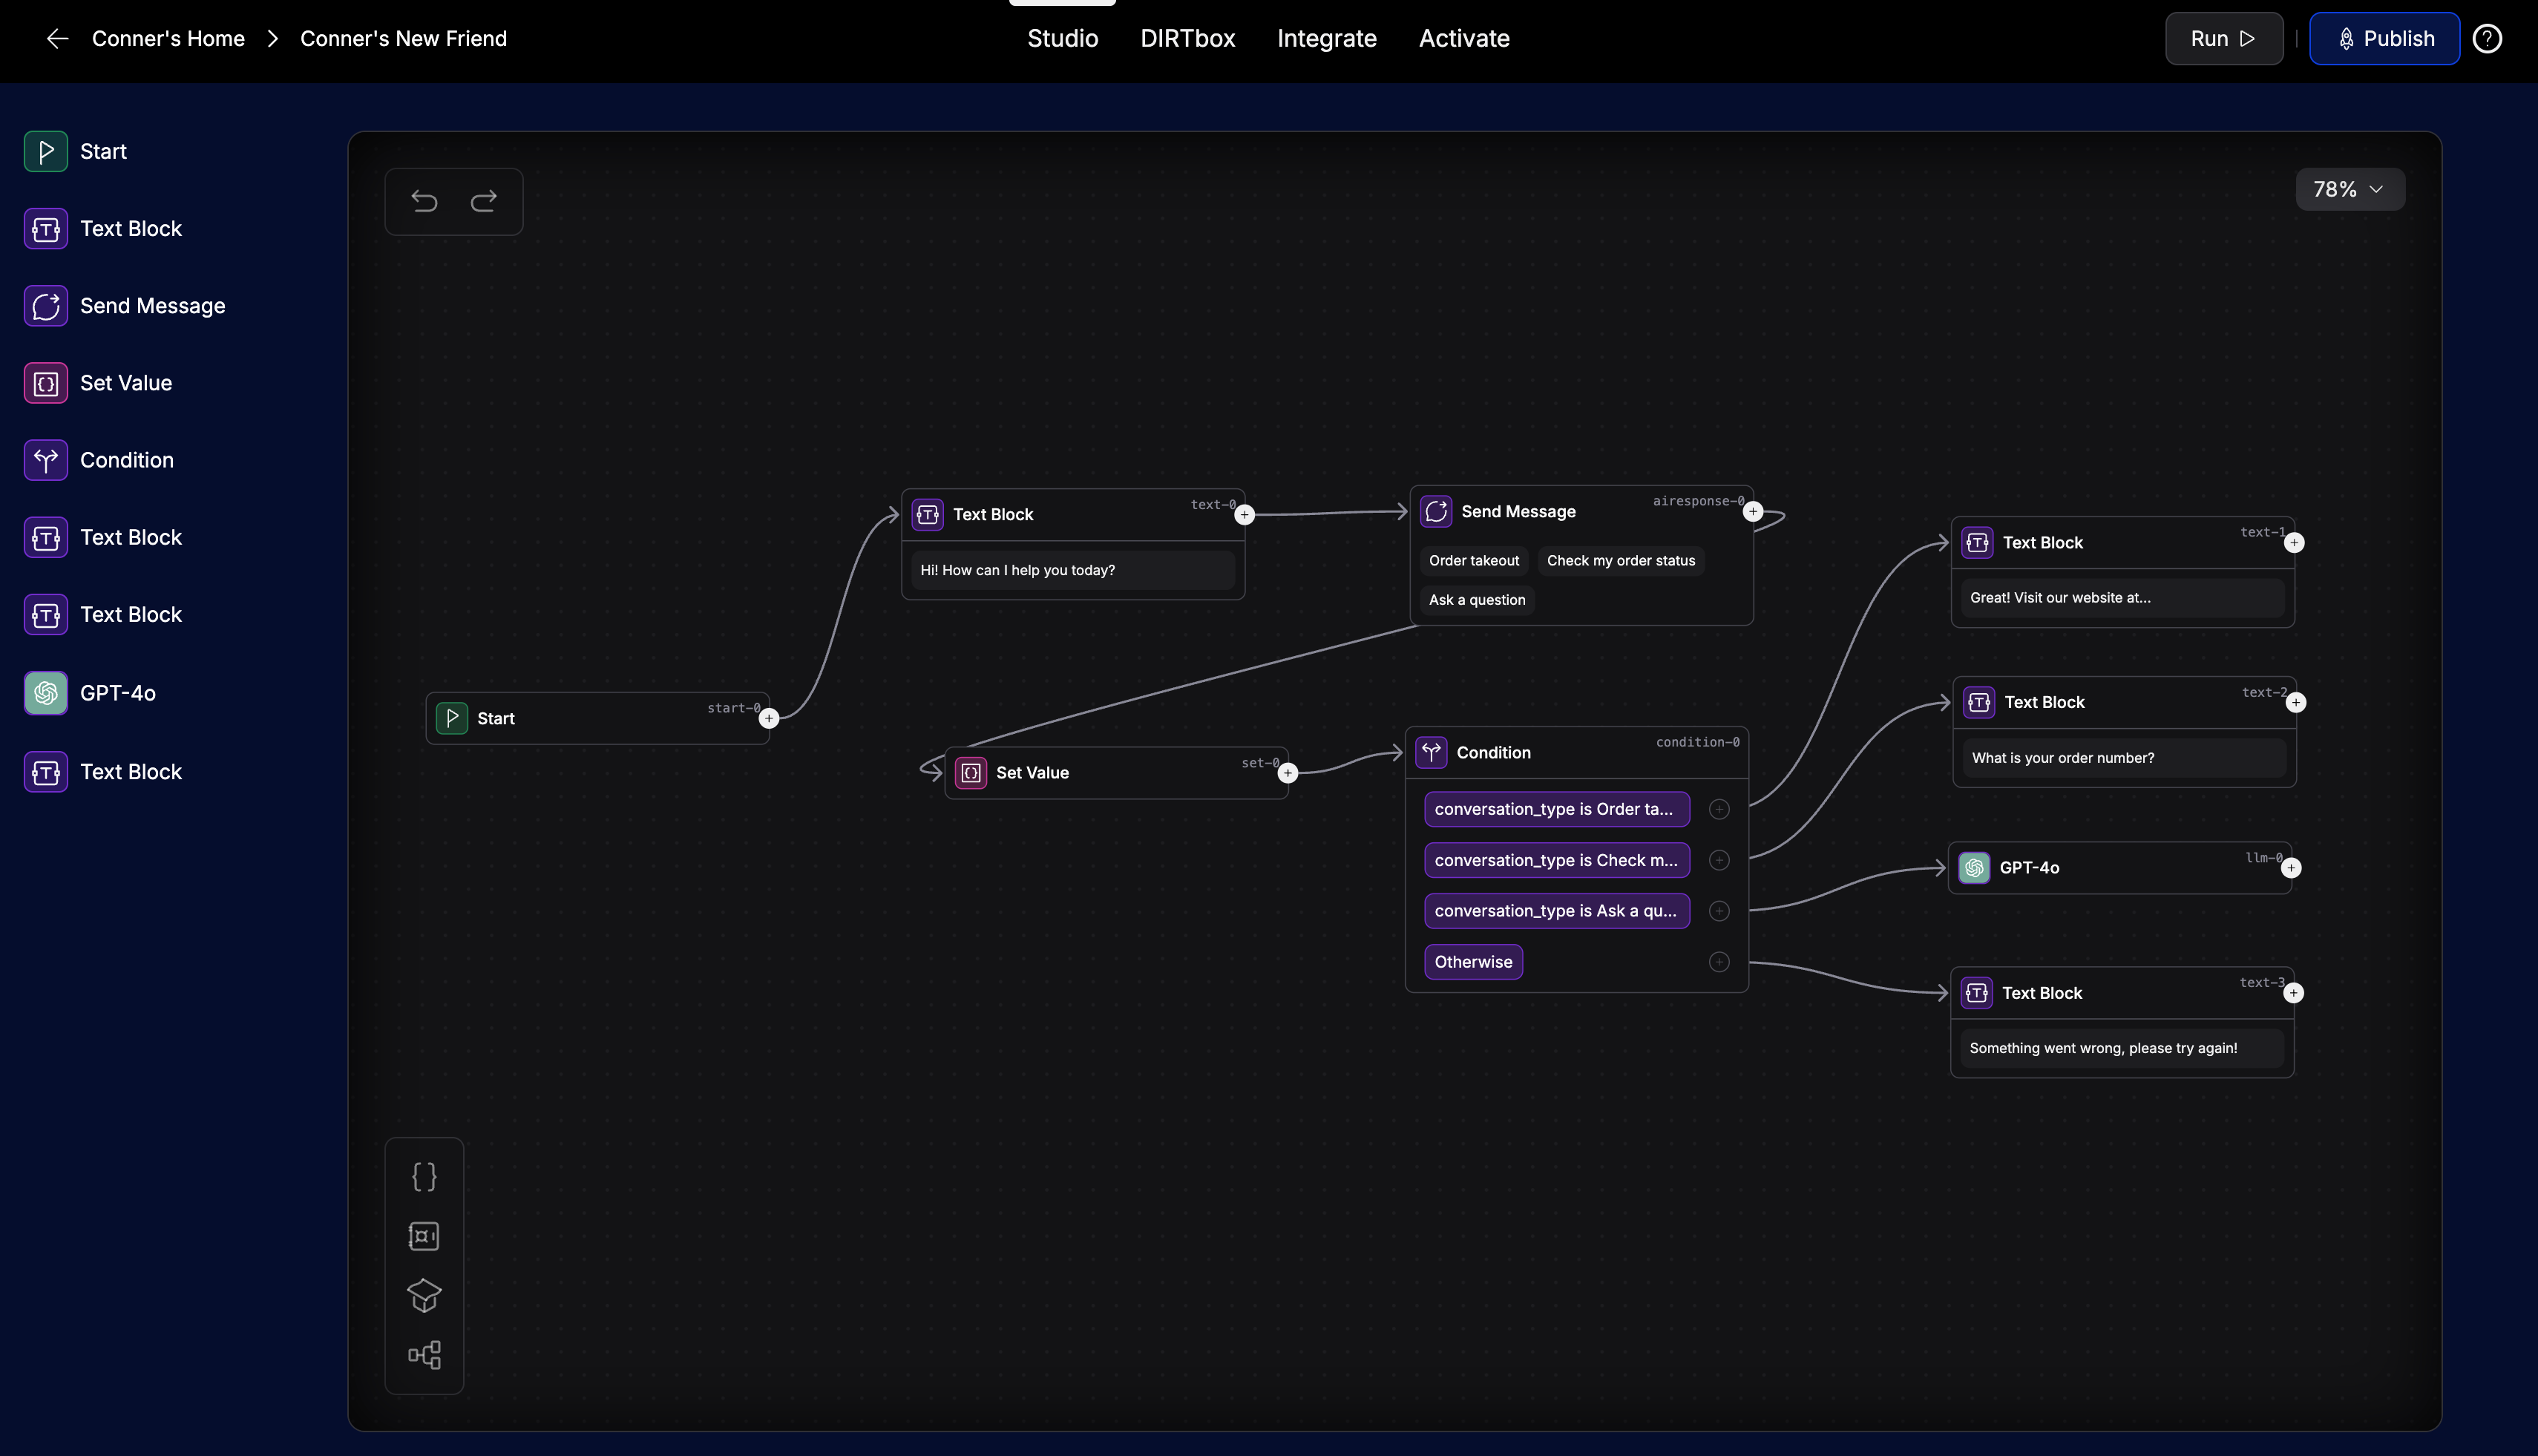
In the example above, we used canned responses and a condition node to classify the user's intent—like ordering takeout, checking order status, or asking a question. This approach works well when you want to tightly control the options a user can select, and when the number of possible paths is small and predictable. For example, branching based on a user's personal information (like age or location) is a great use case for condition nodes.
However, there are some important limitations:
- Limited Flexibility: Users can only pick from the options you provide. If they type something unexpected, your flow won't handle it.
- Not Natural: Real users often want to type their own questions or requests, not just pick from buttons.
For more natural, open-ended conversations—where users can type anything, and you want your assistant to understand and route their intent automatically—use the Intent Classify node. This leverages AI to classify user input into intents you define, making your assistant much more flexible and scalable.
The above example is a great use case for intent classify.
The Intent Classify Node
The Intent Classify node uses AI to figure out what the user wants ("intent") and route the conversation accordingly. This is great for assistants that handle multiple tasks or topics.
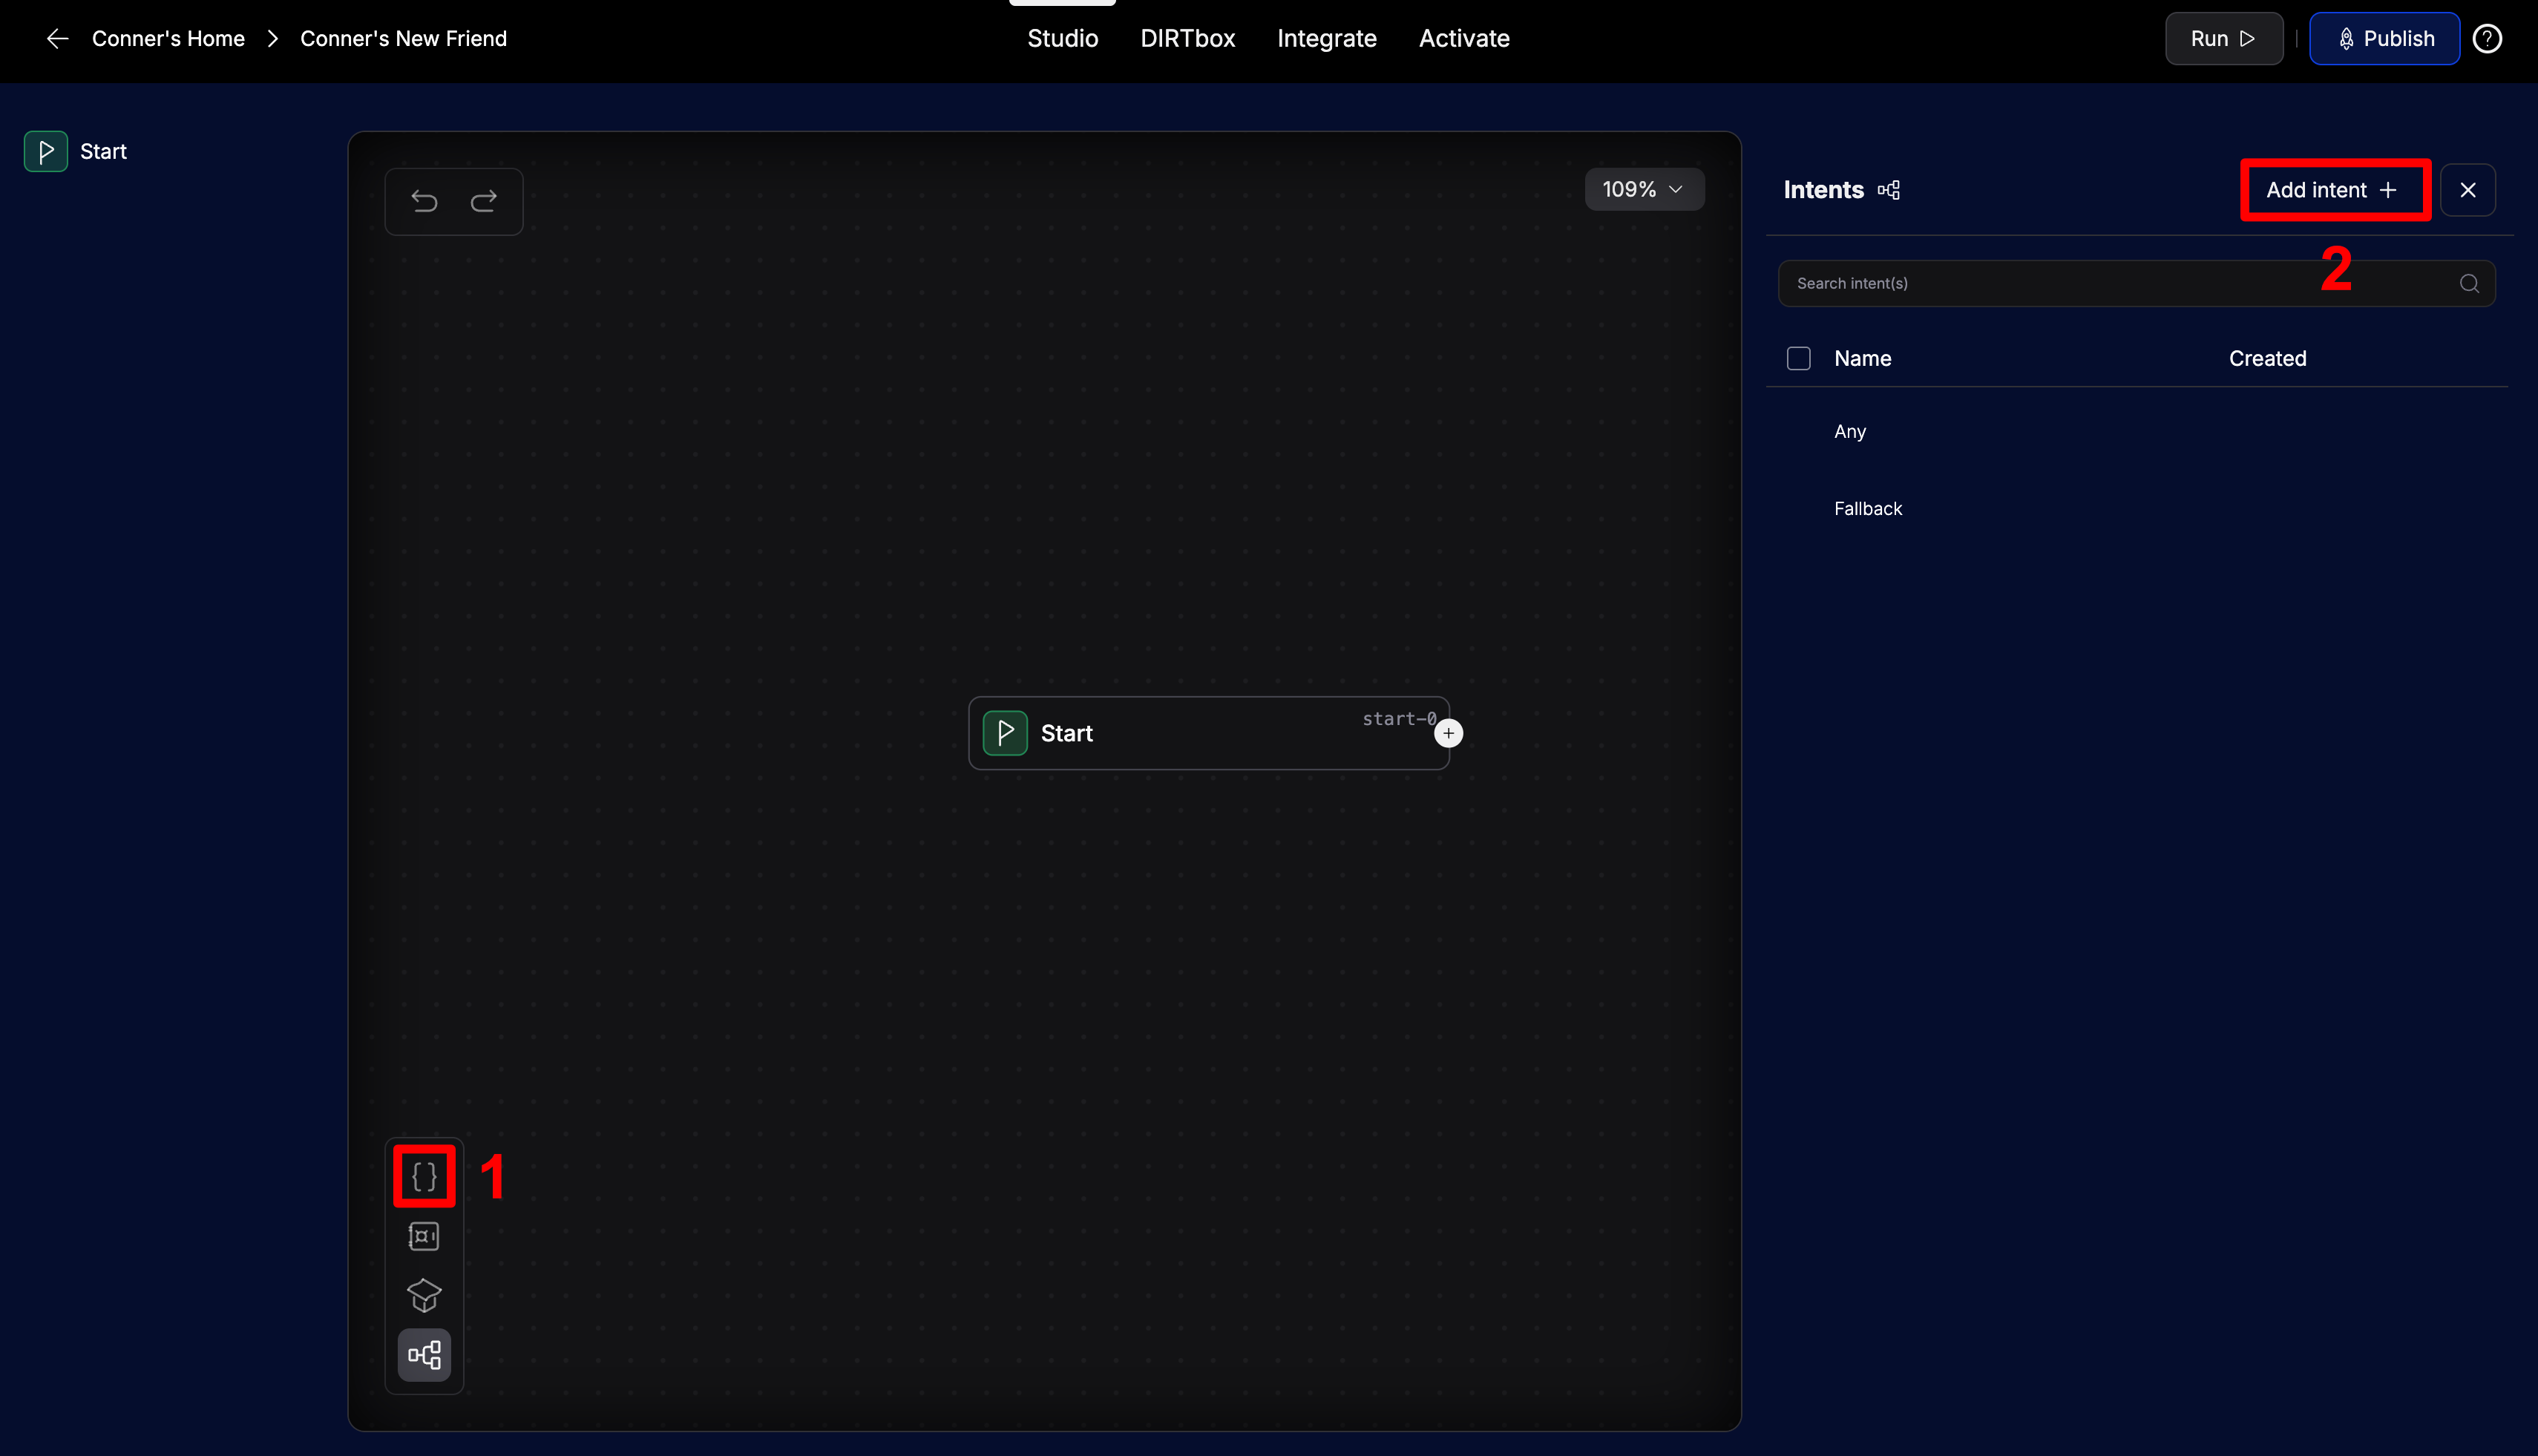
The Intents Tab
- Click the Intents tab in Sequence Studio
- Add new intents (give each a name and example phrases)
- The more examples you provide, the better the AI can classify
- Example phrases: "Order Pizza", "Get Support", "Check Order Status"
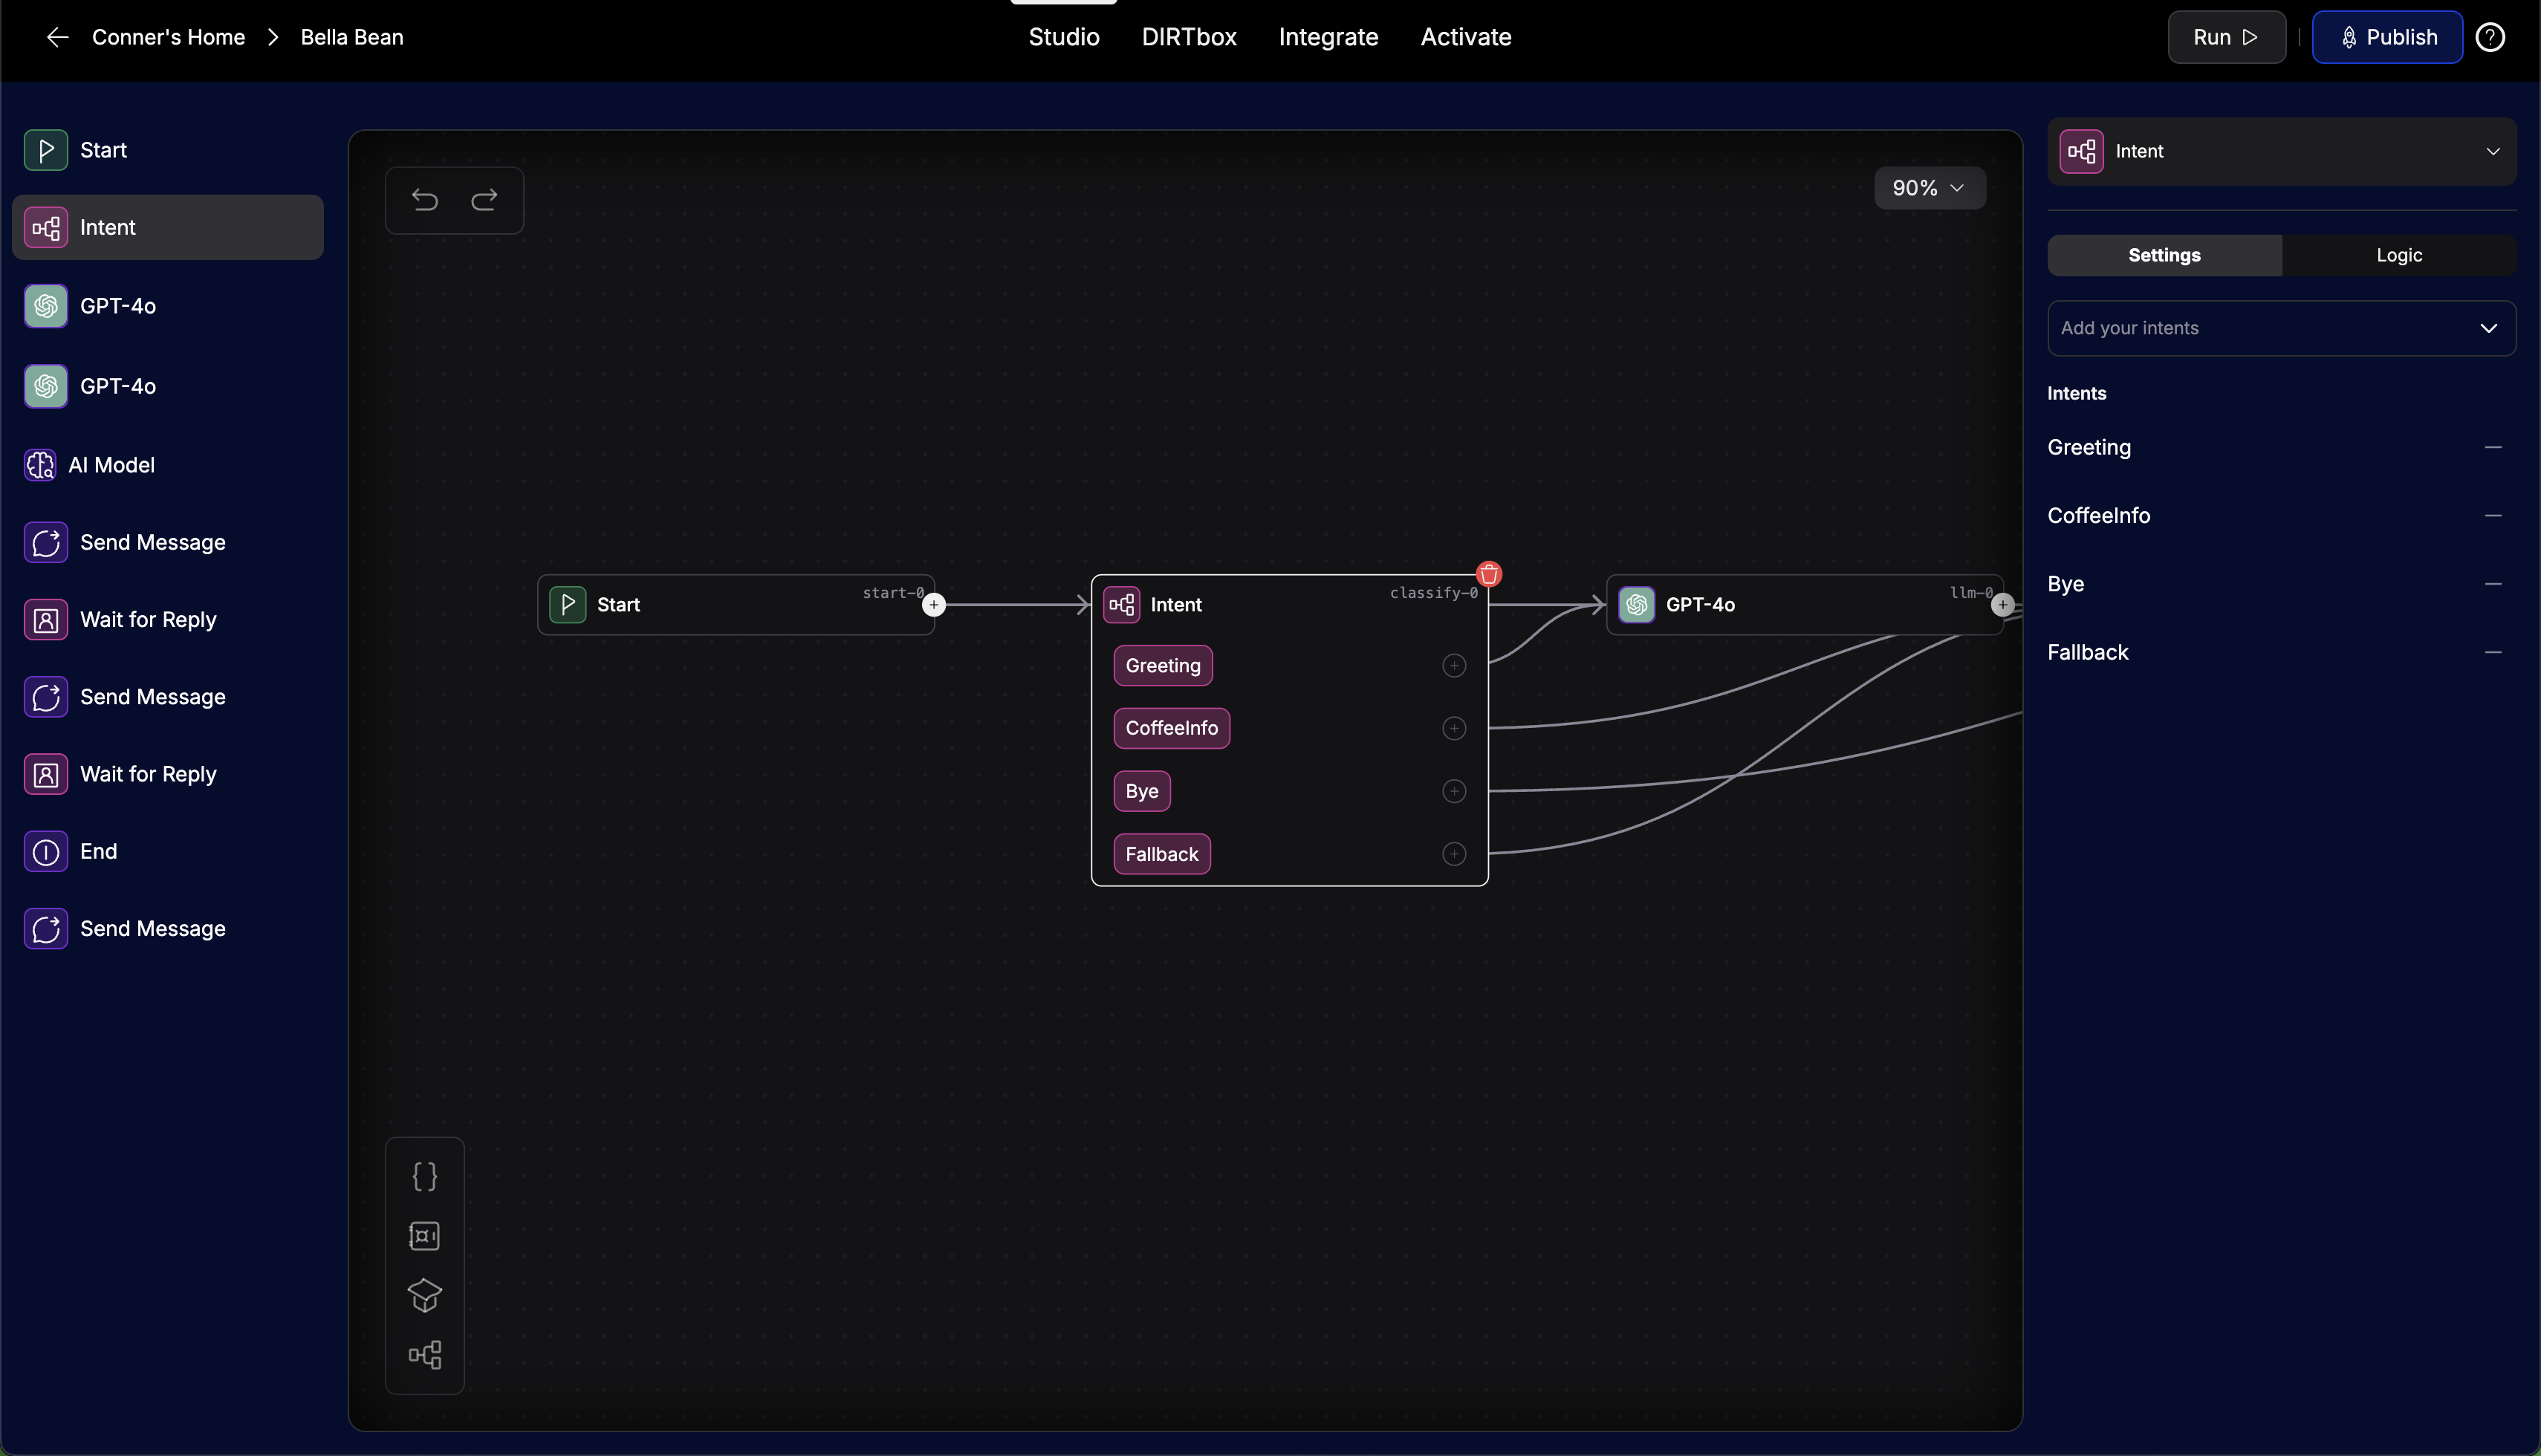
How the Intent Classify Node Works
- Add an Intent Classify node to your flow
- Each output path corresponds to an intent (e.g., "Greeting", "CoffeeInfo", "Bye")
- The node uses an LLM to classify the user's message into one of your defined intents
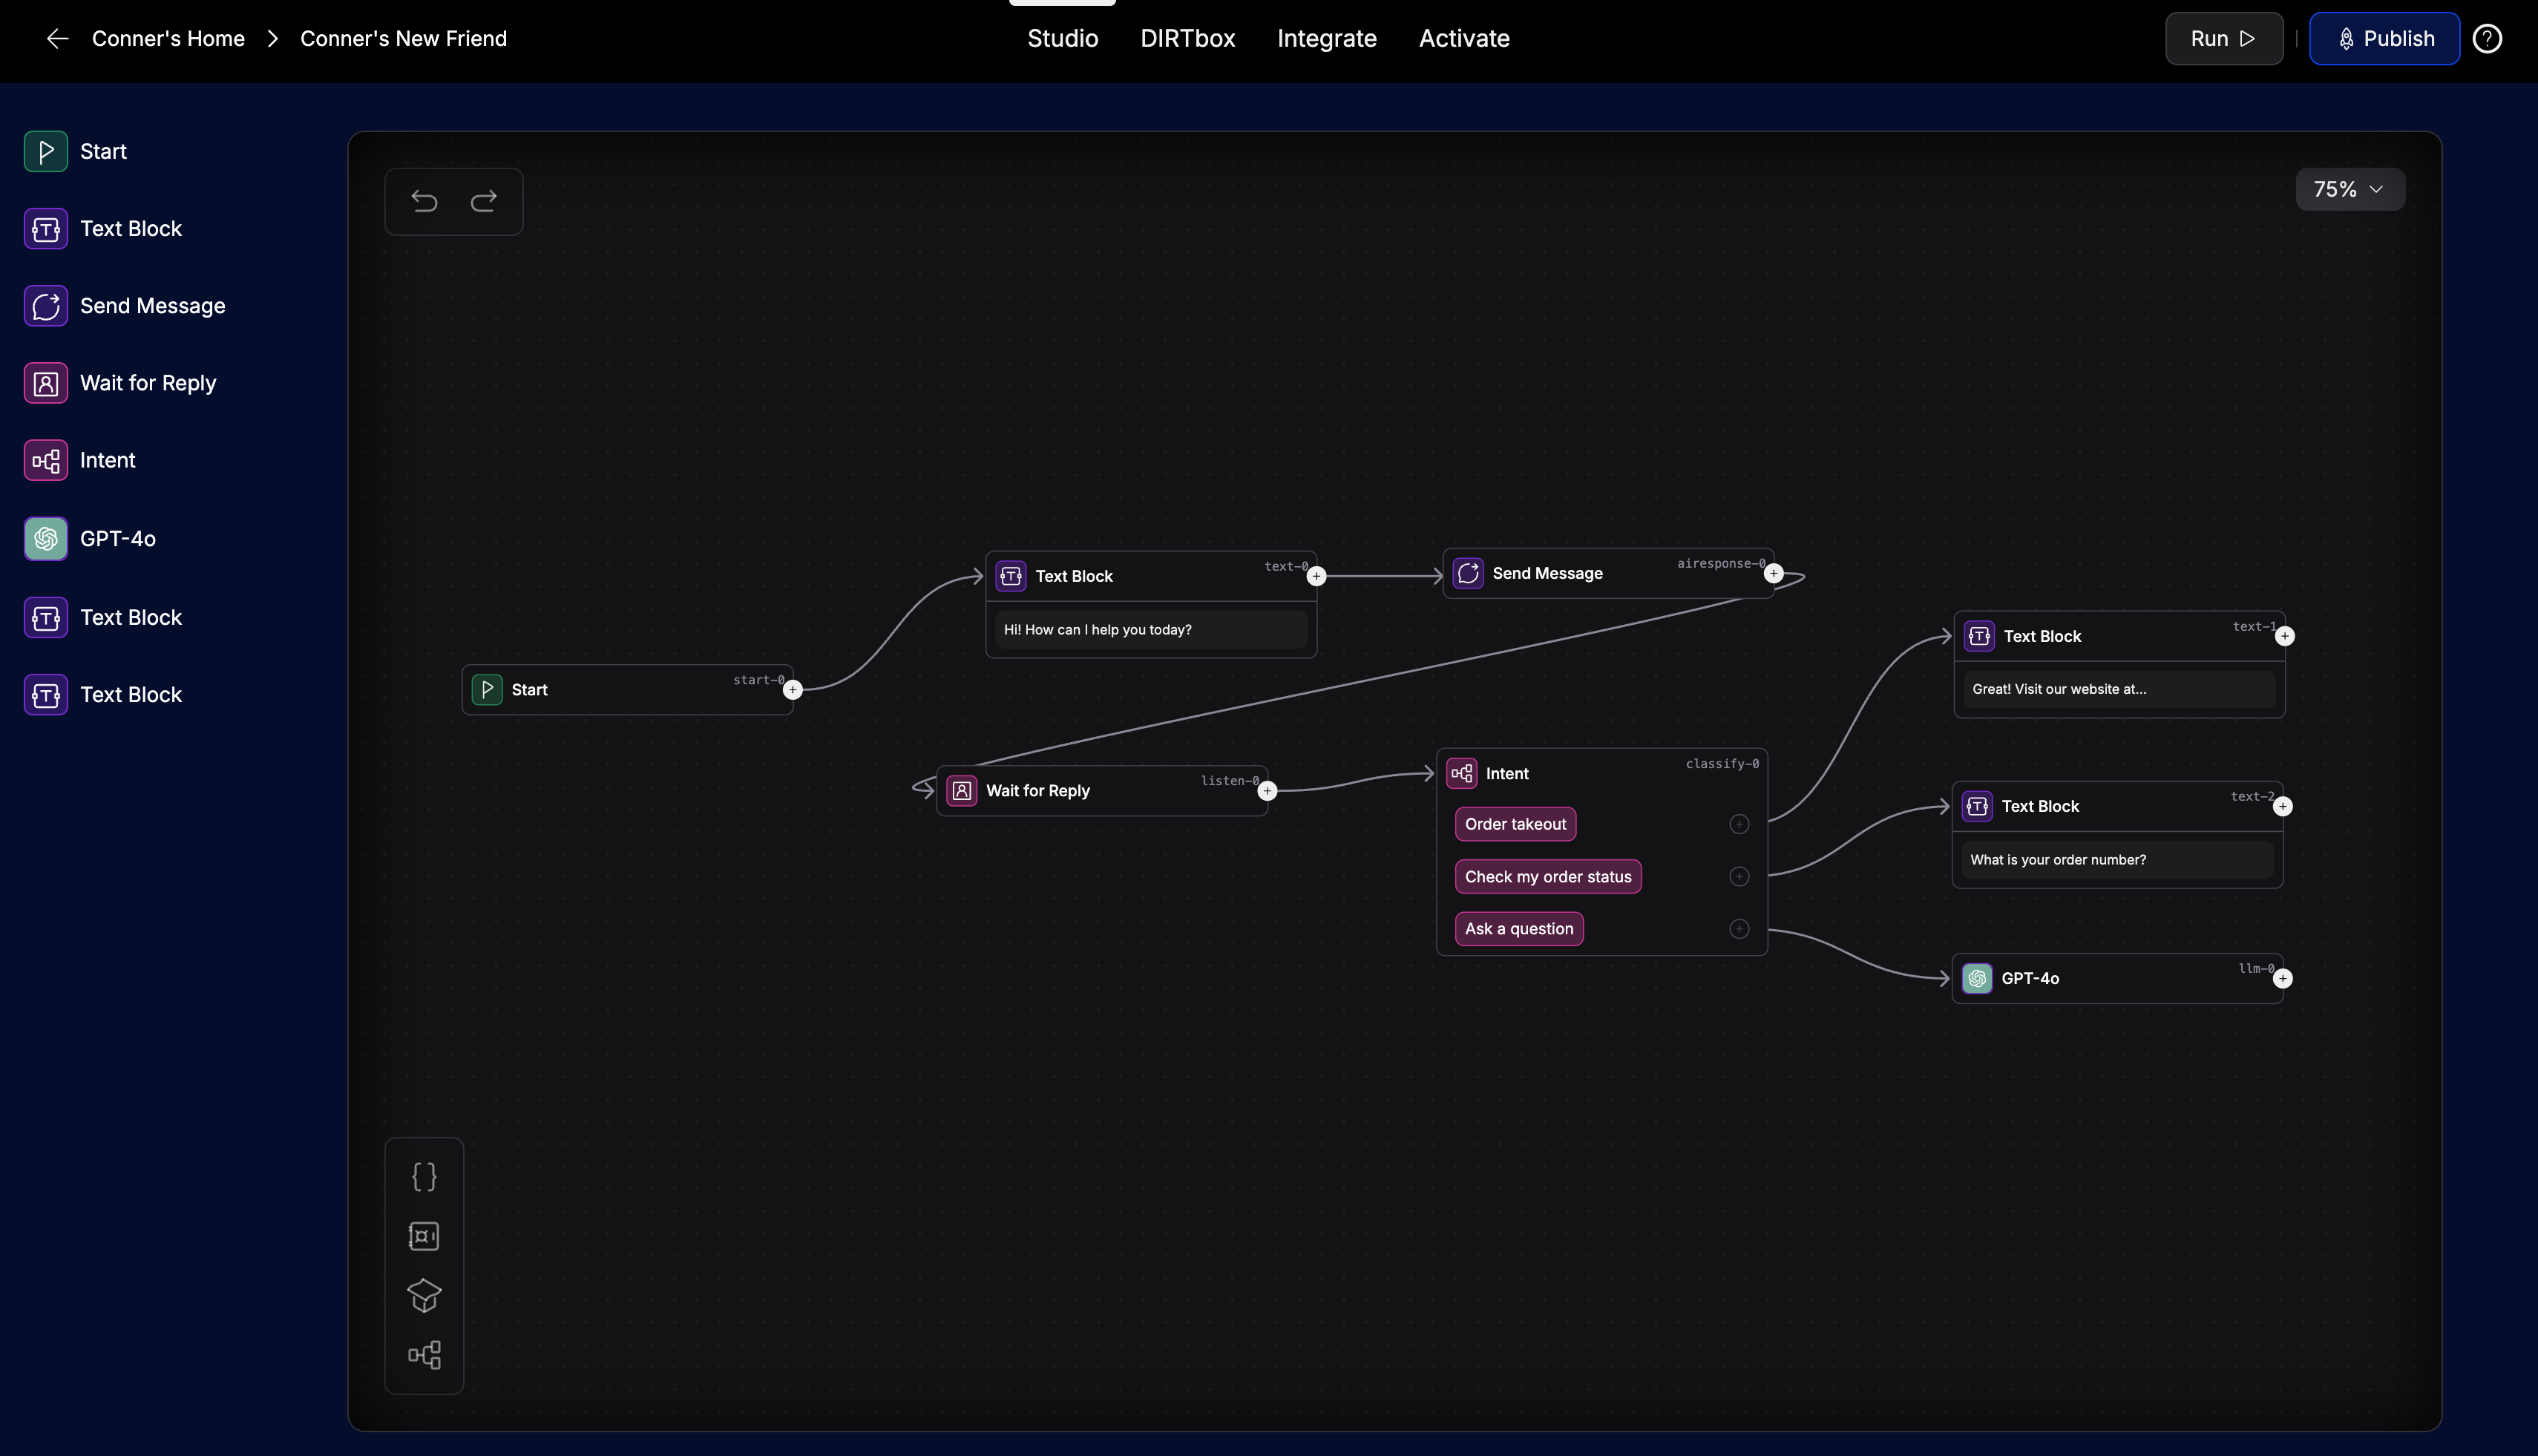
Example: Routing by Intent
Let's do the same example as before, but use intent classify instead of condition nodes.
- This time, in place of the
conversation_typevariable, we create three intents:- Order takeout
- Check order status
- Ask a question
- We then use a Wait for Reply node in place of canned responses, so the user can type their own question.
- Finally, we use an intent classify node to classify the user's message into one of our intents and route the conversation accordingly.
Tips for Smart Logic
- Use clear, descriptive names for variables and intents
- Add plenty of example phrases to each intent
- Test your branches with different user inputs
- Use the DIRTBox to see which path is taken
- Start simple, then add more branches as needed
With conditions and intents, you can build assistants that feel truly intelligent and responsive to your users.