Design Flows in Sequence Studio
To build an assistant, you need to design a conversation flow.
Conversation Flow outlines how the conversation progresses from one point to another, typically organized in a tree-like structure with nodes representing different states or steps in the conversation.
Main elements in conversation flow
- Nodes
- Connections
1. Nodes
Nodes represent individual states or steps within the conversation. Each node typically corresponds to a specific action, prompt or response.
2. Connections
Connections specify the pathways through which the conversation advances, allowing for branching, looping or other forms of interaction.
Now that you've already created a BotStack and added your data to the Brain Vault, let's build a simple assistant using the nodes and connections.
For now, we will only focus on four nodes:
- Start
- AI Model
- Send Message
- Wait for Reply
1. Start
The start node represents the beginning of the conversation. It is triggered by a mention or the initial message in a DM. The input provided to start the conversation is immediately passed to all the start node's outputs.
2. AI Model
The AI Model node utilizes the Large Language Model of your choice, such as OpenAI Chat-GPT, Anthropic Claude, or Google Gemini to handle conversational dialogue.
3. Send Message
The Send Message node takes input from the other nodes in the workflow and sends it to the user in the chat.
4. Wait for Reply
The Wait for Reply node waits for user input within the chat. Once a message is received, it is immediately passed onto all the Wait for Reply node's outputs.
Now, let's build a simple assistant.
Building Your First Assistant
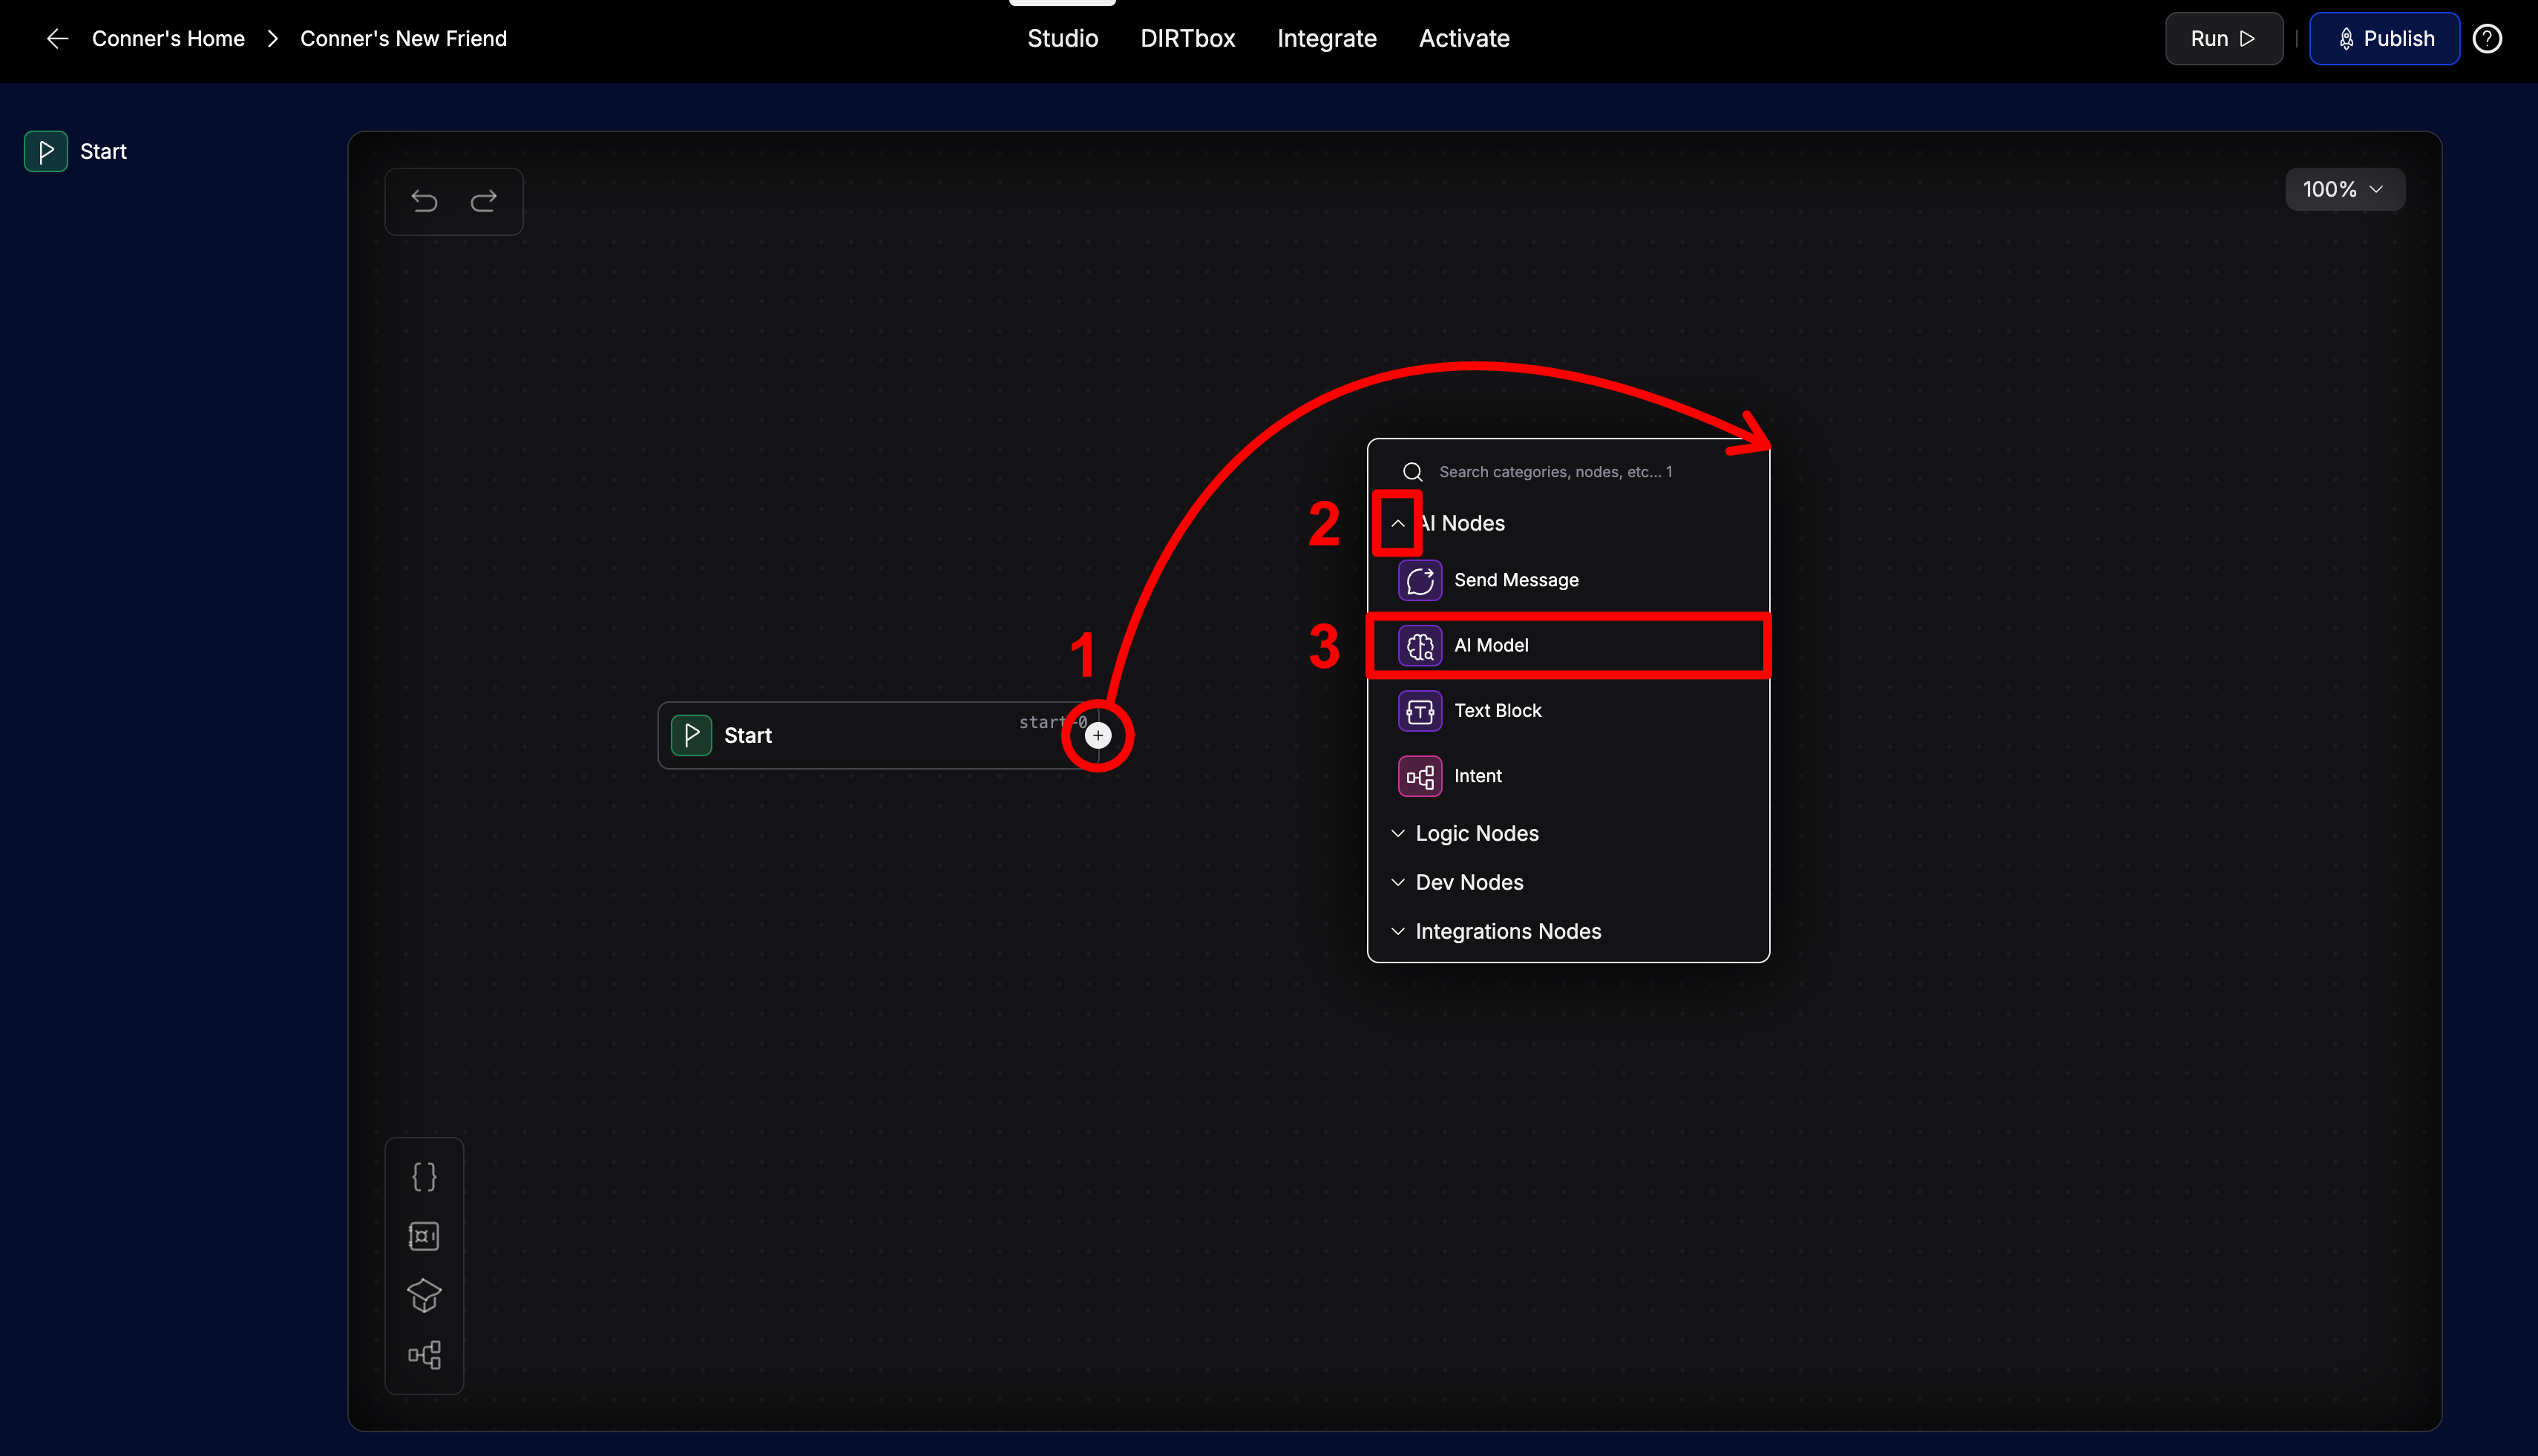
- Add an AI Node: Click and drag the + button to any location, then choose AI Model from the dropdown menu.
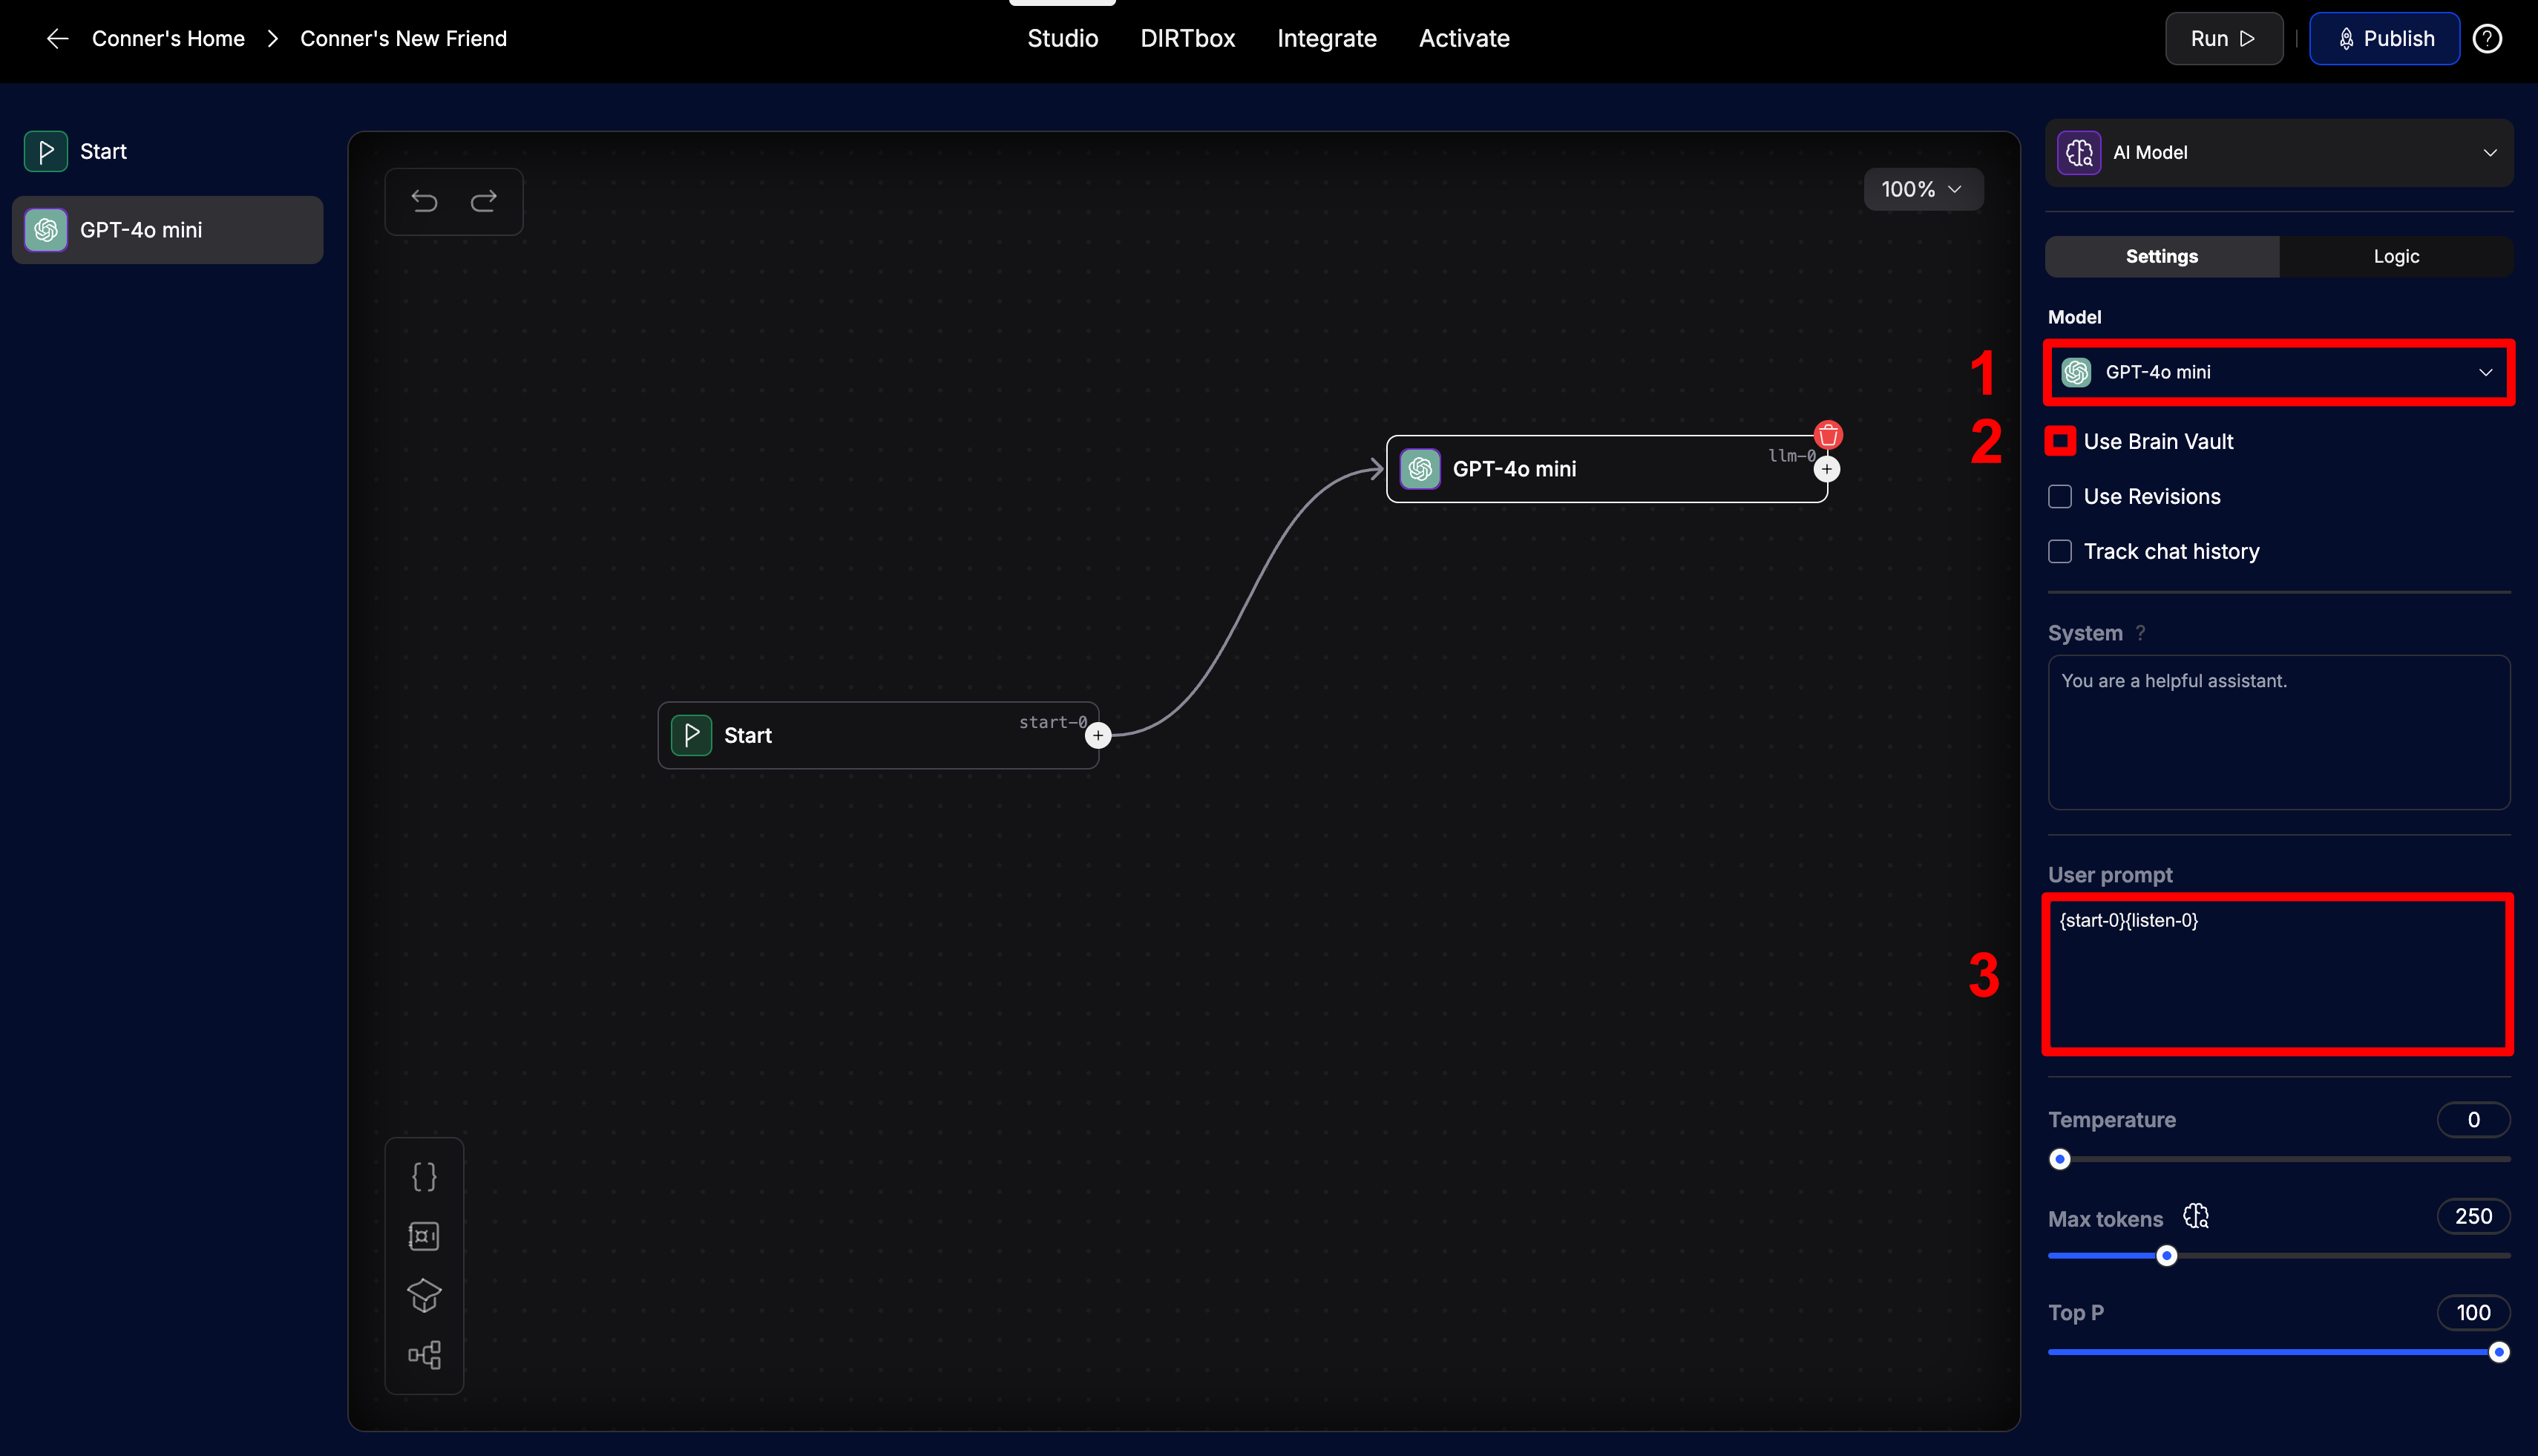
- Choose a Model: Select the language model you want your assistant to use. Let's choose GPT-4o mini for this example. Check the Brain Vault box so the assistant can use the data you just uploaded. Then, write {start-0} and {listen-0} in the user prompt field. These are the behind-the-scenes names of the Start and Wait for Reply nodes (visible in the top-right corner of the node), and inserts their outputs (the user's message) into the LLM's prompt so it can respond.
- Complete the Assistant: Continue by creating Send Message and Wait for Reply nodes. Then, click and drag from the + button to the AI Model node to complete a loop.
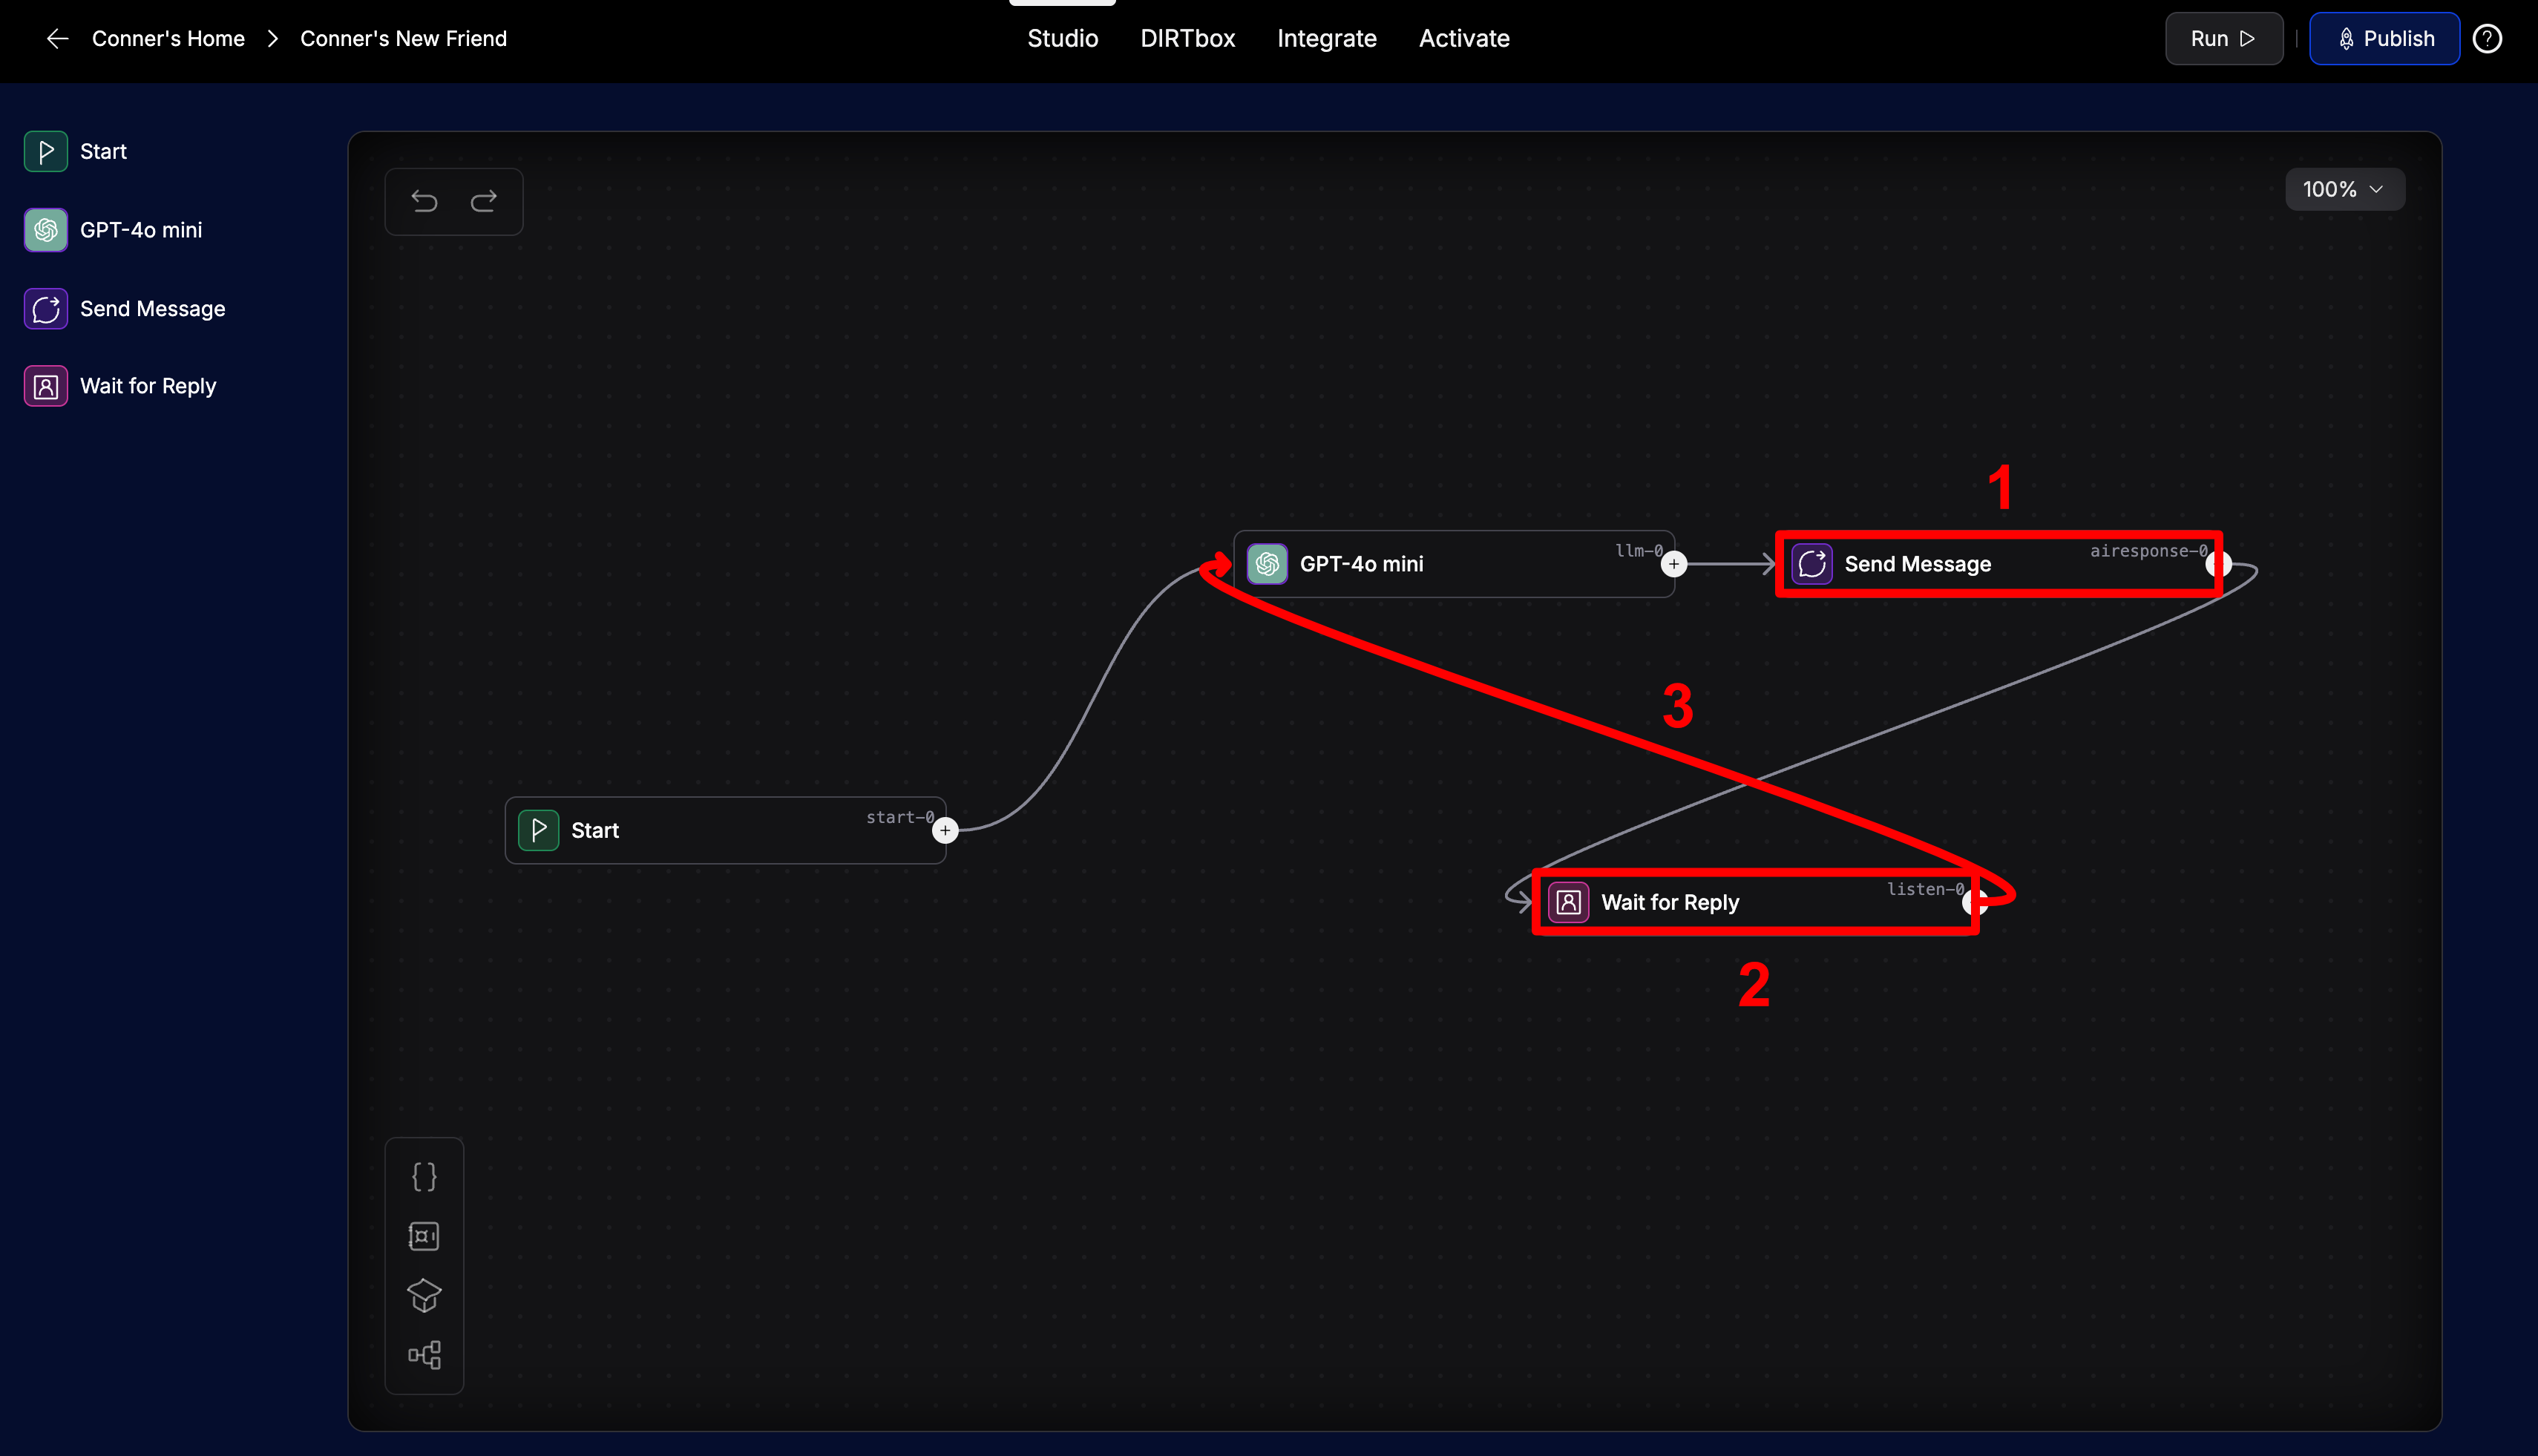
The conversation flow begins with the Start Node, then transitions to the AI Model Node, followed by the Send Message Node, and finally, moves to the Wait for Reply Node.
By connecting the Wait for Reply Node to the AI Model Node, it forms a loop, ensuring that the assistant won't end the conversation but rather continue the flow indefinitely.
Now you can proceed to the next chapter, which covers how to test the assistant you just built.