Create and Manage Workspaces
Workspaces in BotStacks provide dedicated environments for managing and developing Bot Stacks, facilitating collaboration among team members, and organizing resources effectively within your organization.
This guide outlines the steps to create and manage workspaces efficiently.
Creating a Workspace
In your dashboard, click on your workspace name on the left sidebar to open the dropdown menu. From the dropdown, click the ‘Create New Workspace’ option.
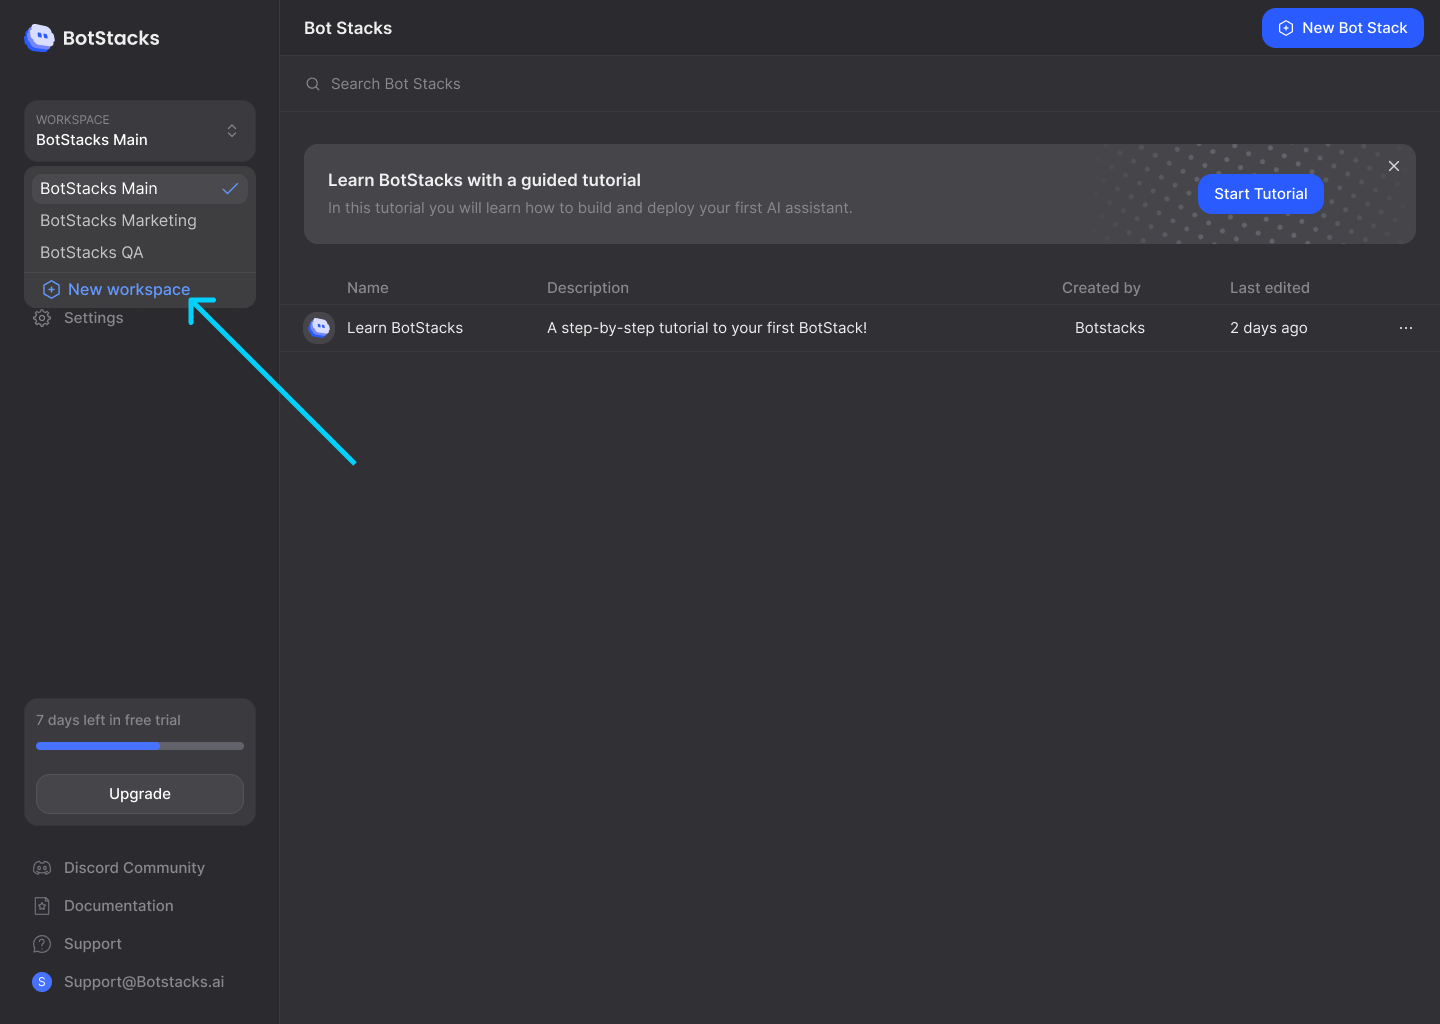
When you create a Workspace, a window will pop up asking you to enter a name for your workspace. You can change this name later without affecting your workspace in any way, it’s just for your reference on the dashboard.
Managing the Workspaces
Switch between workspaces
To switch between different workspaces, simply click on the desired workspace name located on the left sidebar of the dashboard.
Inviting Team Members
To invite team members, navigate to the “Team” menu within the workspace settings.
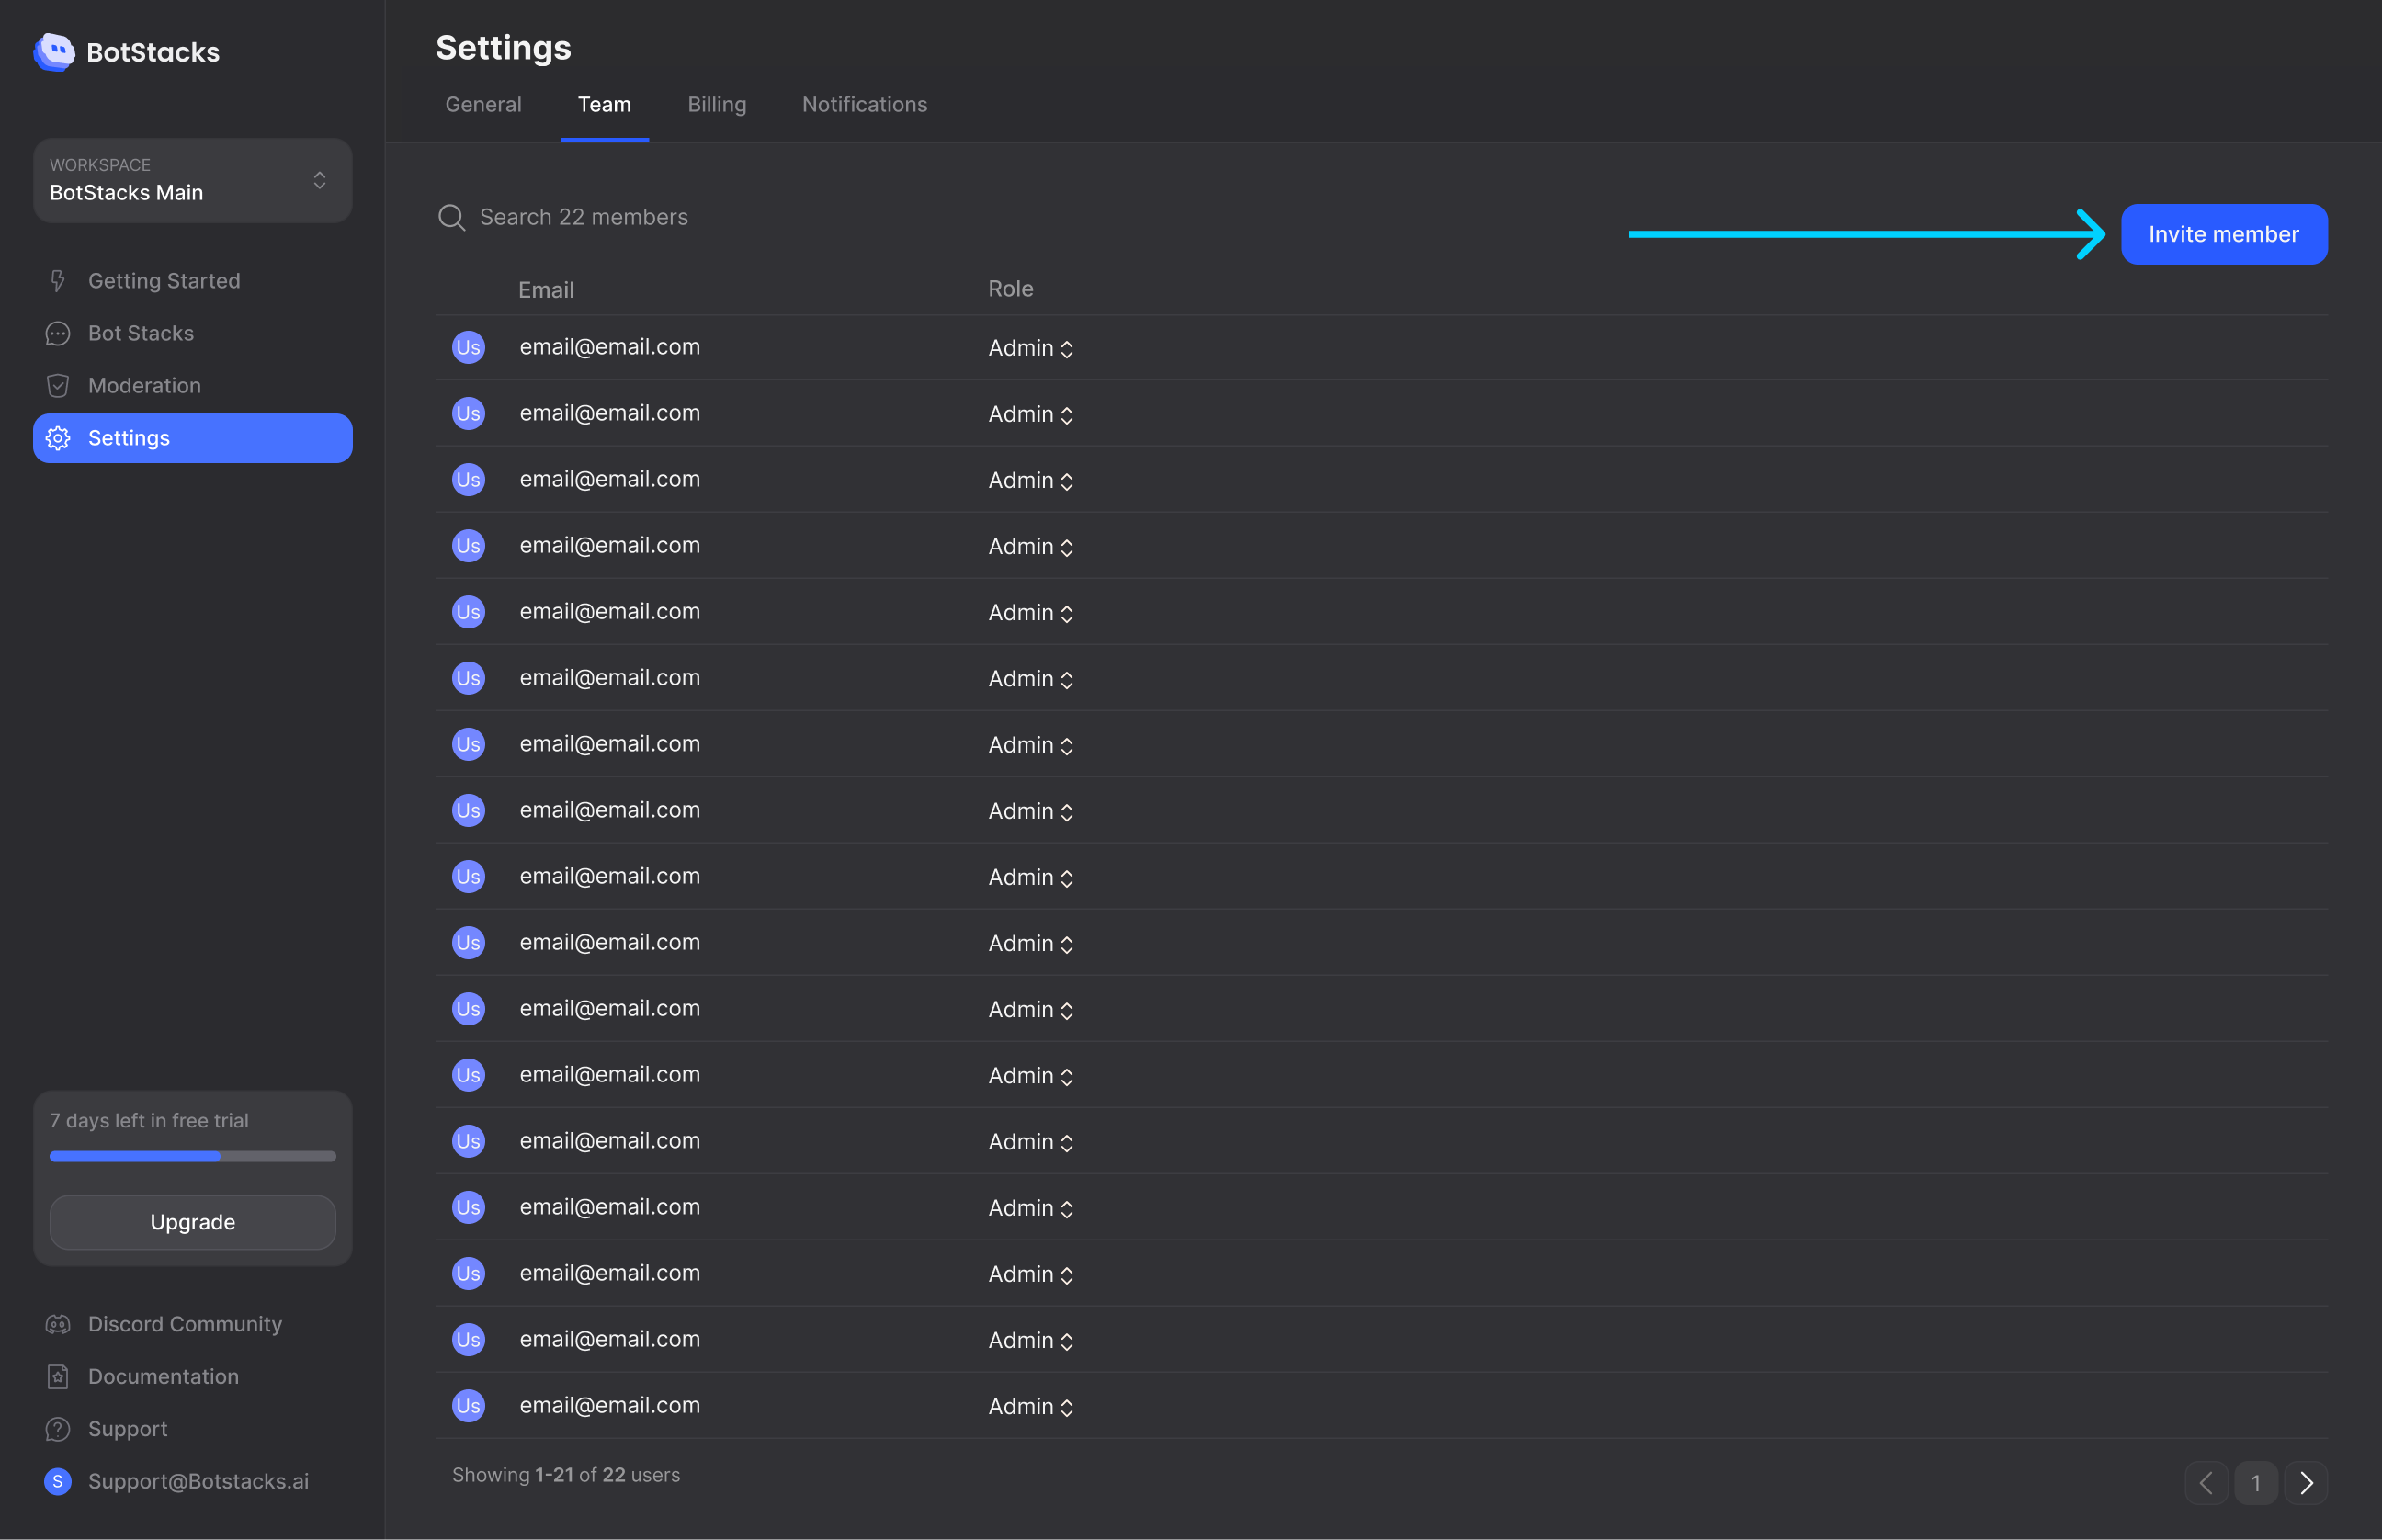
Managing Access Permissions
To adjust team member permissions, access the “Team” menu and make the necessary changes.

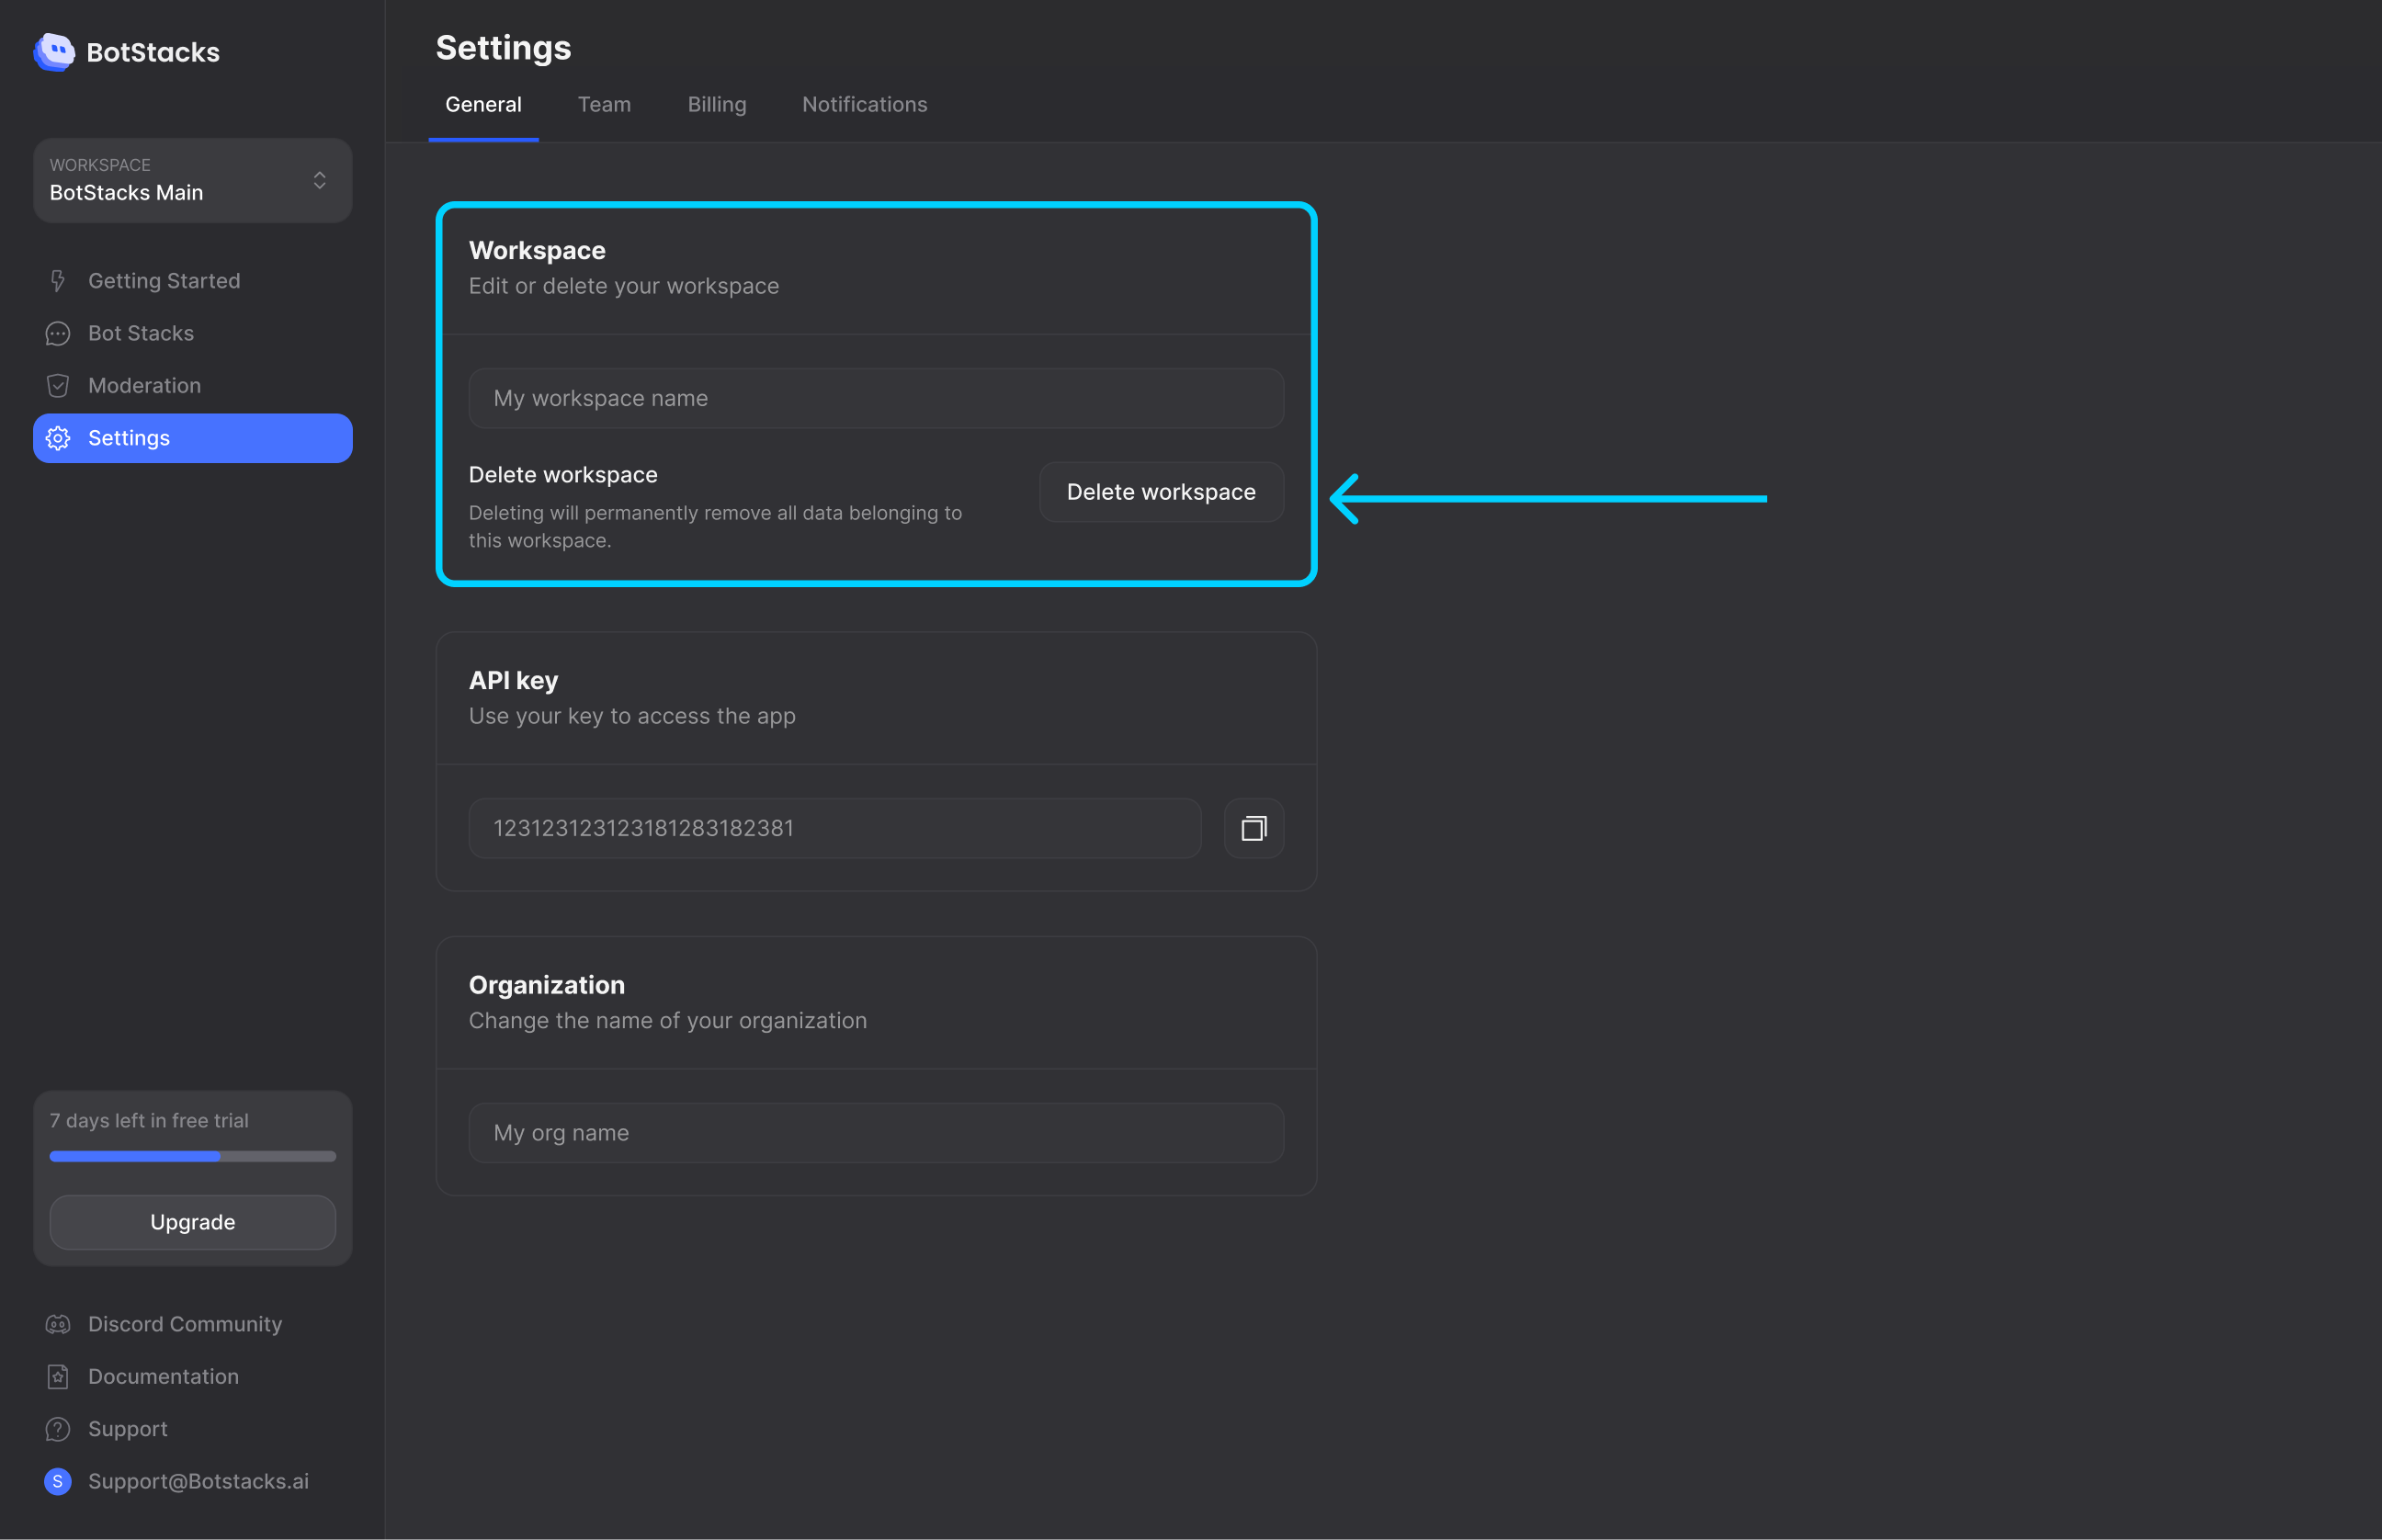
Delete Workspace
Only team members with Admin permissions have the ability to delete workspaces.